Appearance
View All Bookings
The Booking section in FluentBooking contains all the information about your reservations. You can also sort the bookings by host. Let's take a closer look at the Booking section to see how each option works.
Bookings
When you click on the Booking tab from the top navigation bar, you’ll see a full list of your bookings.
Booking View
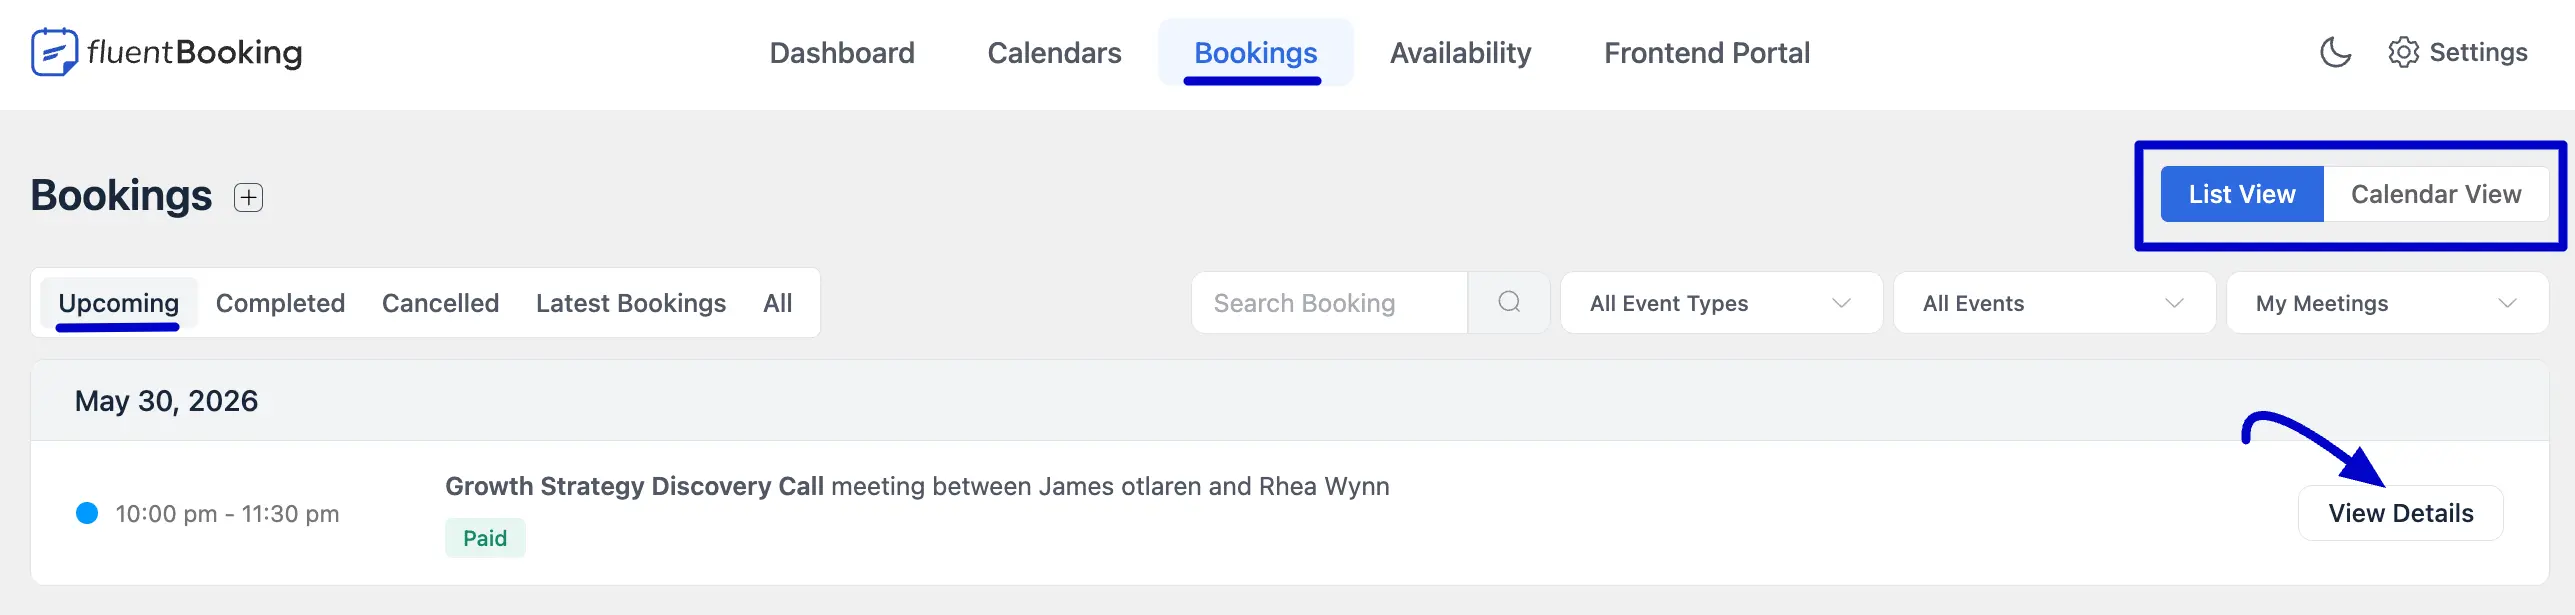
You can see your bookings in two different ways: List View and Calendar View. If you prefer to see your bookings in a simple list format, select the List View option. To see your bookings laid out by date, choose the Calendar View from the top-right corner.
List View
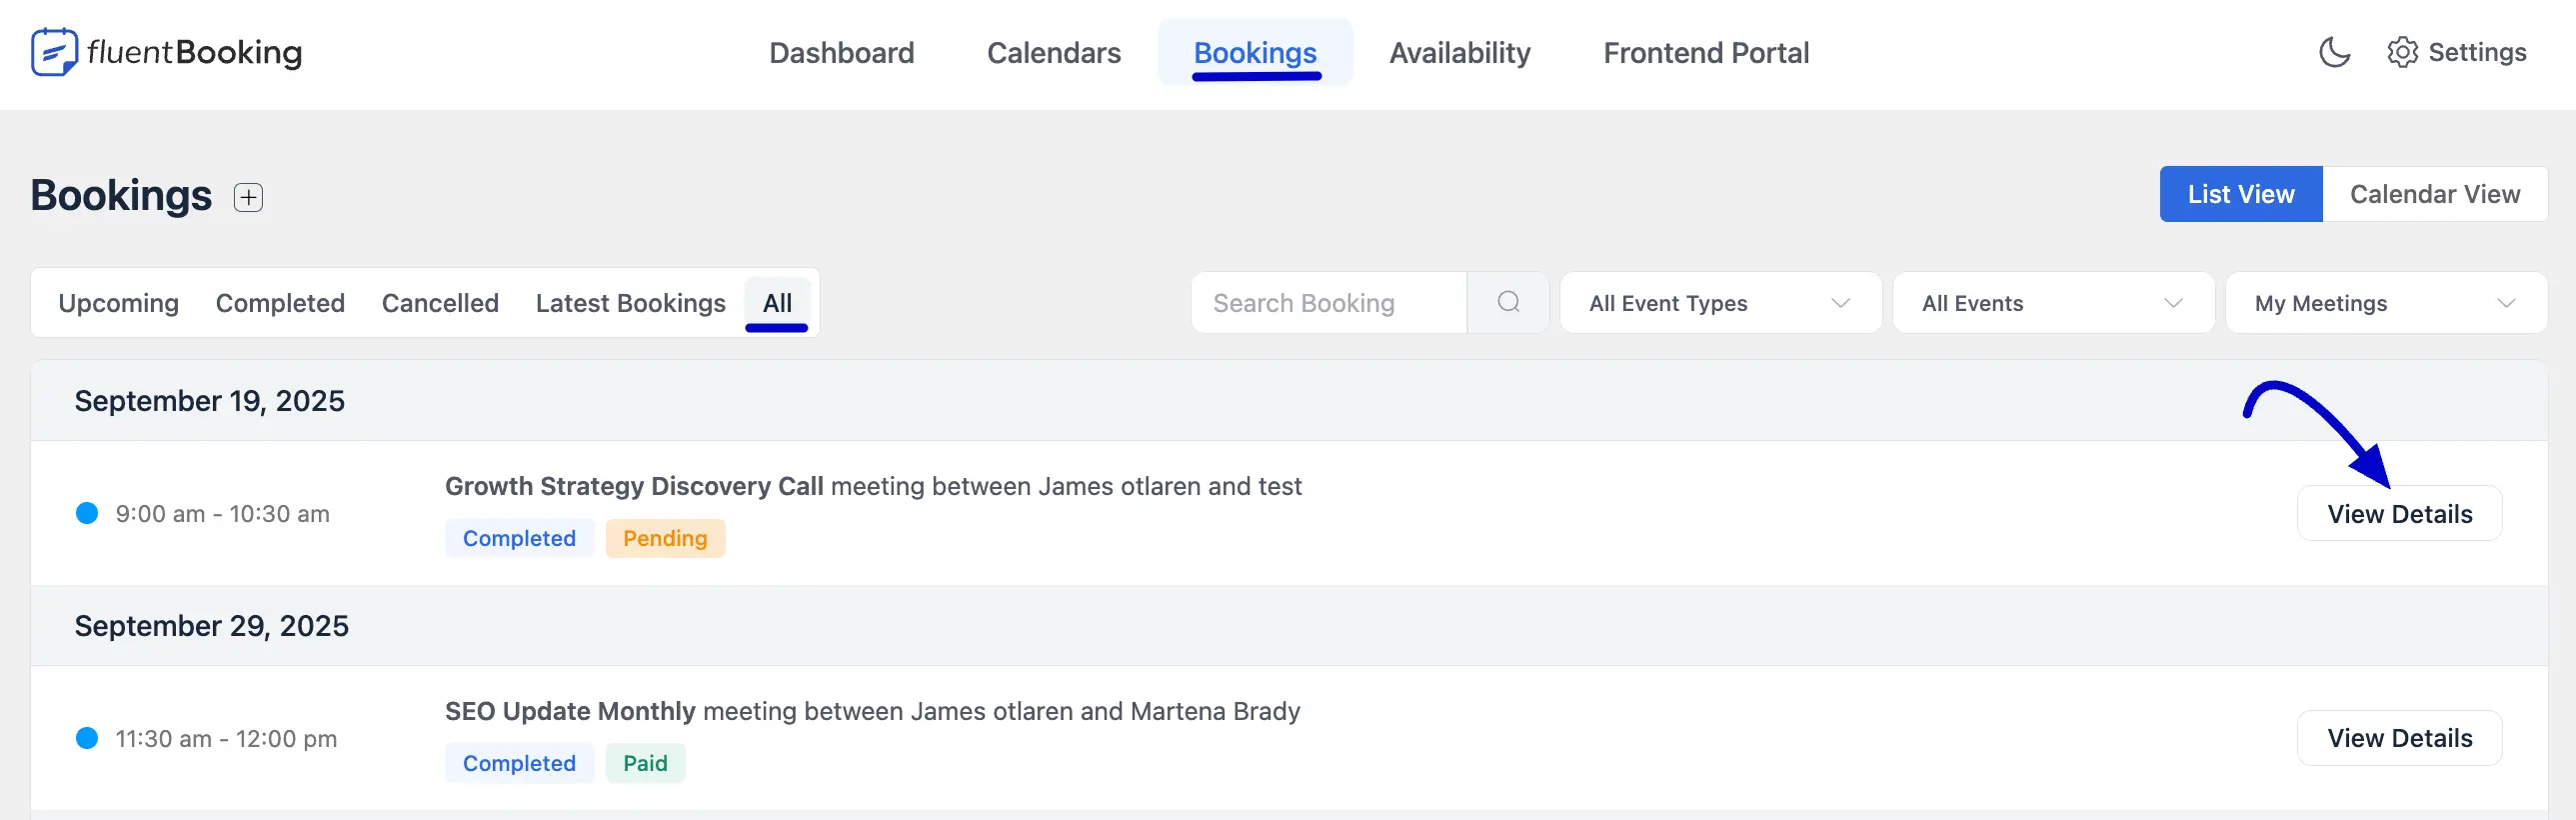
By default, the system will show your bookings in List View first.
Upcoming Bookings: This is where you can find information about your upcoming meetings. To see more details about a particular booking, just click on the View Details button.
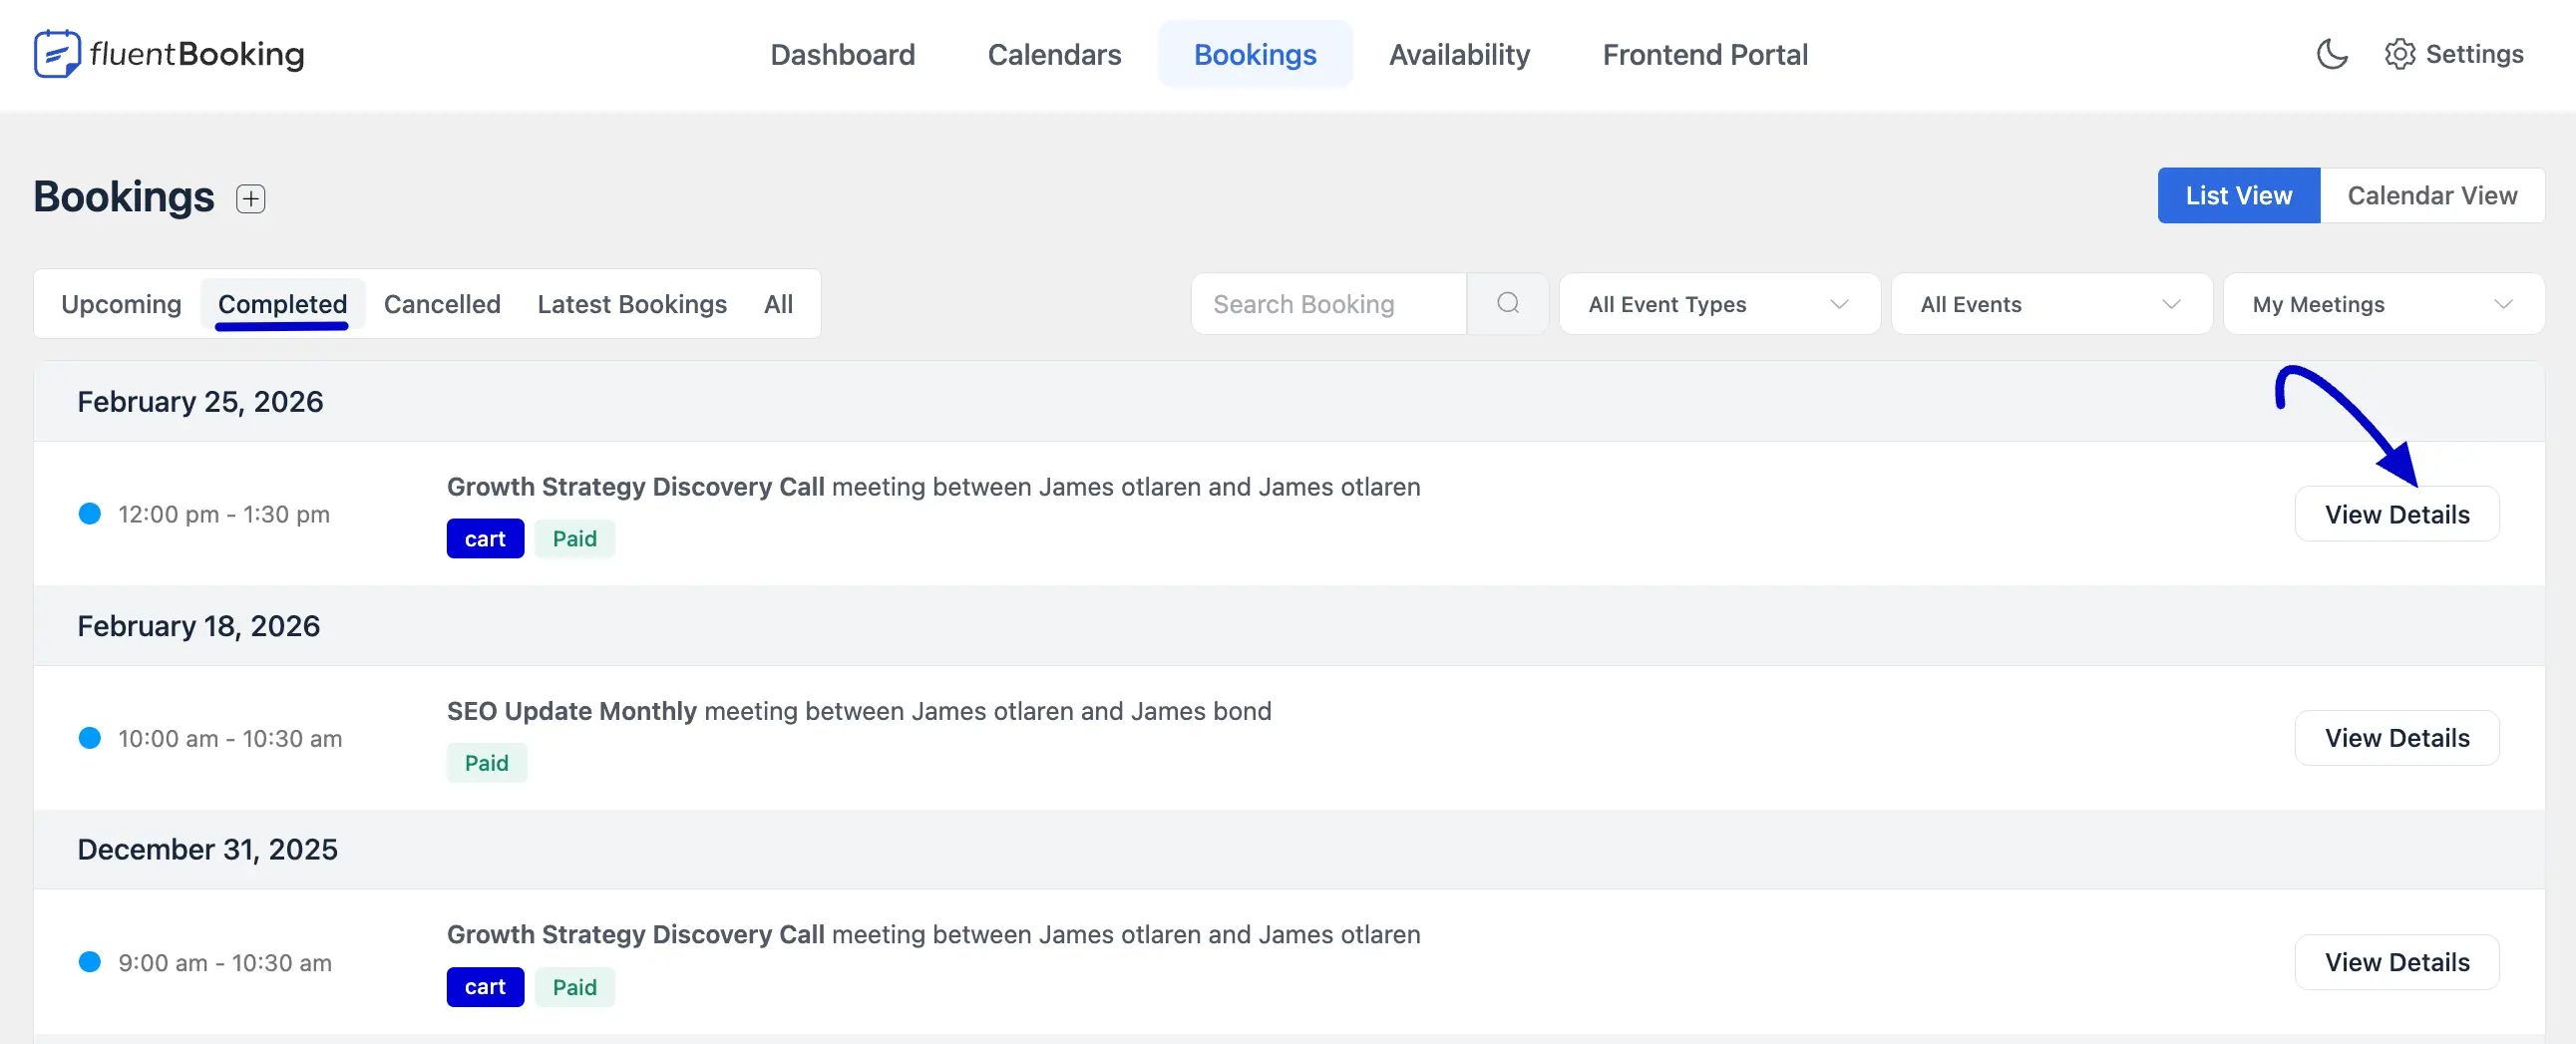
Completed Bookings: If you need a quick overview of your past reservations, visit the Completed section. It’s like an archive of your finished bookings. For more detailed information about completed bookings, click the View Details button for the particular booking you want to see.
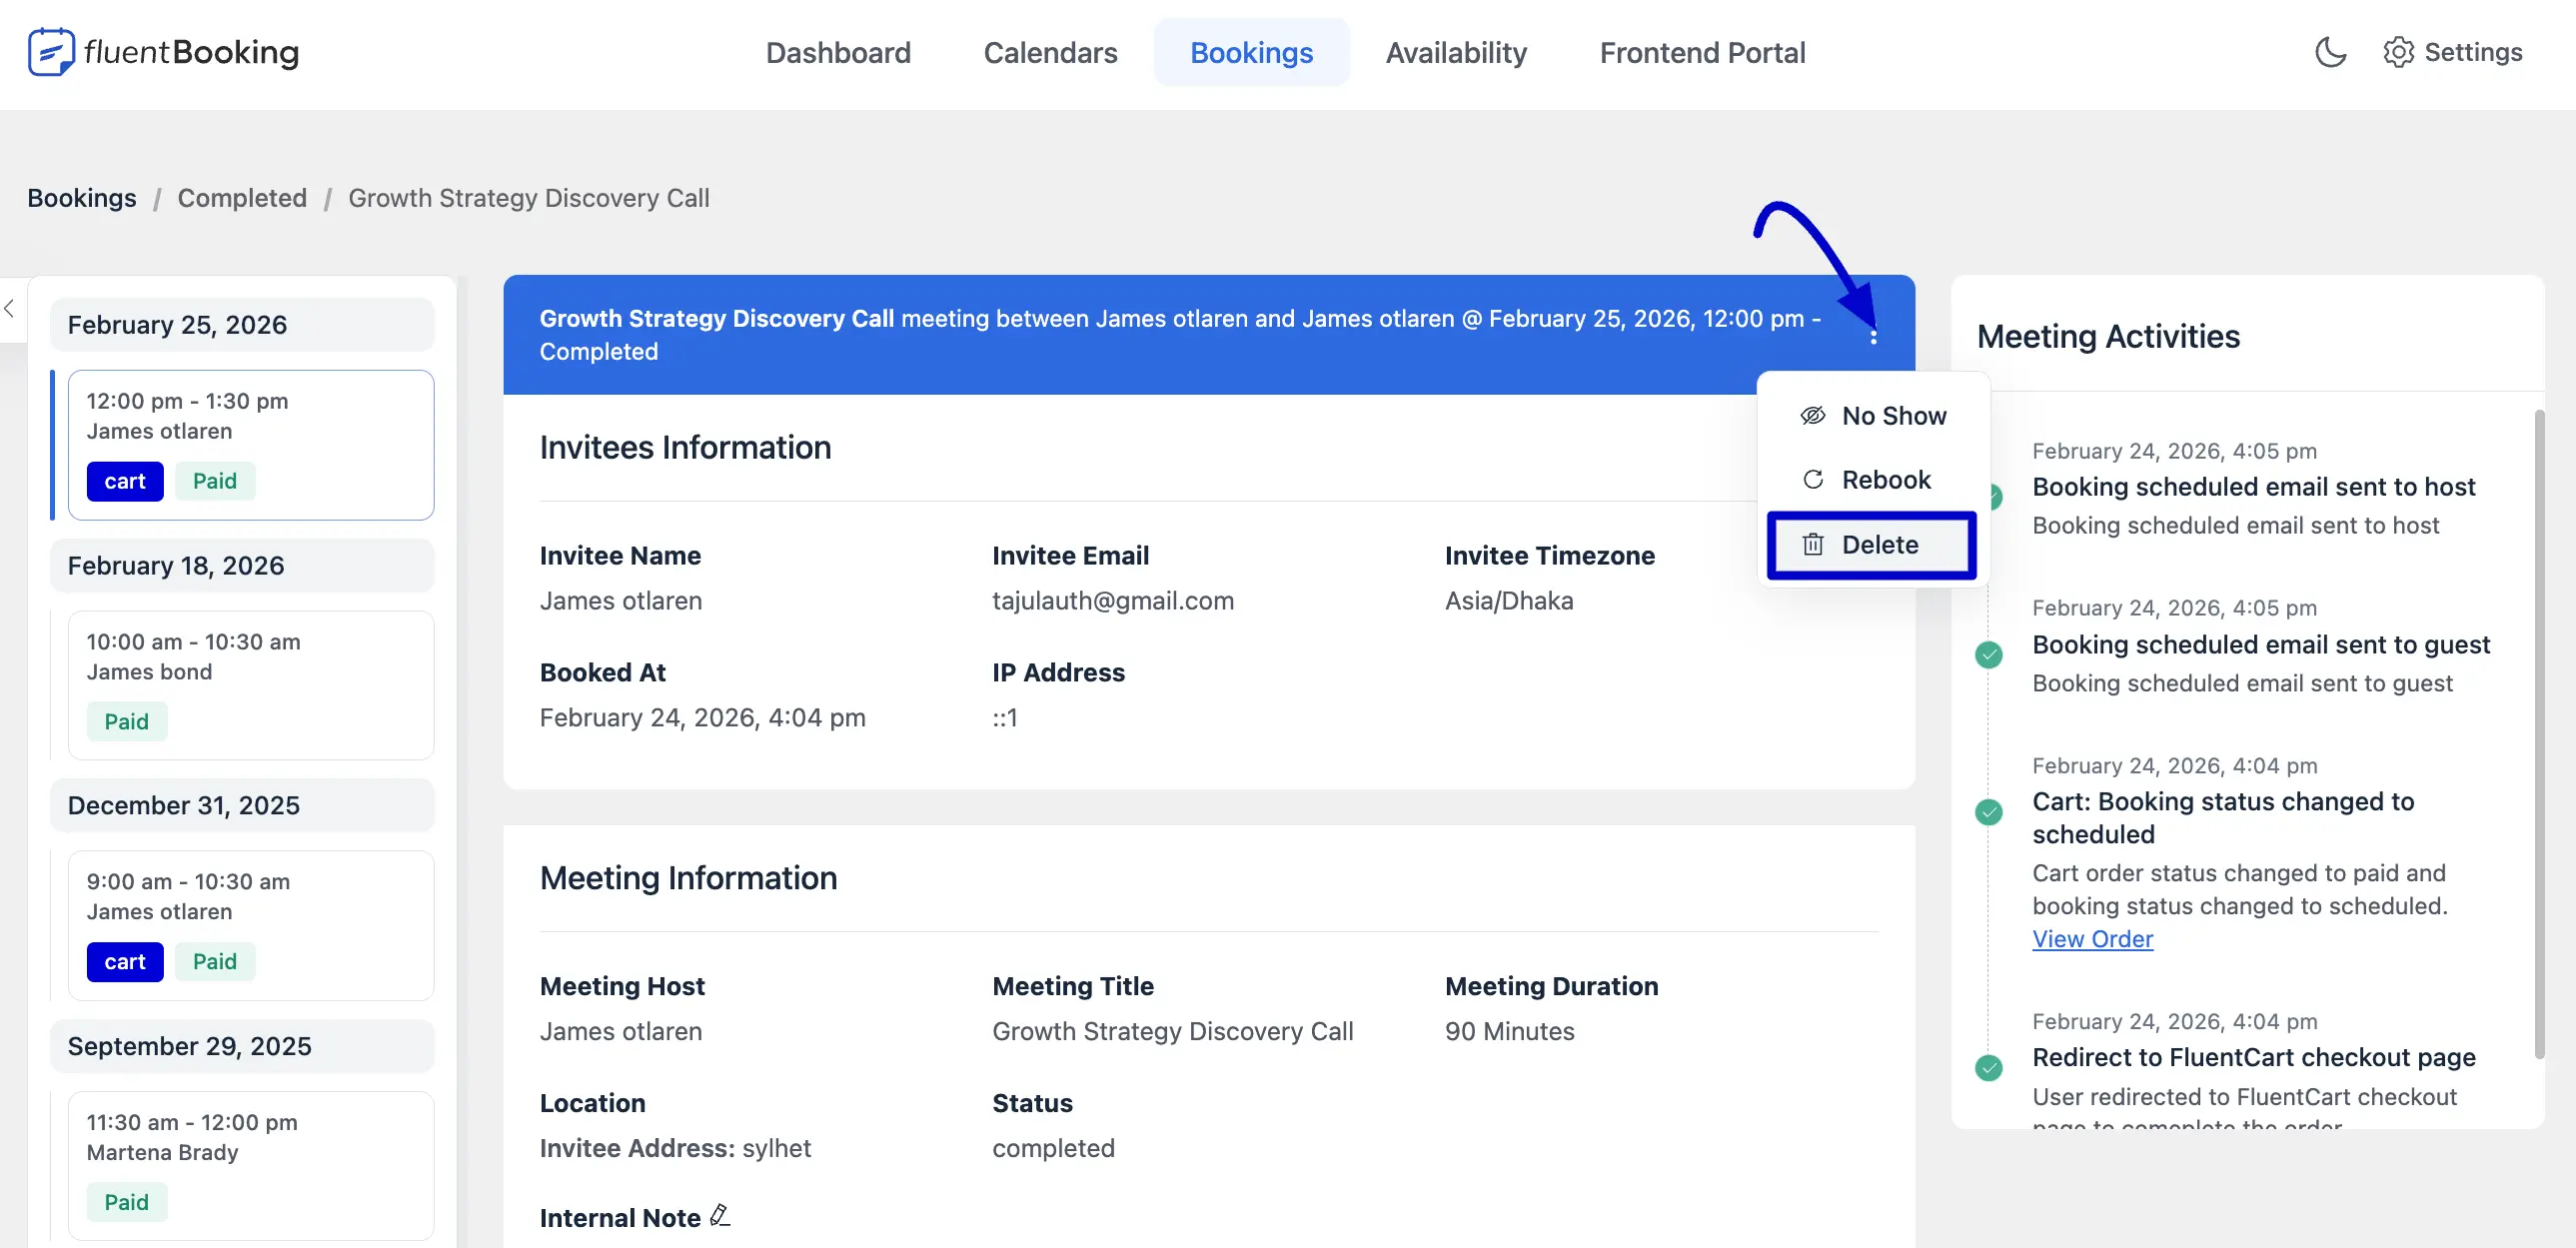
After clicking View Details, you can easily delete completed bookings. Simply click the three-dots menu and then select the Delete button.
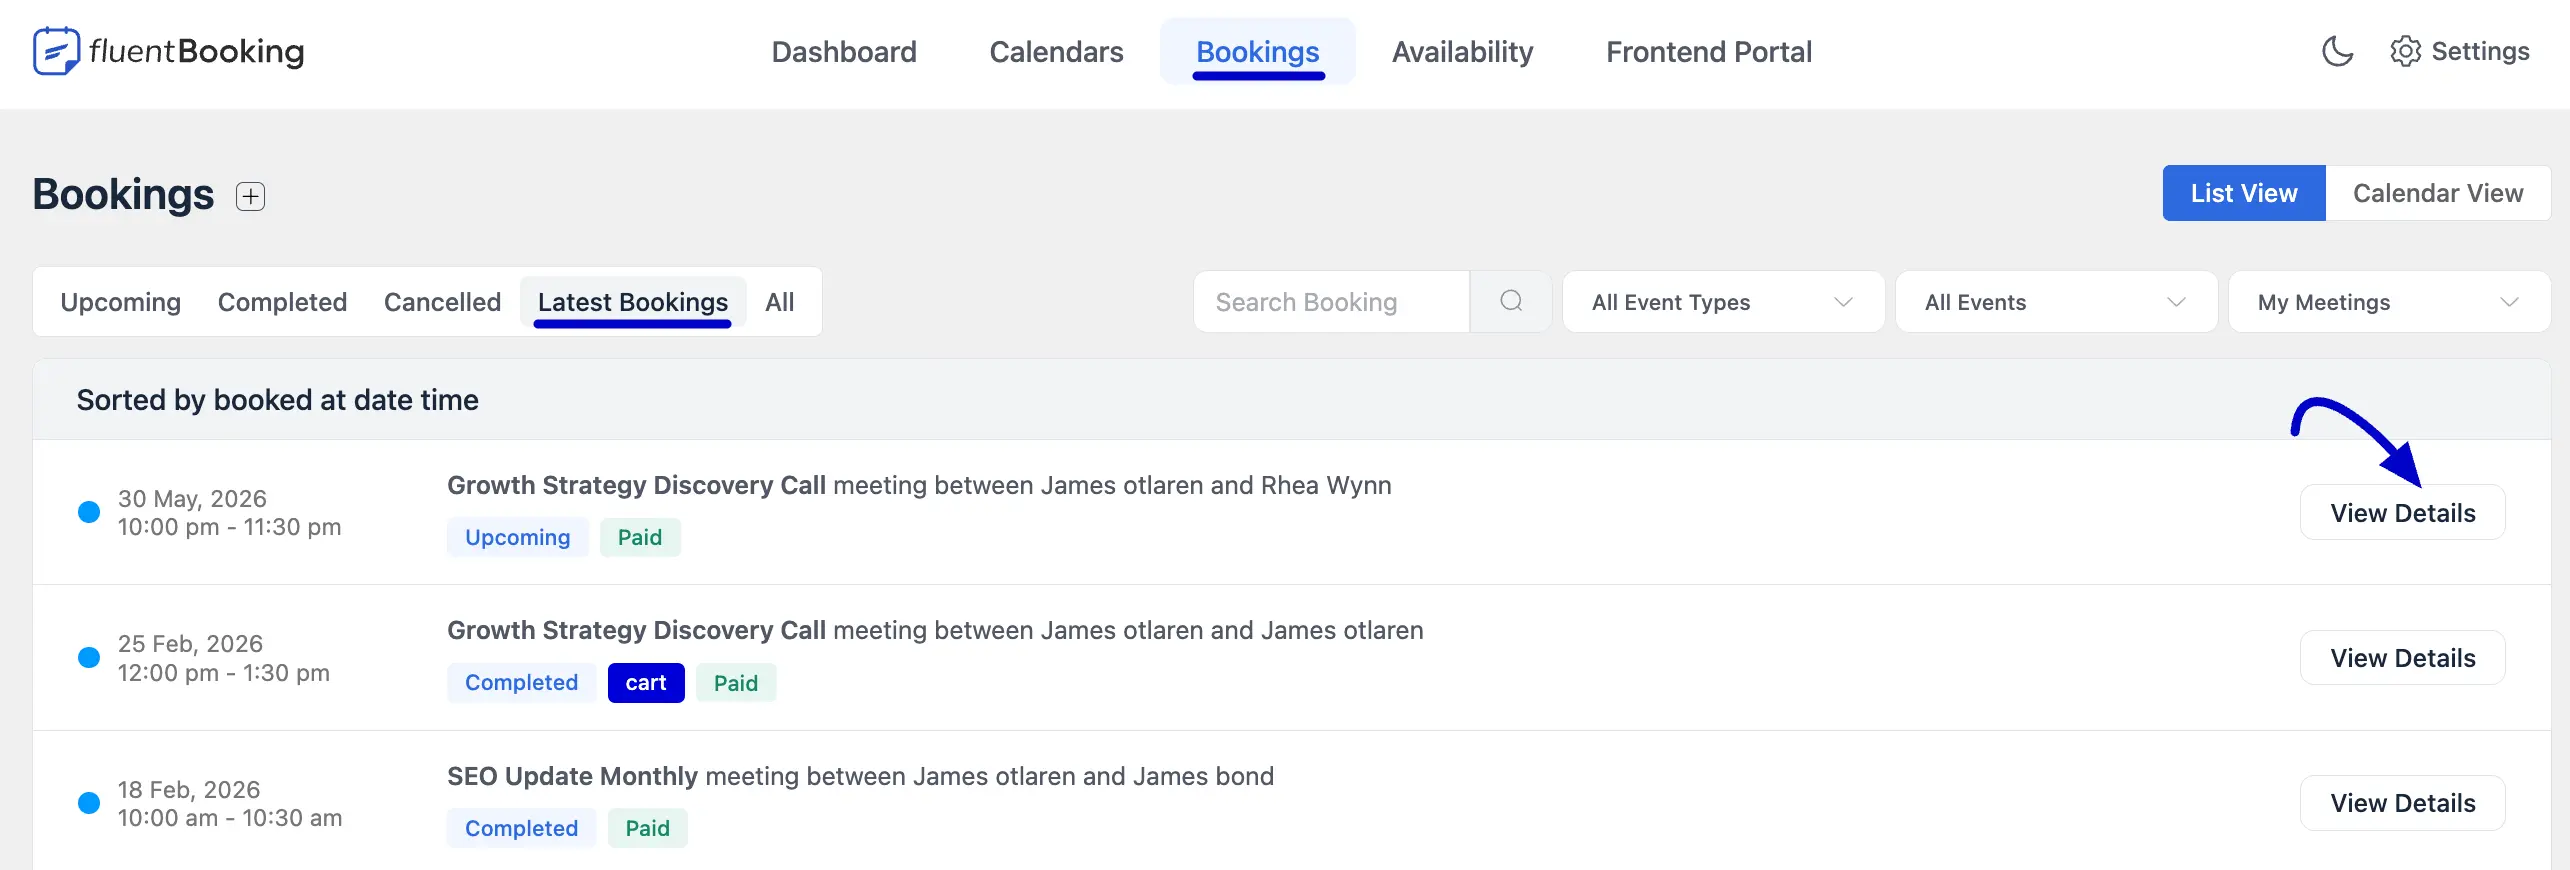
Latest Bookings: To check out your most recent reservations, go to the Latest Booking area. This is where you'll find the newest bookings.
Cancelled Bookings: If a meeting is revoked by either the host or the guest, it will be moved to the Cancelled section. You can view the meeting time, participant names, and even payment statuses for these events. To review the reason for cancellation or additional participant notes, simply click the View Details button.

All Bookings: For a comprehensive view of your booking details, the All section is where you'll find everything neatly organized.
Calendar View
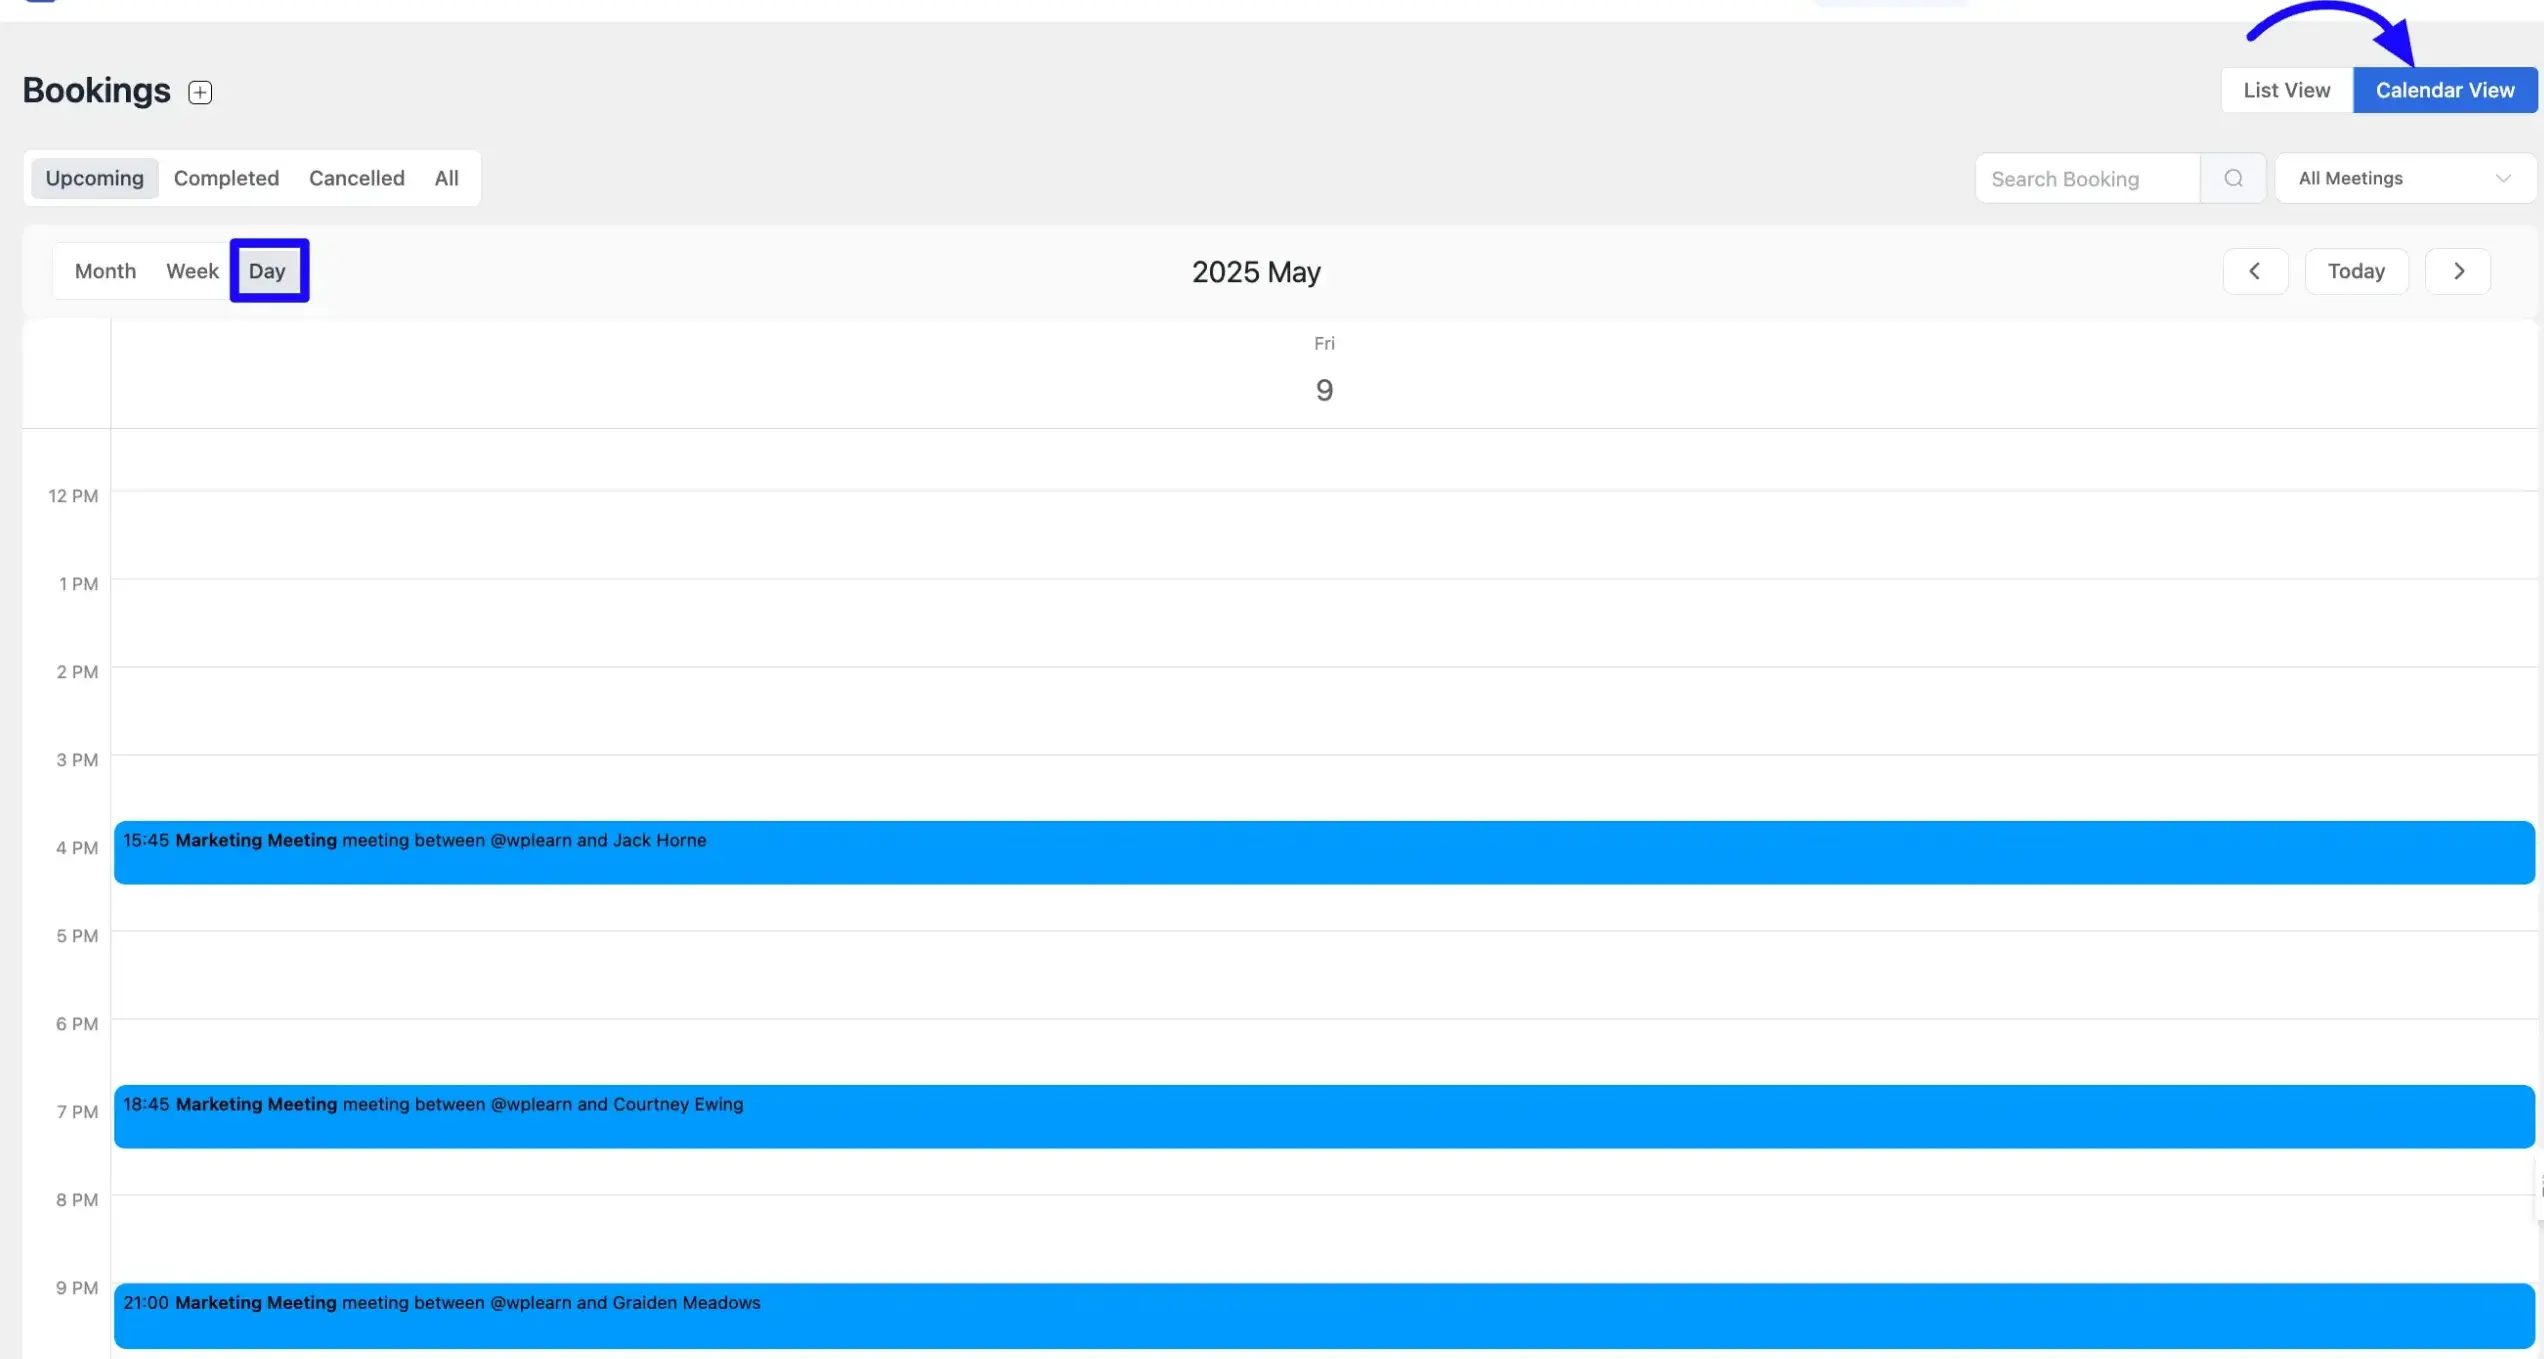
Want to see all your bookings in one place? Just choose the Calendar View option. You can look at your schedule by day, week, or month. Click on any booking to see the details or make quick changes.
Day View: Click on Day to see all your bookings for one day, hour by hour. It’s great if you have a busy schedule and want to stay on top of things.
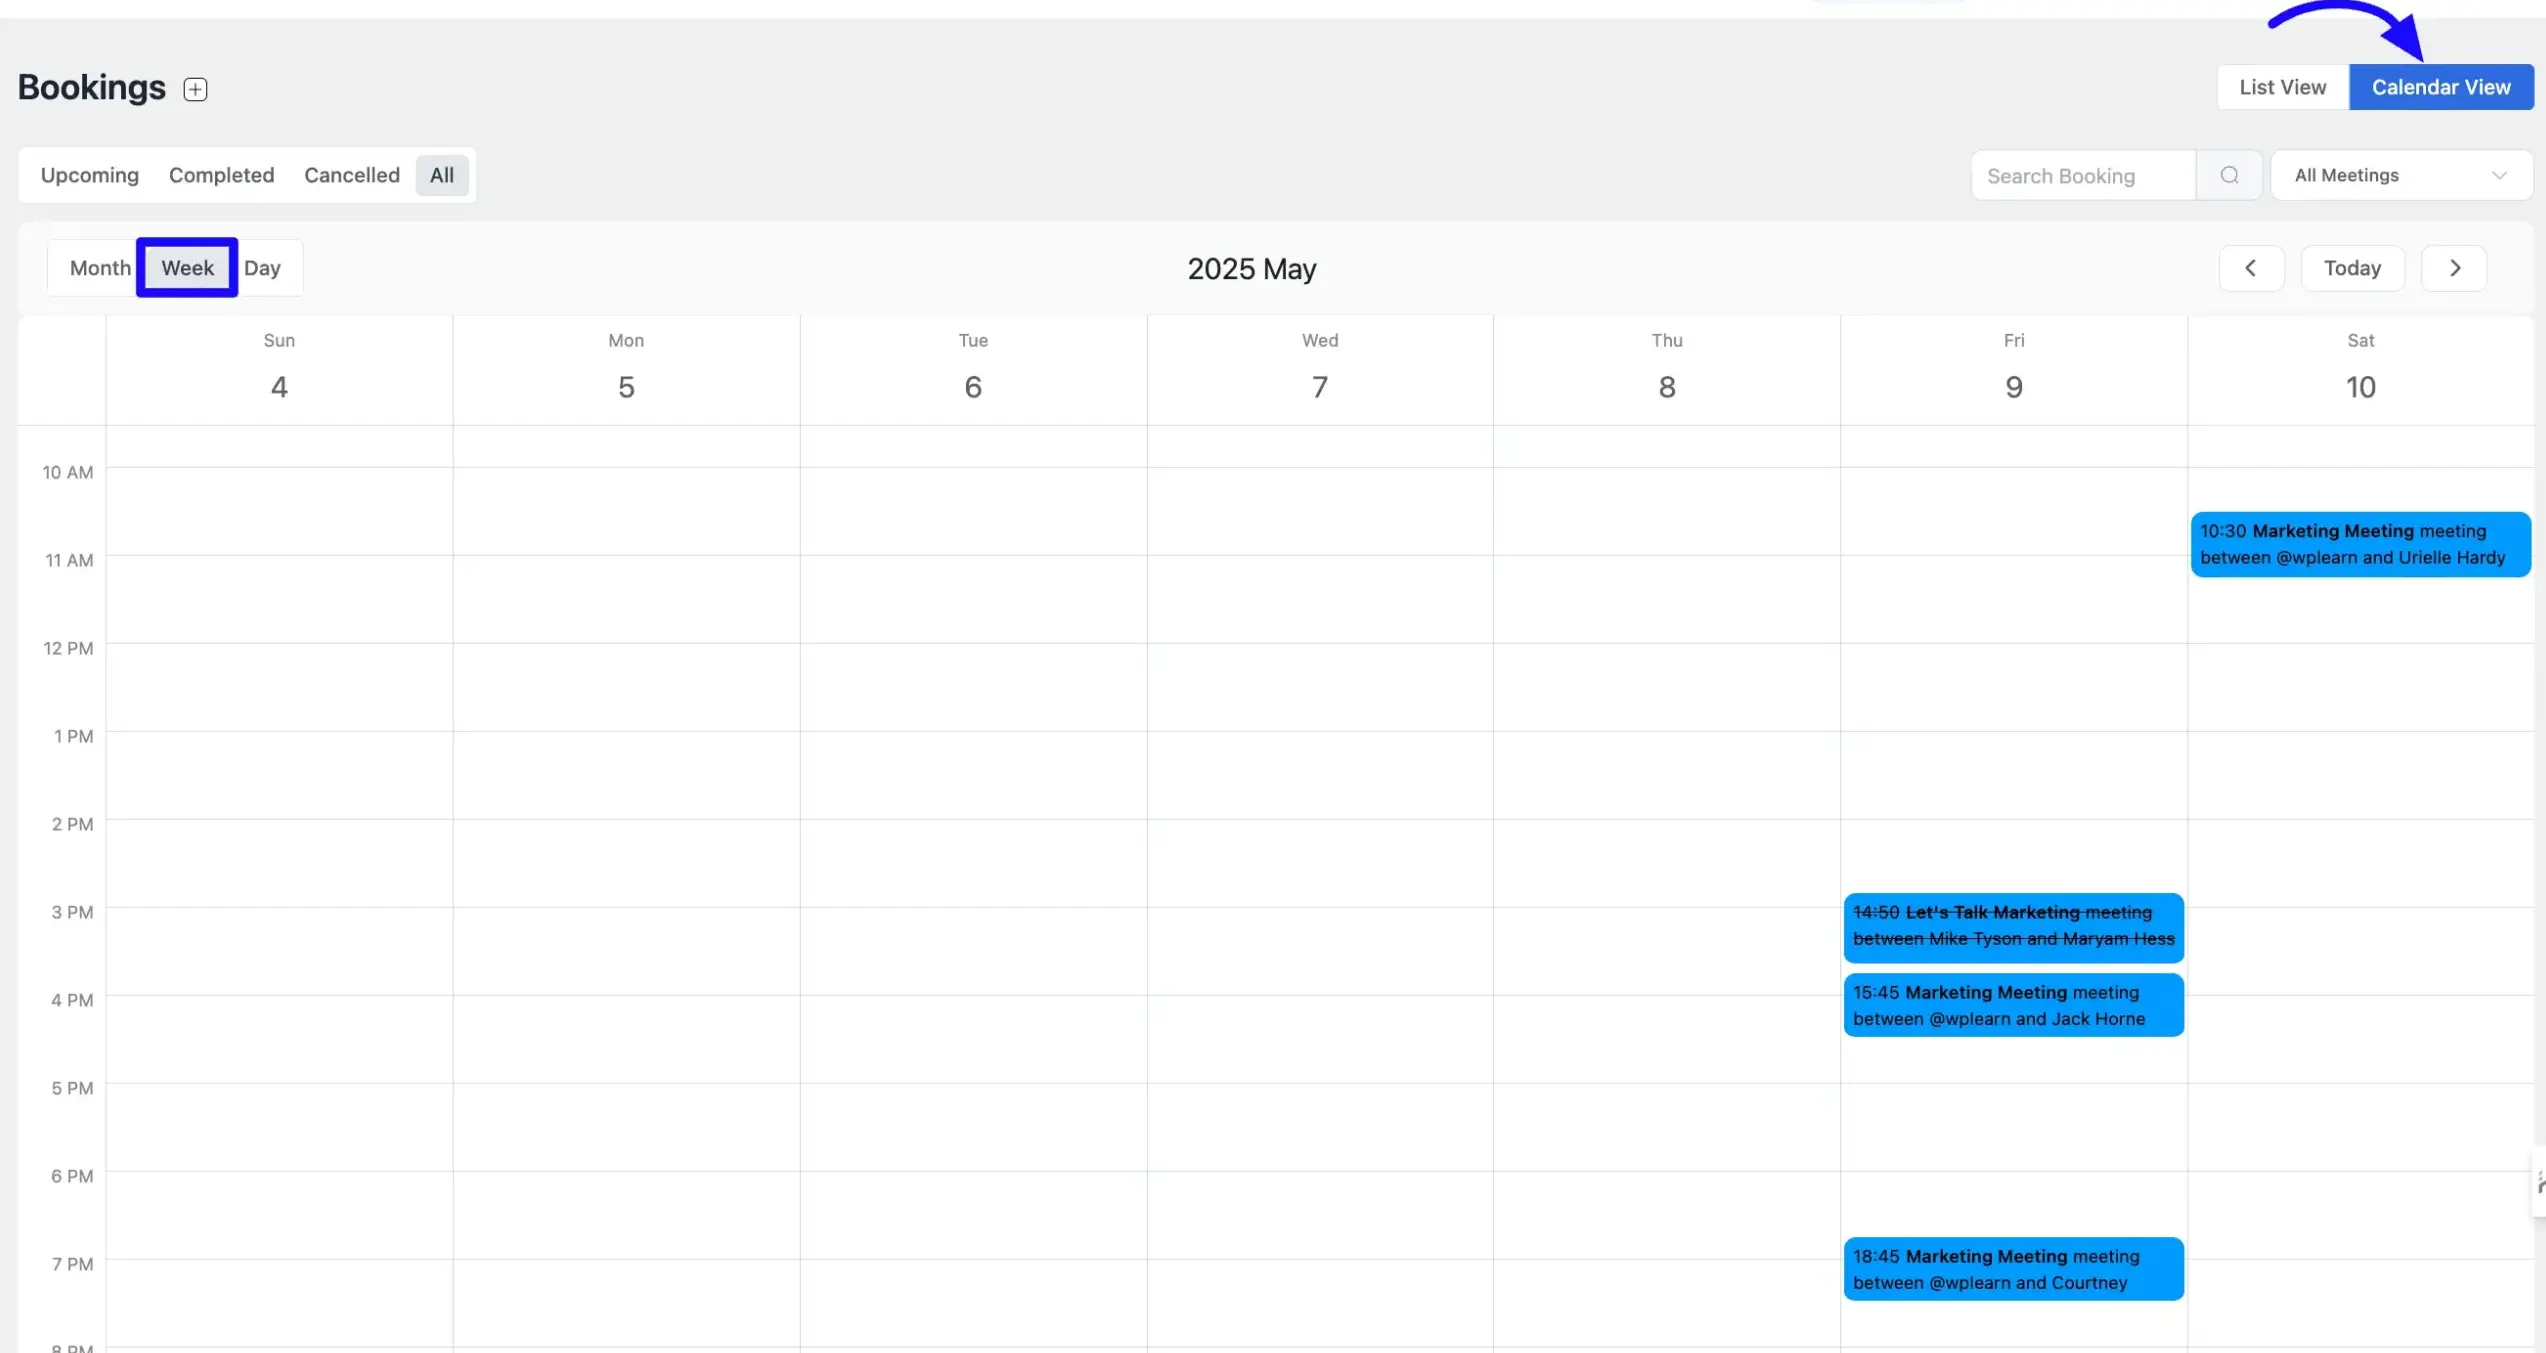
Week View: Select the Week view to see your bookings for the whole week. It helps you plan ahead and manage your time better.
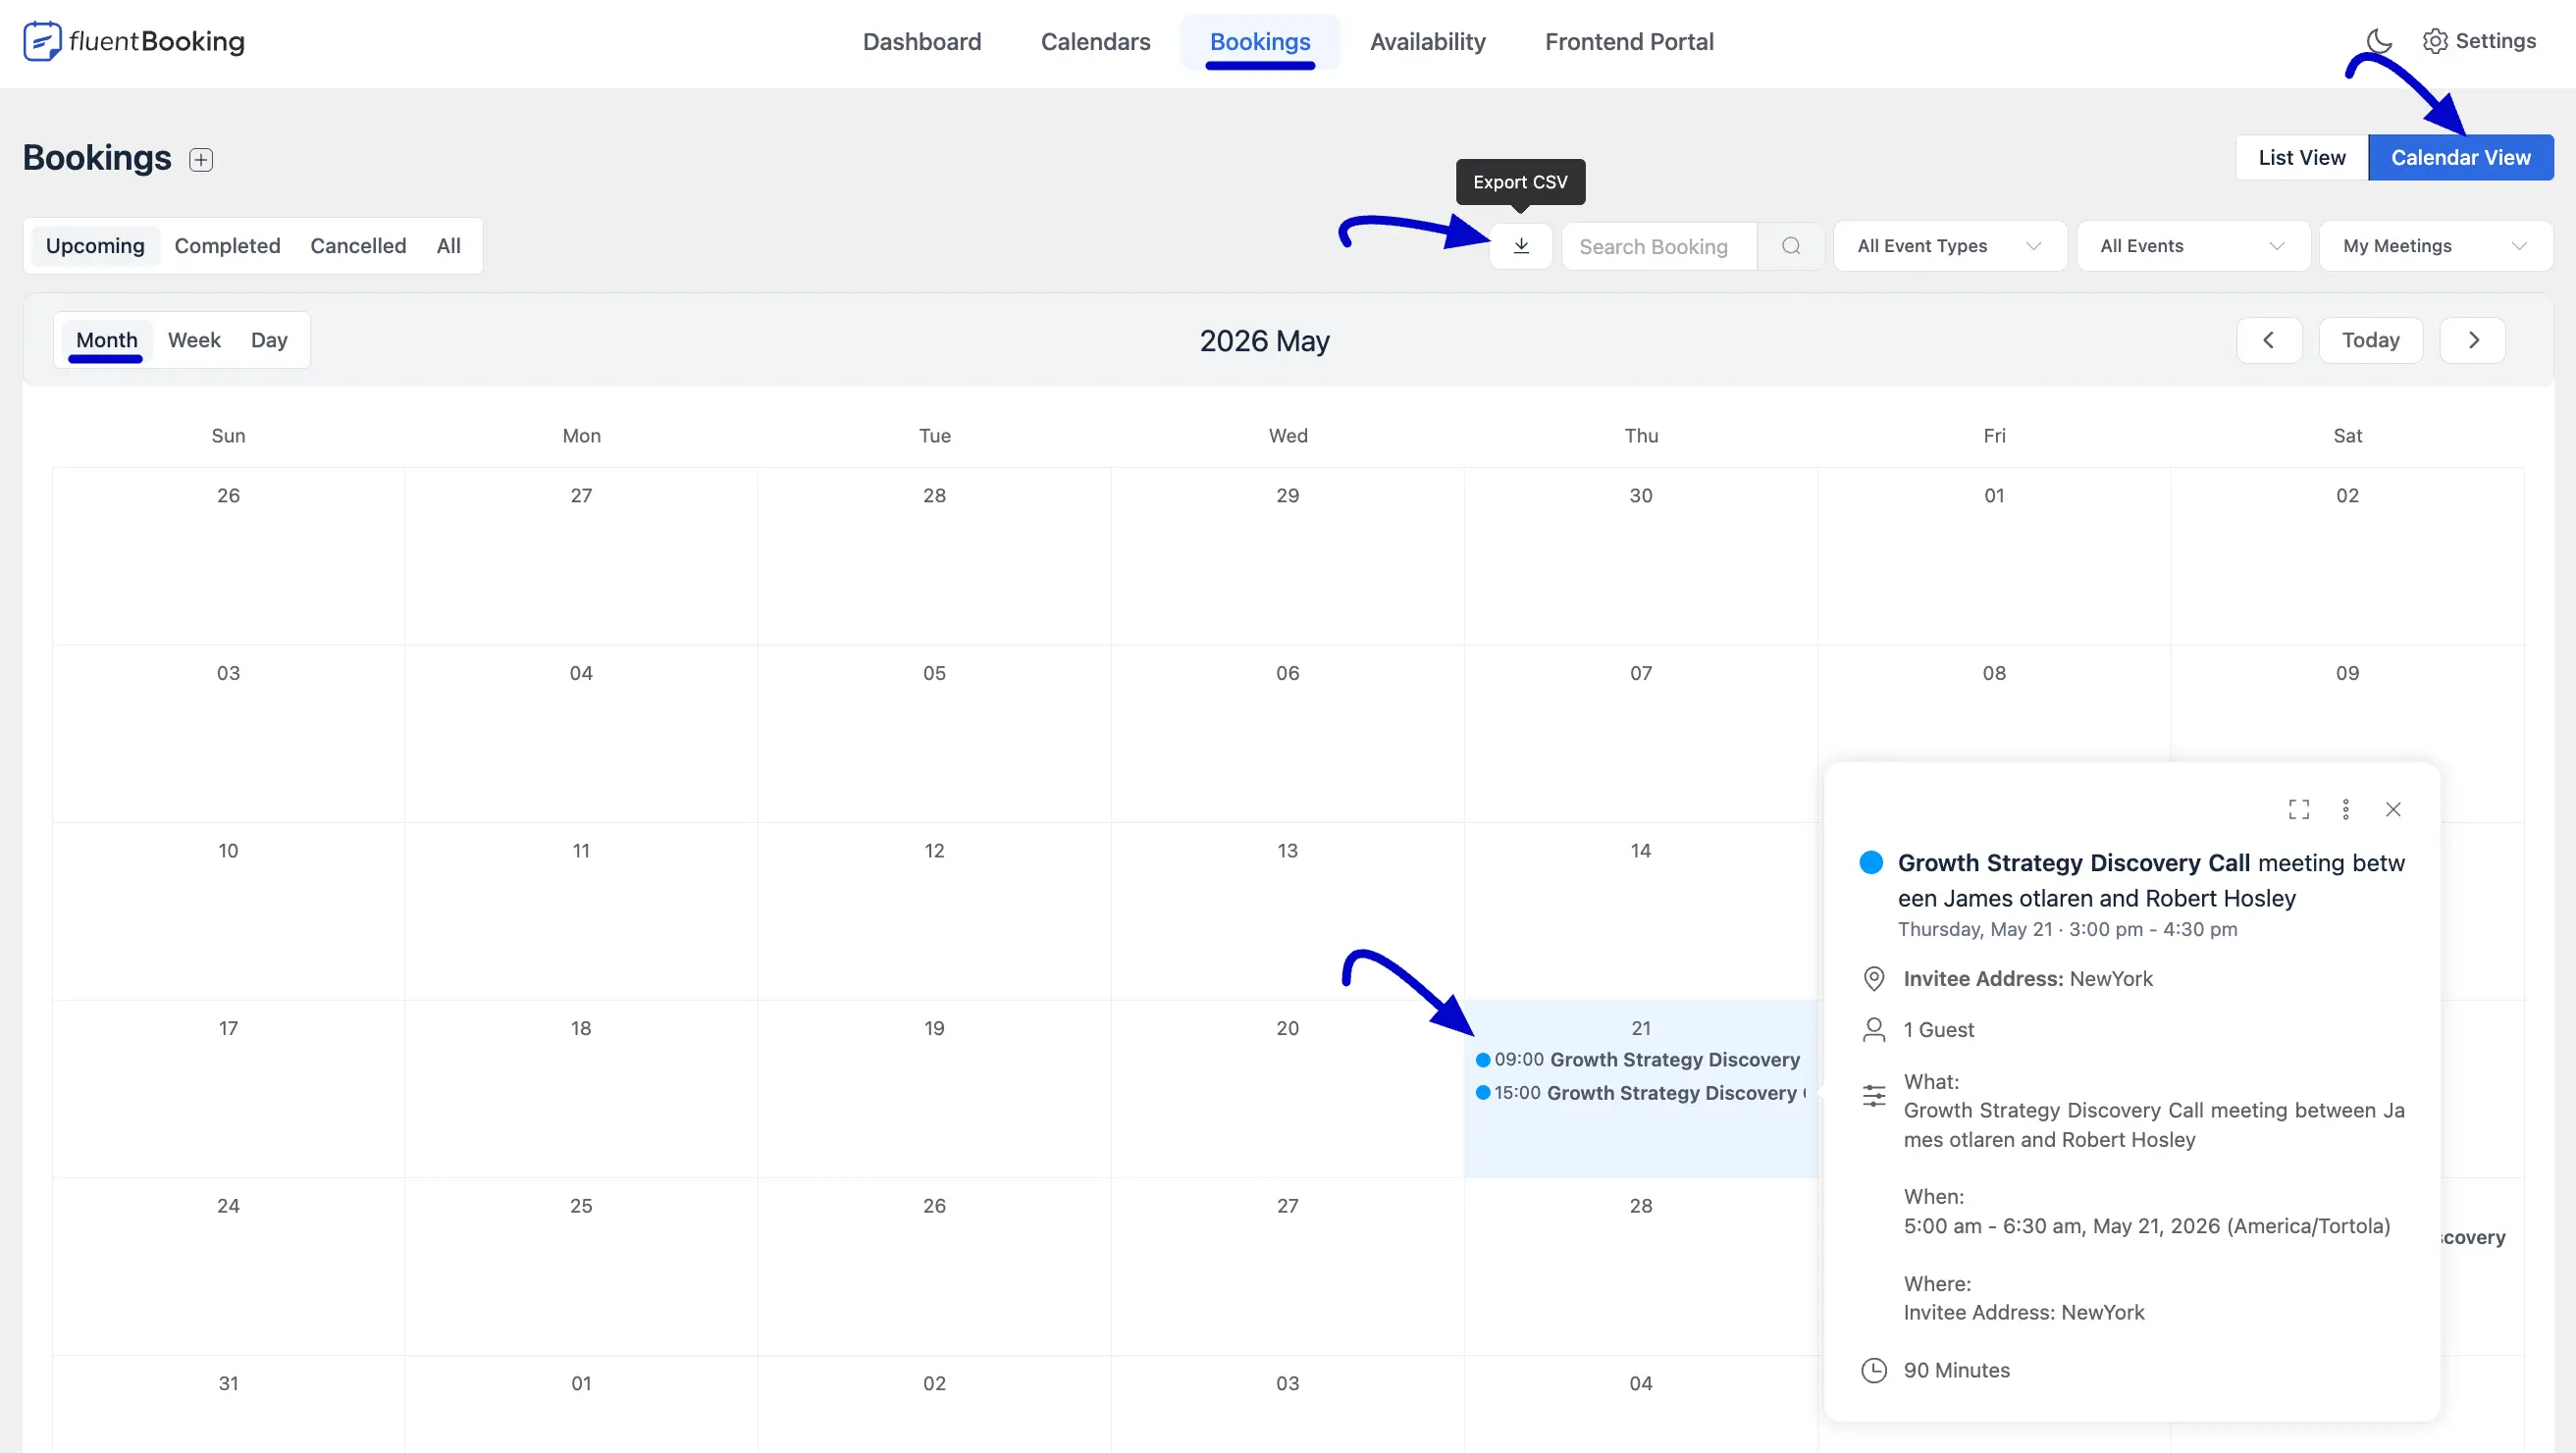
Month View: With the Month view, you can see everything you’ve booked for the month in one big calendar. It’s a clear way to track all your events and meetings.
If you need more details for specific events, just click on any day or event and you’re in.
Exporting Bookings to CSV: You can easily export your booking data for reporting or bookkeeping. Simply click the Export CSV icon located next to the search bar to download a full record of your filtered events directly to your device.
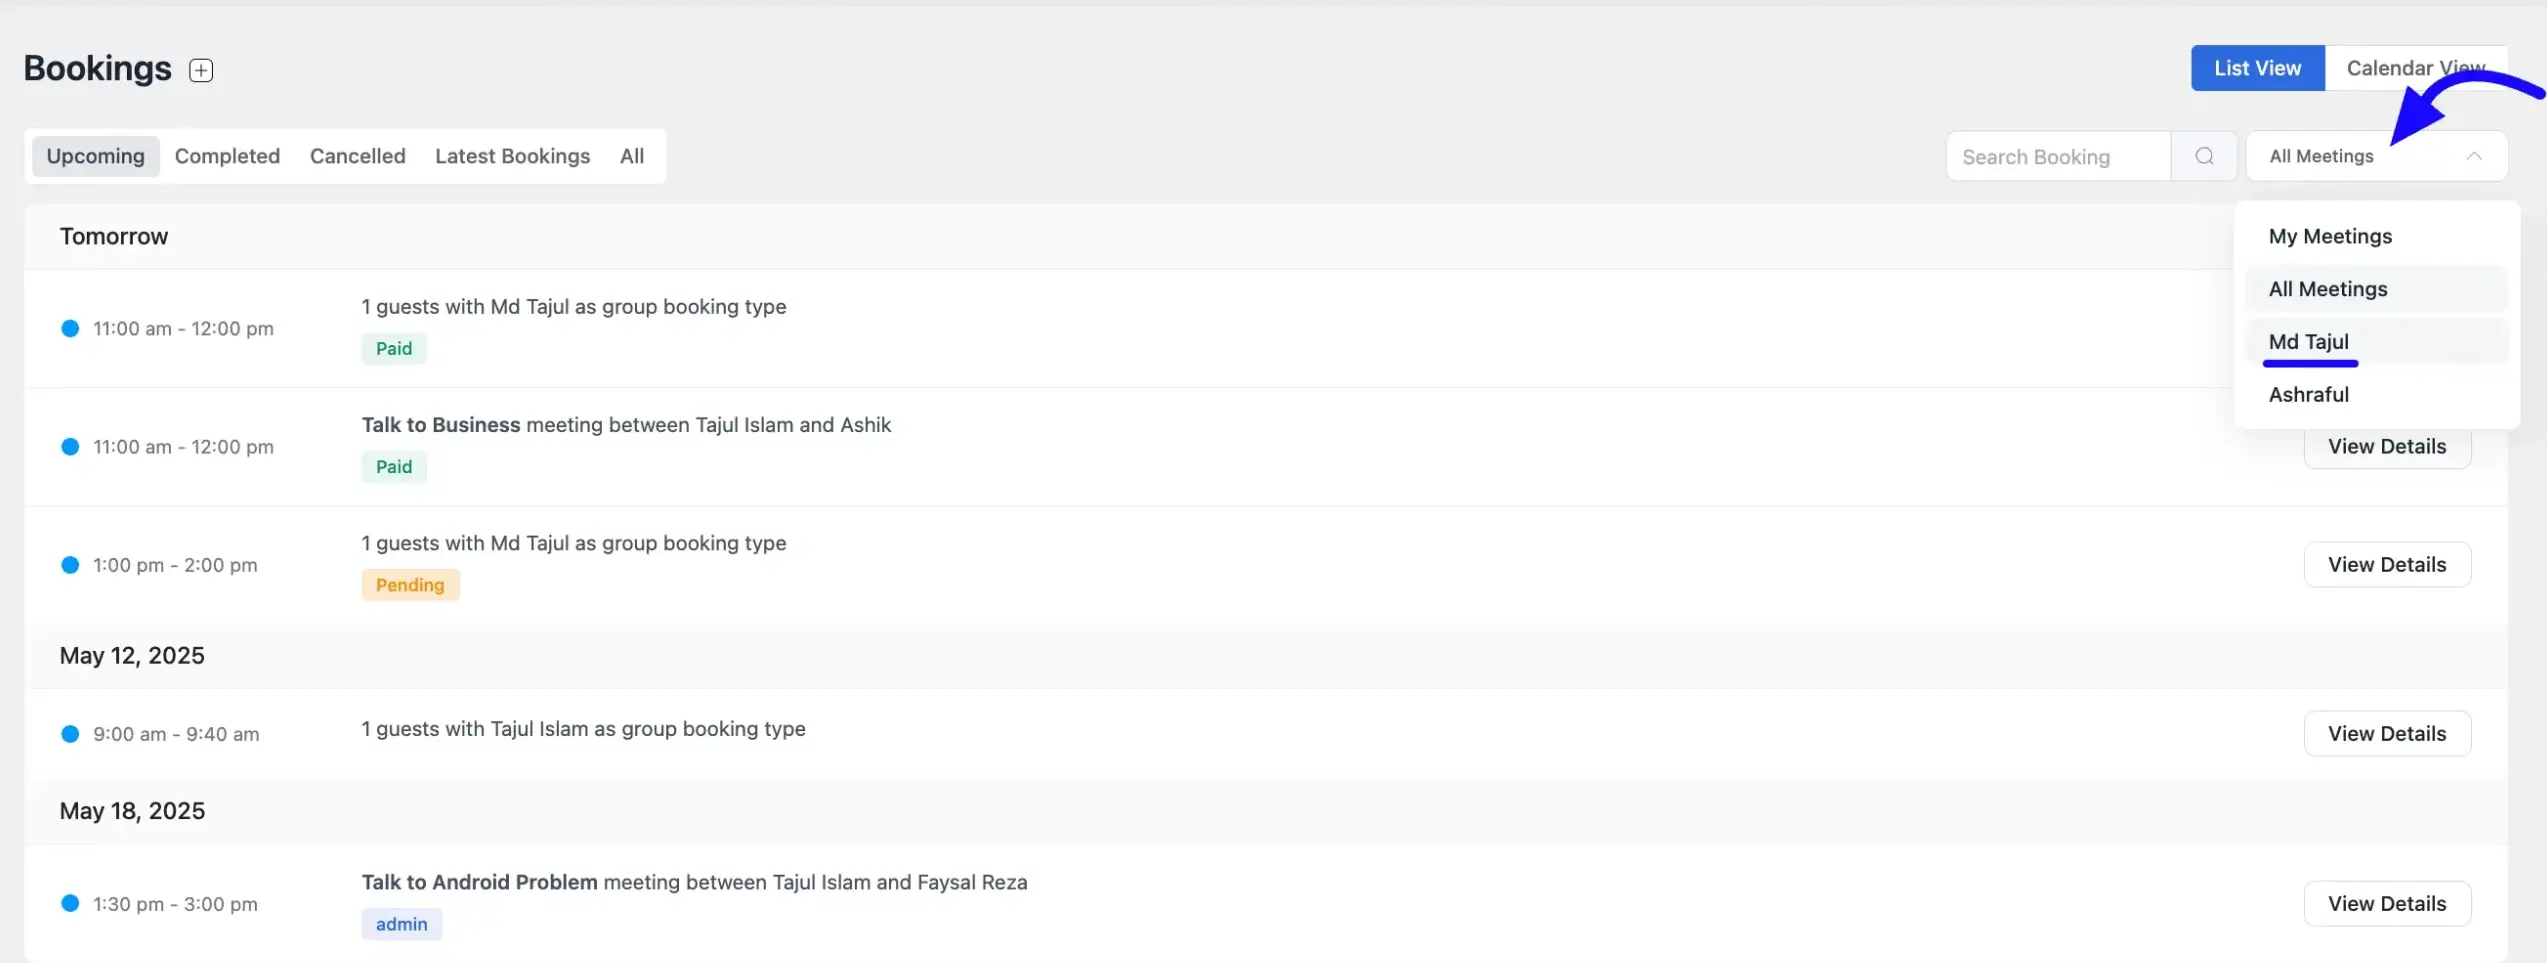
View Specific Host's Bookings
If you'd like to focus on a particular host's bookings, simply select their name from the list in the top-right corner. This provides a quick way to access all the bookings associated with that host.
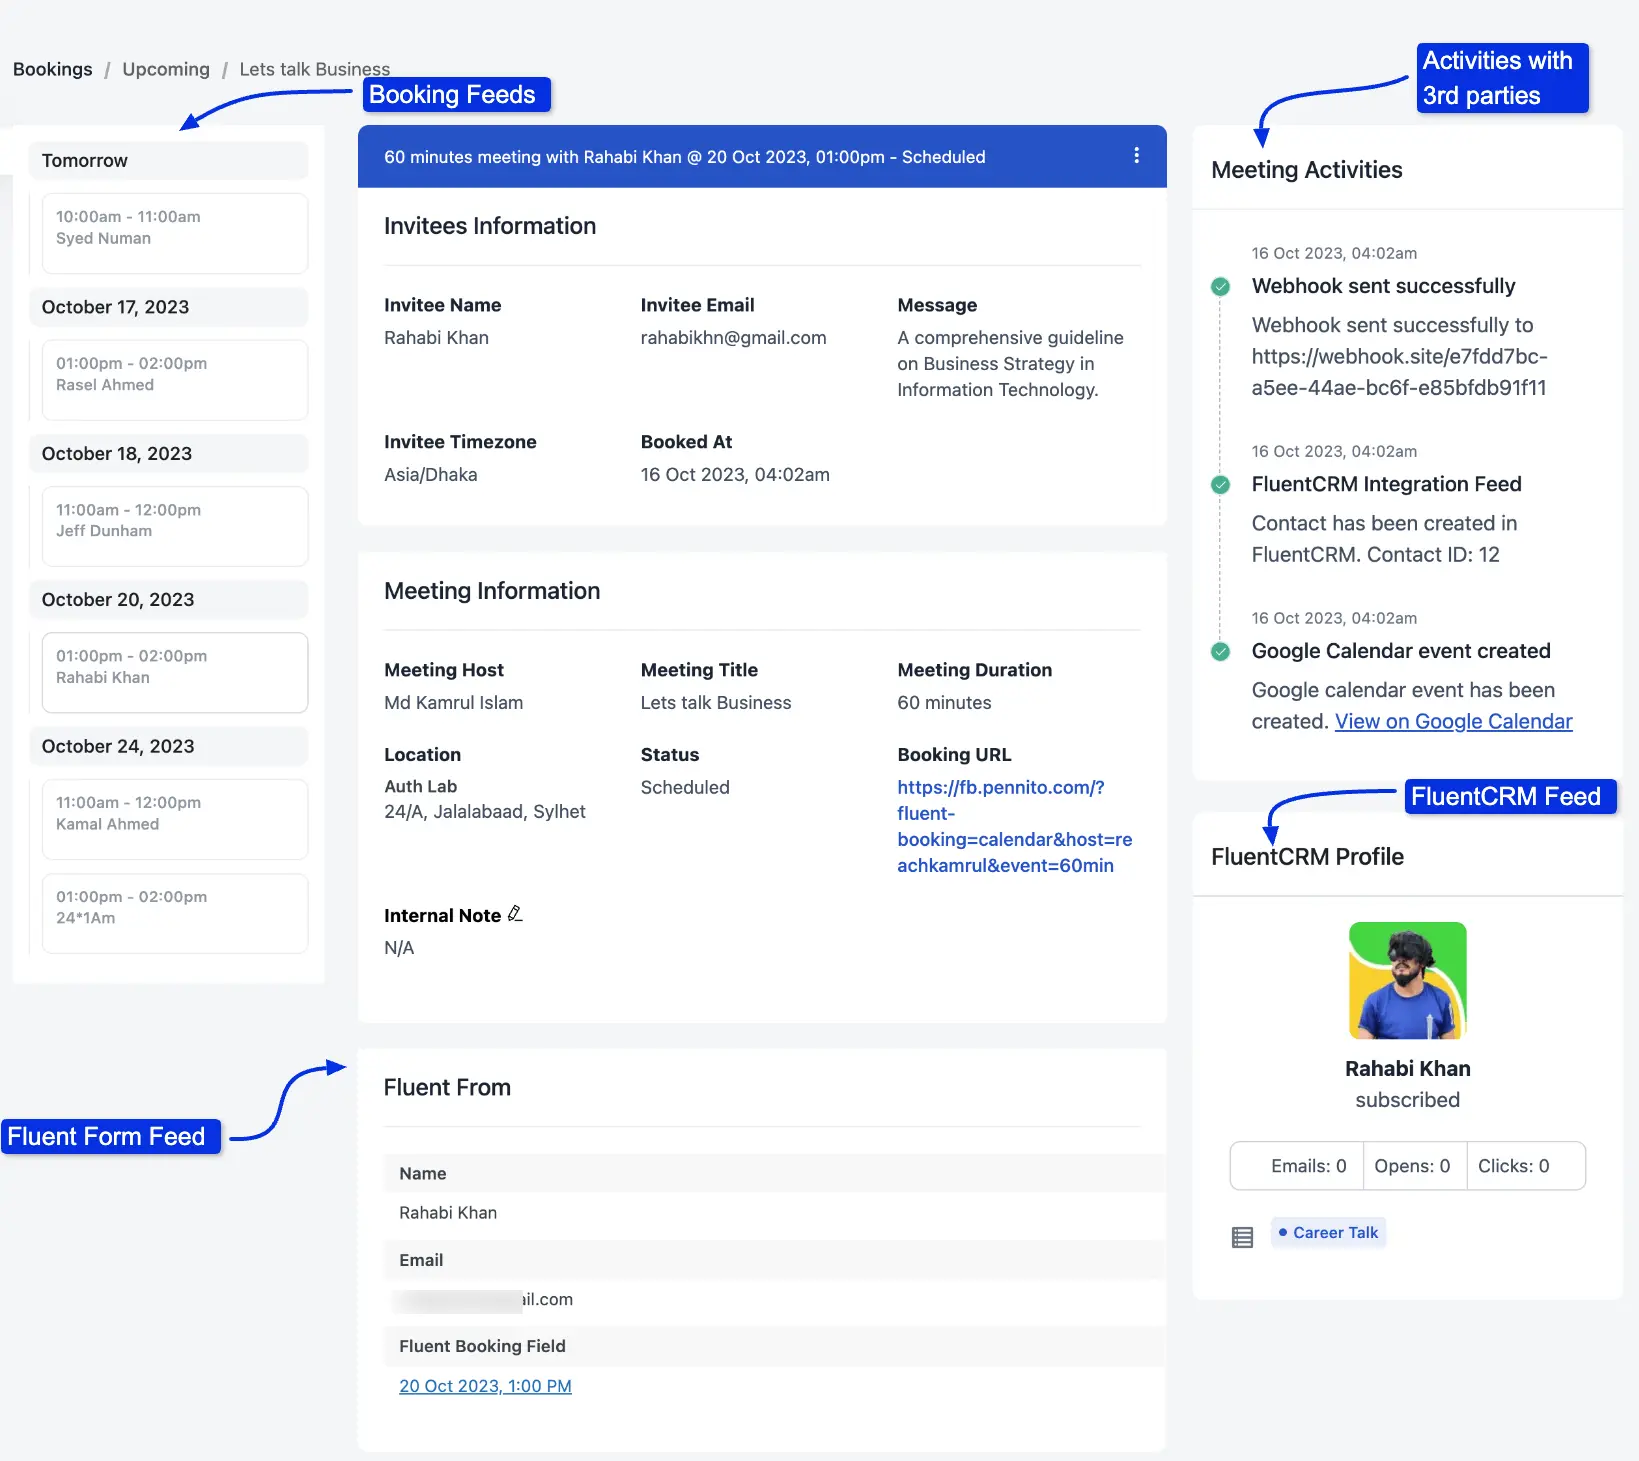
Booking Details: 360 view
Along with the Invitee and Meeting information, you will have 360-degree insights into the whole booking details, including upcoming bookings and 3rd party activities such as Webhook,FluentCRM, Google Calendar, and Zoom.
You will also find the source of the booking if it came from any of your Fluent Form entries. Also, if you have this contact in the FluentCRM contact list, it will show the contact information on the sidebar.
CRM Tags and Lists
The FluentCRM sidebar card also allows you to manage the attendee's tags and lists without leaving FluentBooking. Click the tag or list picker to add or remove items. Changes sync to FluentCRM instantly. This requires FluentCRM to be installed and the FluentCRM integration to be active for the event.
Manual Confirmation Email Sending
If a confirmation email didn’t reach the attendee, the admin can manually resend it without any hassle.
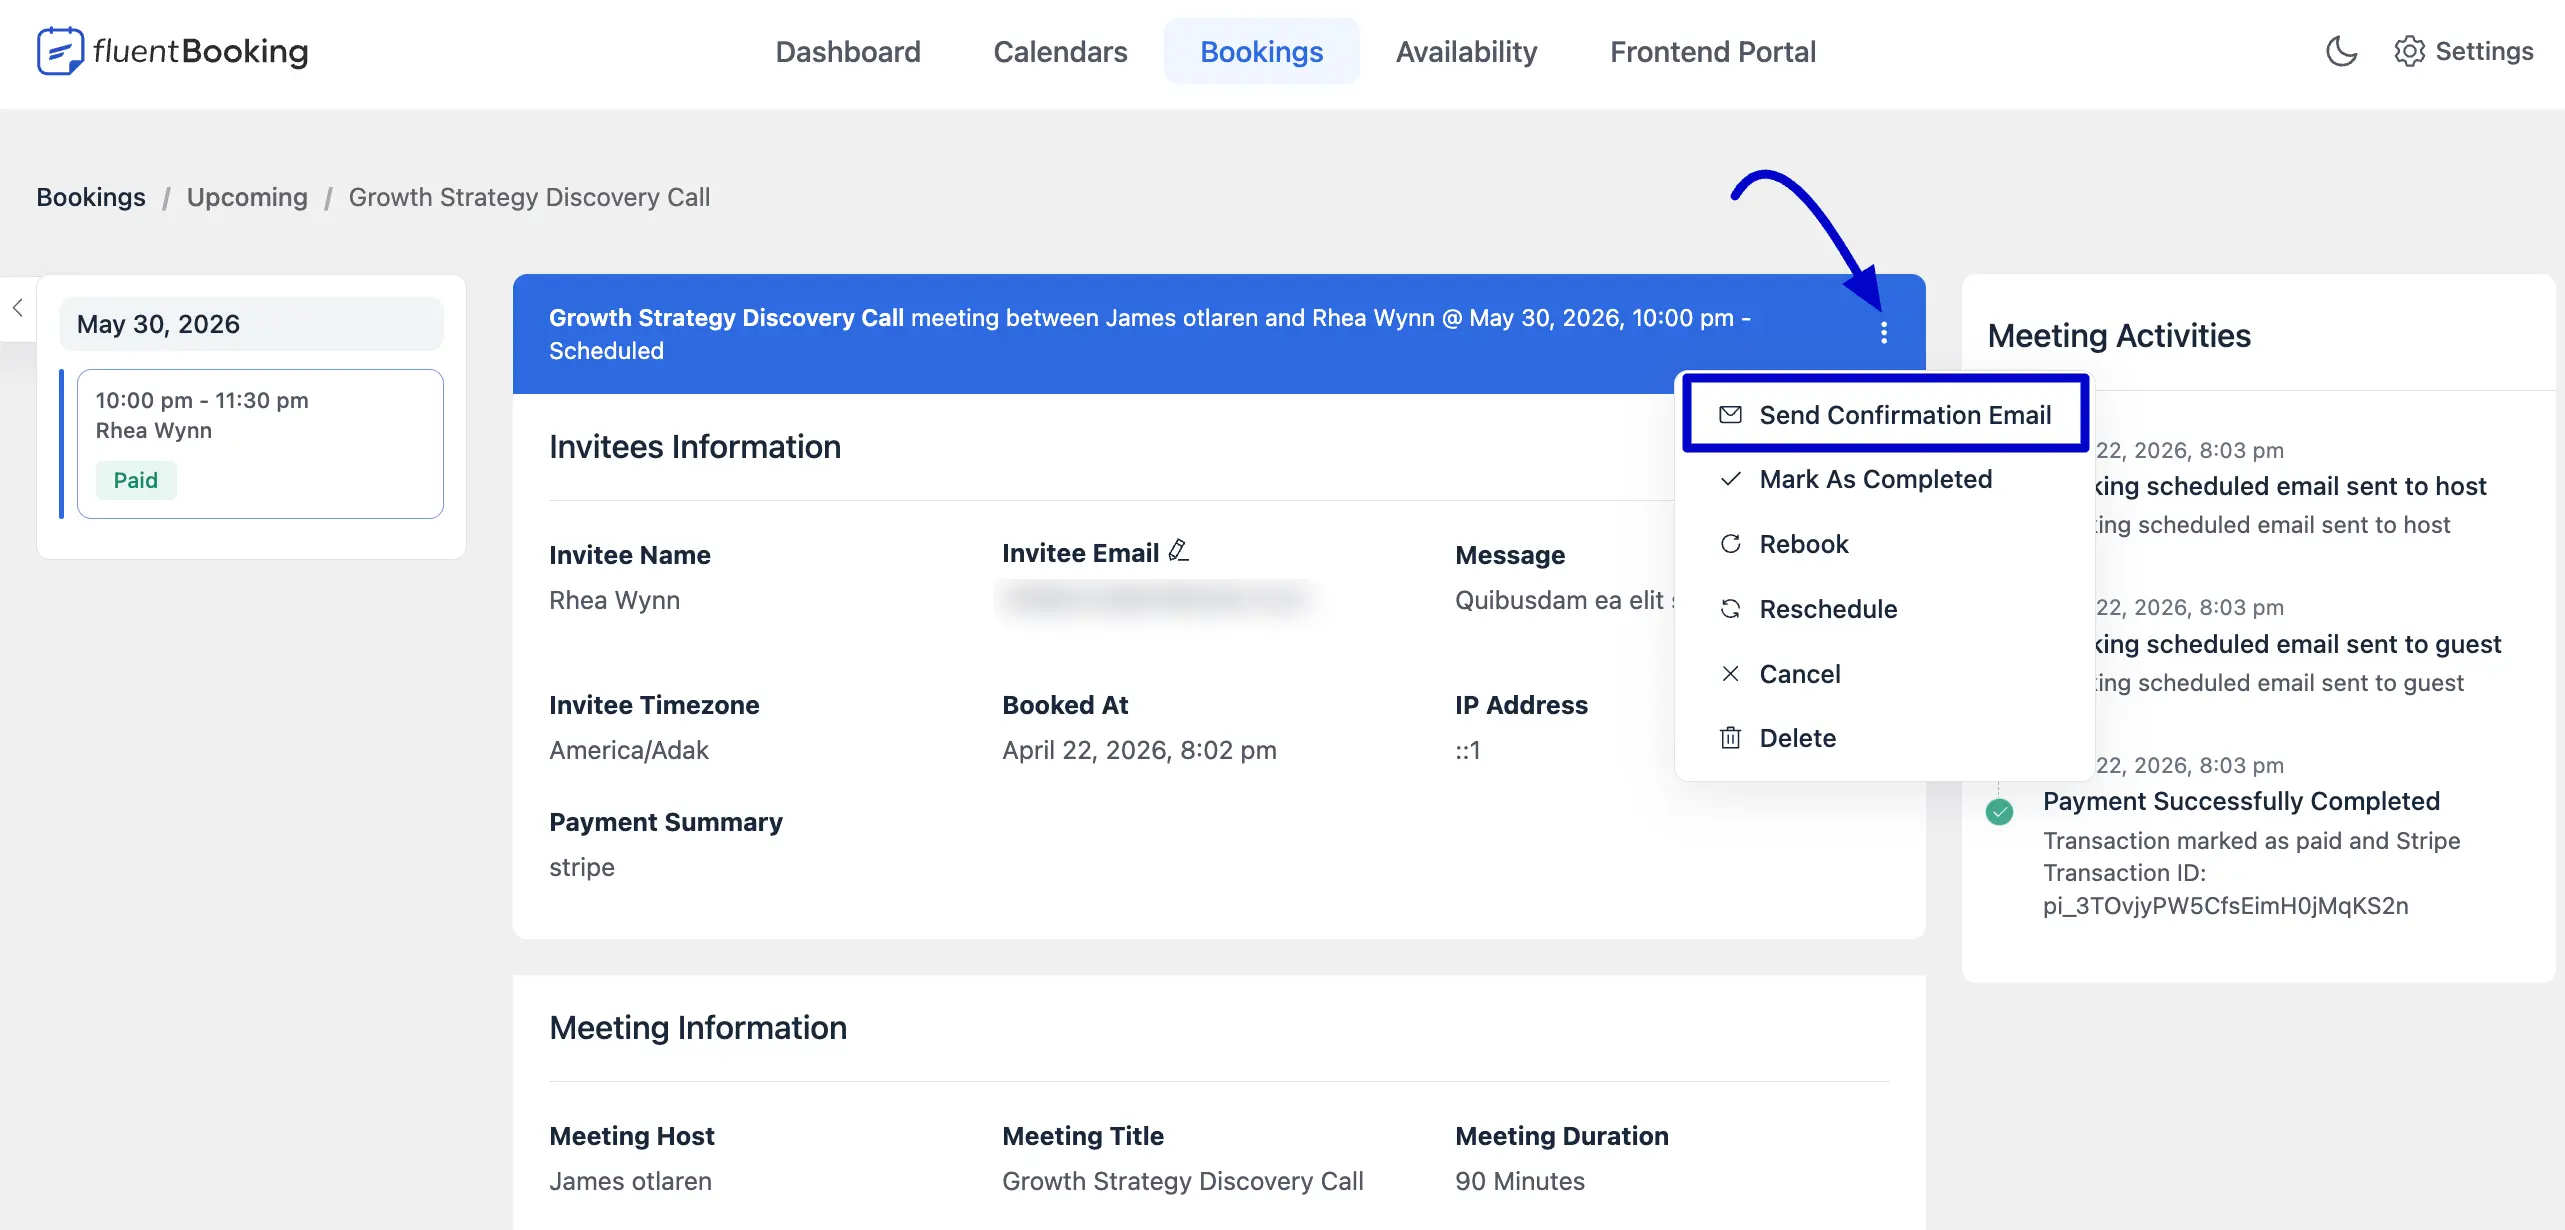
To do this, go to the Bookings section from the top navigation bar. Look for the booking you want to check and see if the email was sent. If it wasn’t, click on the three-dot icon next to that booking.
From the dropdown menu, click on Send Confirmation Email. Once you click it, the email will be sent again to the attendee automatically. You’ll also see a message confirming that the email was successfully sent.
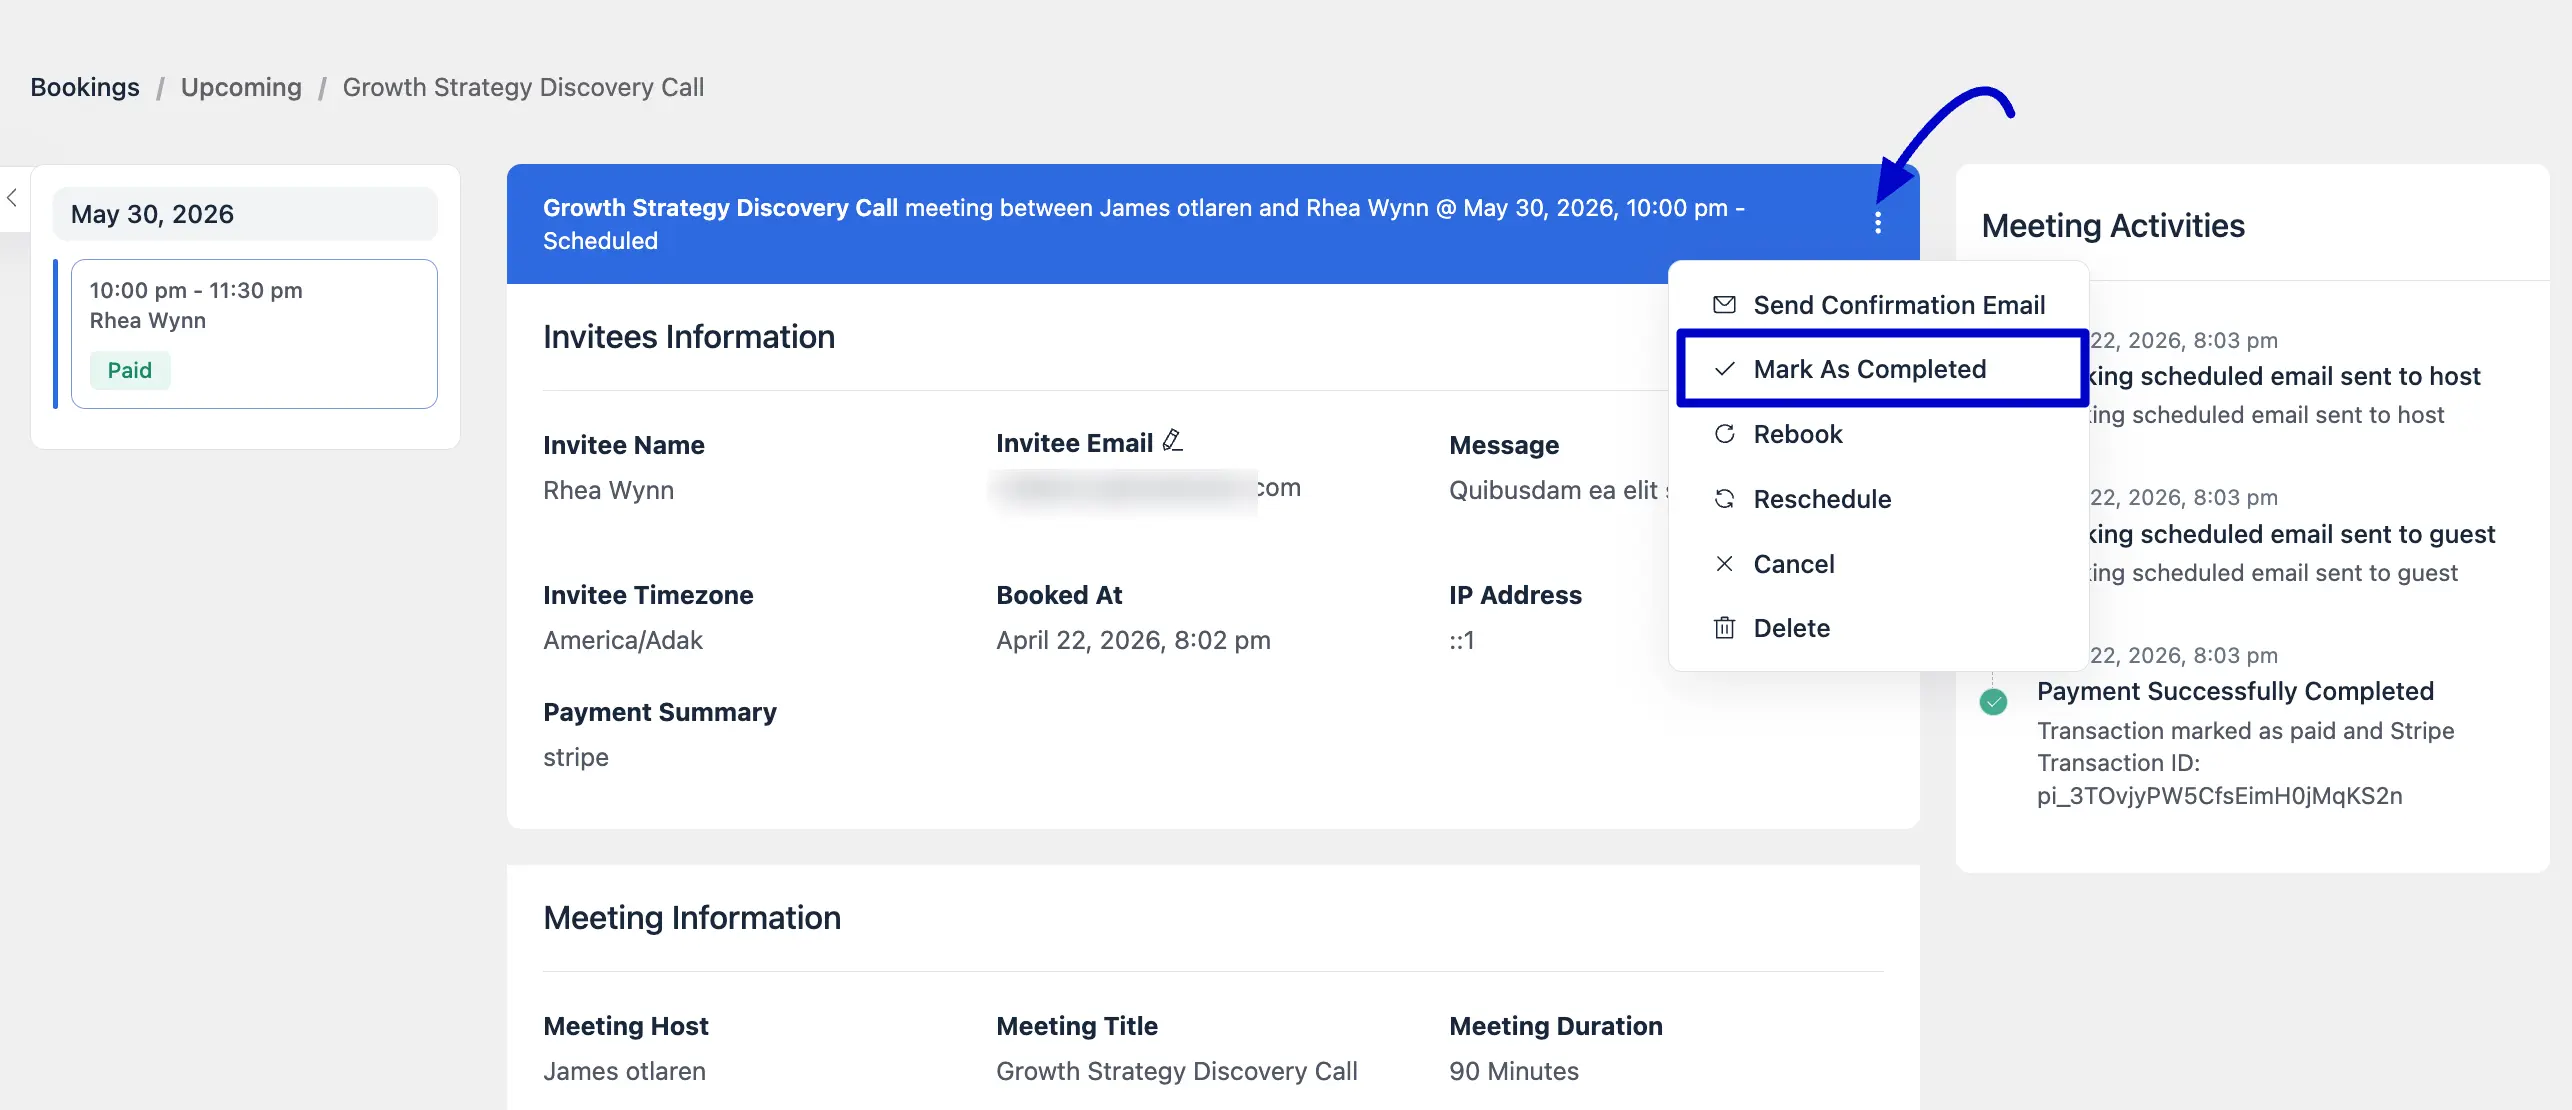
Mark as Completed
If you want to manually mark a booking as completed, simply click on the Mark As Completed option for that booking. Once selected, the status will update, and the booking will appear under the Completed Bookings section.
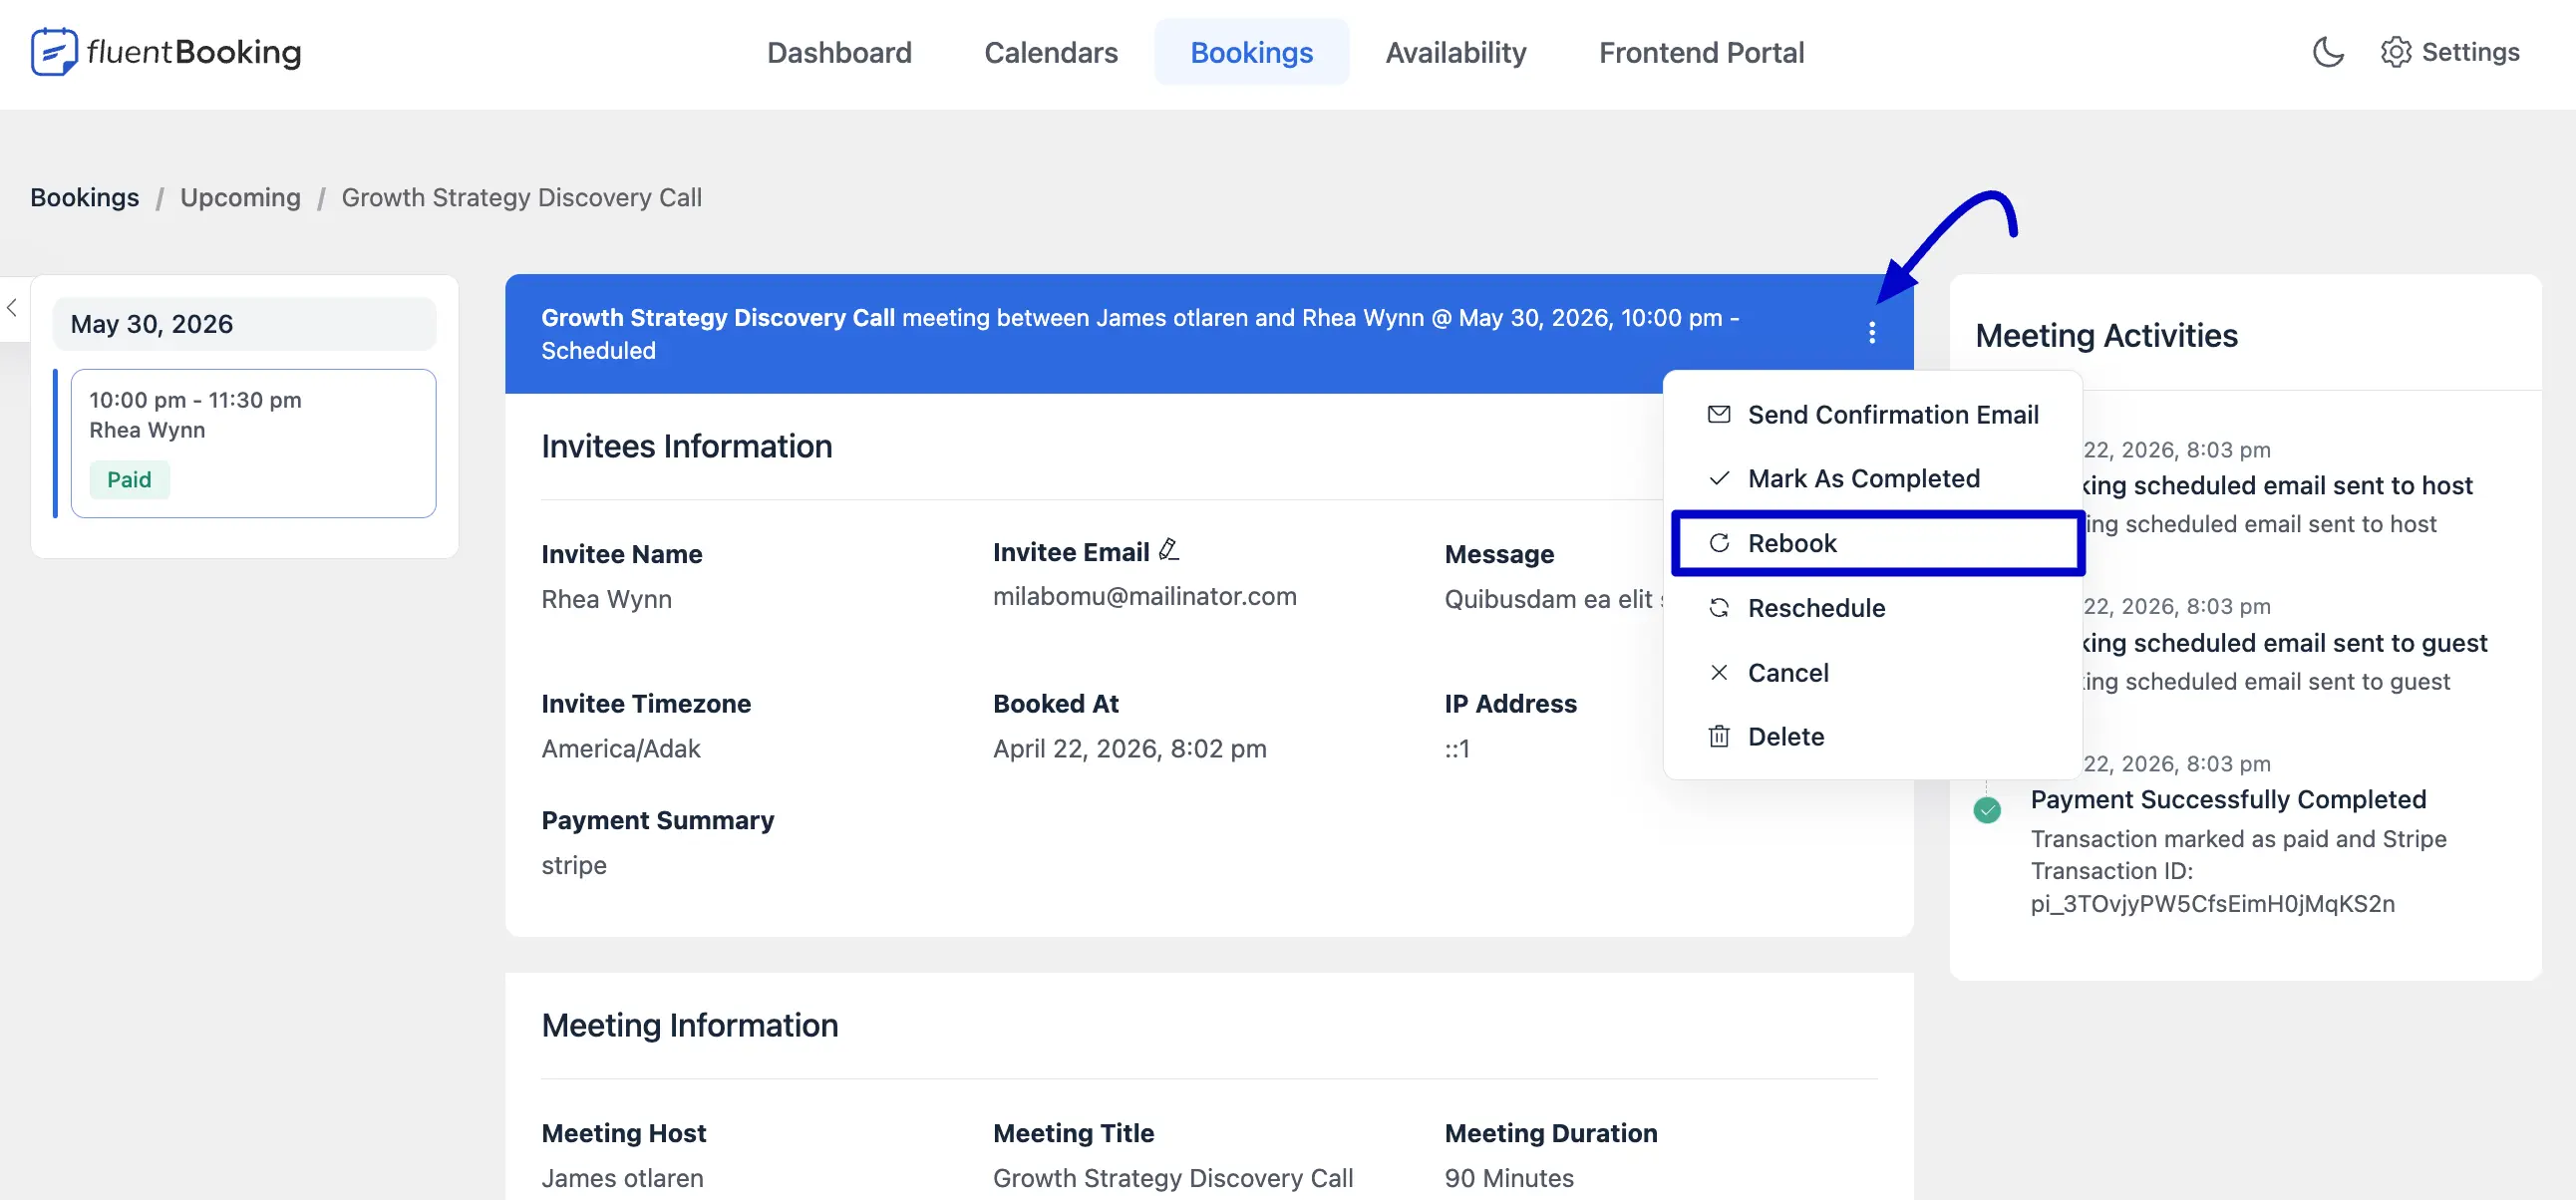
Appointment Rebook
You can easily rebook an appointment for an attendee, and all the information fields will be filled in automatically.
To do this, go to the Bookings section and select the meeting you want to rebook. You’ll see the Rebook option. Just click on it, and the rebooking form will open with the previous details already filled in.
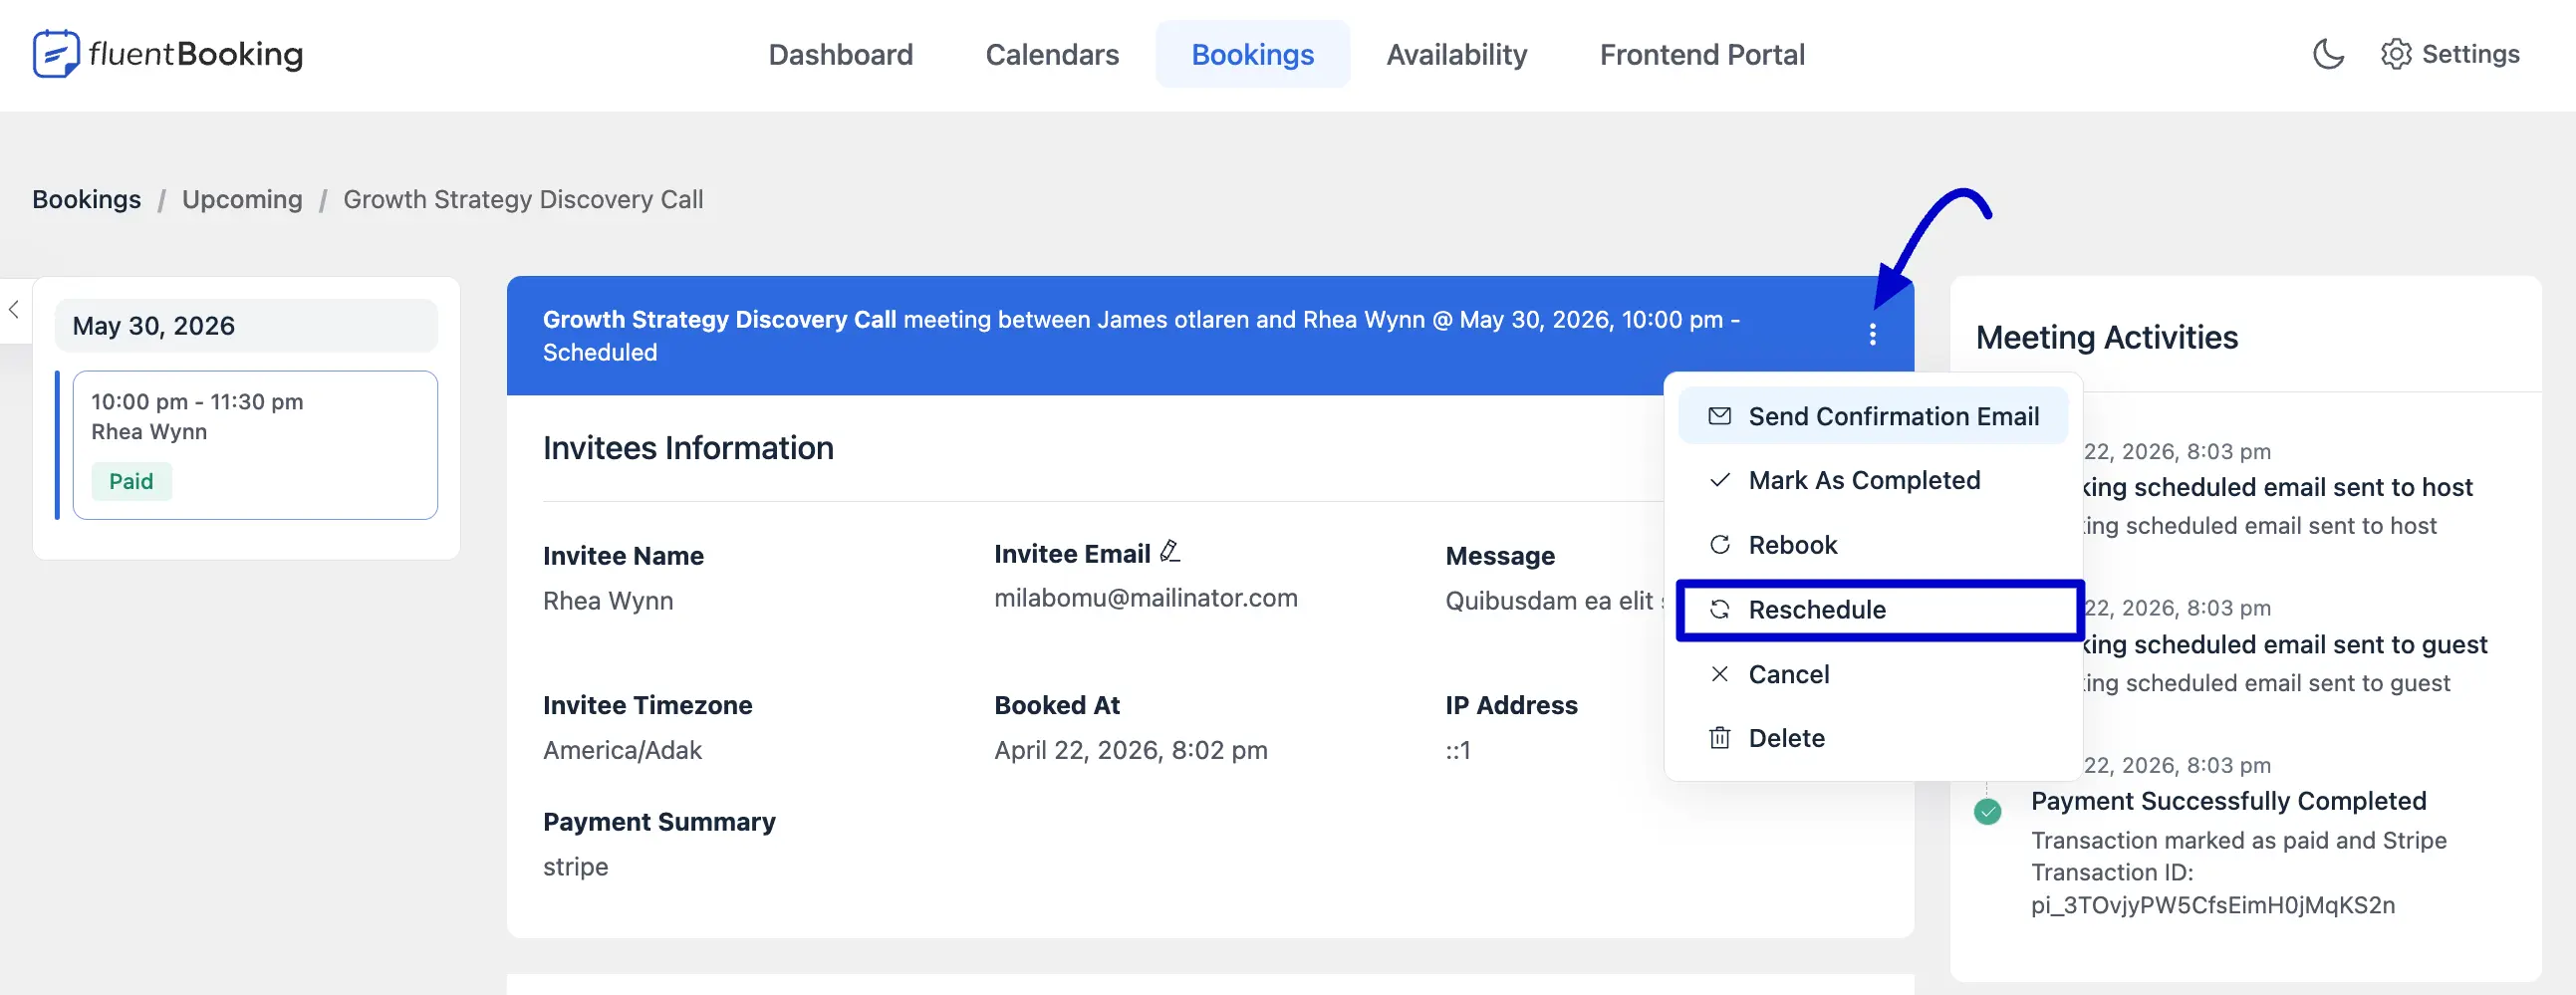
Reschedule the Booking
If you need to reschedule a booking for an attendee, go to the Bookings section and click the three-dot icon next to the booking you want to change. Then, select the Reschedule option.
You’ll be automatically redirected to the booking schedule page, where you can choose a new date and time for the attendee’s appointment.
Cancel or Delete a Booking
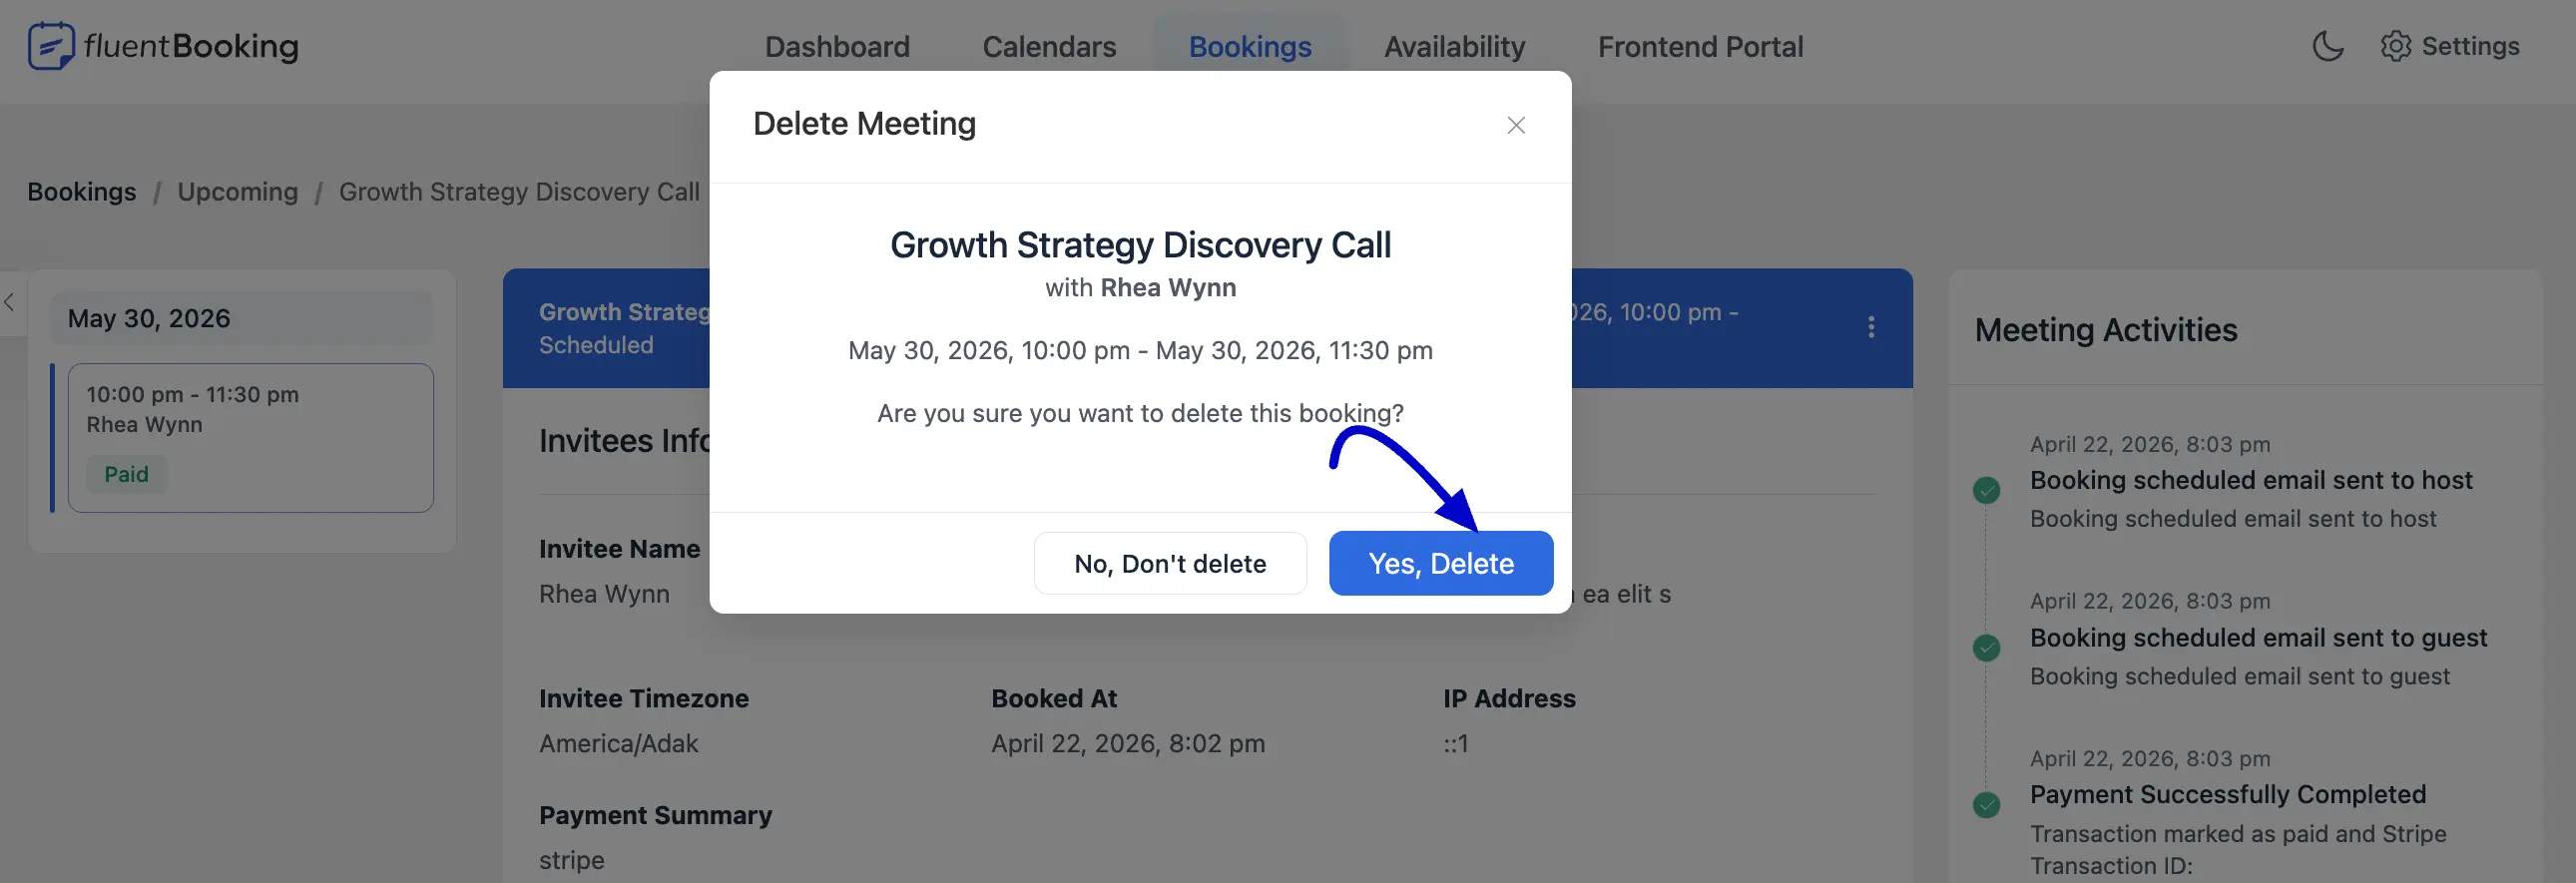
If you want to delete an attendee’s booking, click on the Delete option.

A confirmation pop-up will appear. Just click Yes, Delete button to confirm and remove the booking.
To cancel a booking instead, click on the Cancel option. This will mark the booking as canceled without deleting it. For more details on how to cancel a booking, be sure to check out the related article.
In FluentBookings, we've designed it to be easy for you to manage your booking details. Enjoy the simplicity!