Appearance
FluentCRM integration with FluentBooking
FluentCRM is a WordPress email marketing automation plugin that streamlines lead management, email campaigns, automatic sequences, learner and affiliate handling, and user activity tracking.
This integration between FluentCRM and FluentBooking simplifies the process of adding event attendees to your FluentCRM customer list for business growth and marketing lead collection.
NOTE
The FluentCRM integration is only available in FluentBooking Pro. You will need the FluentBooking Pro plugin to access this feature.
Important
You need to have the FluentCRM plugin installed and activated, and at least one host created in FluentBooking, before configuring this integration.
Integration Steps
Follow these straightforward steps to integrate FluentCRM with FluentBooking:
Access FluentBooking
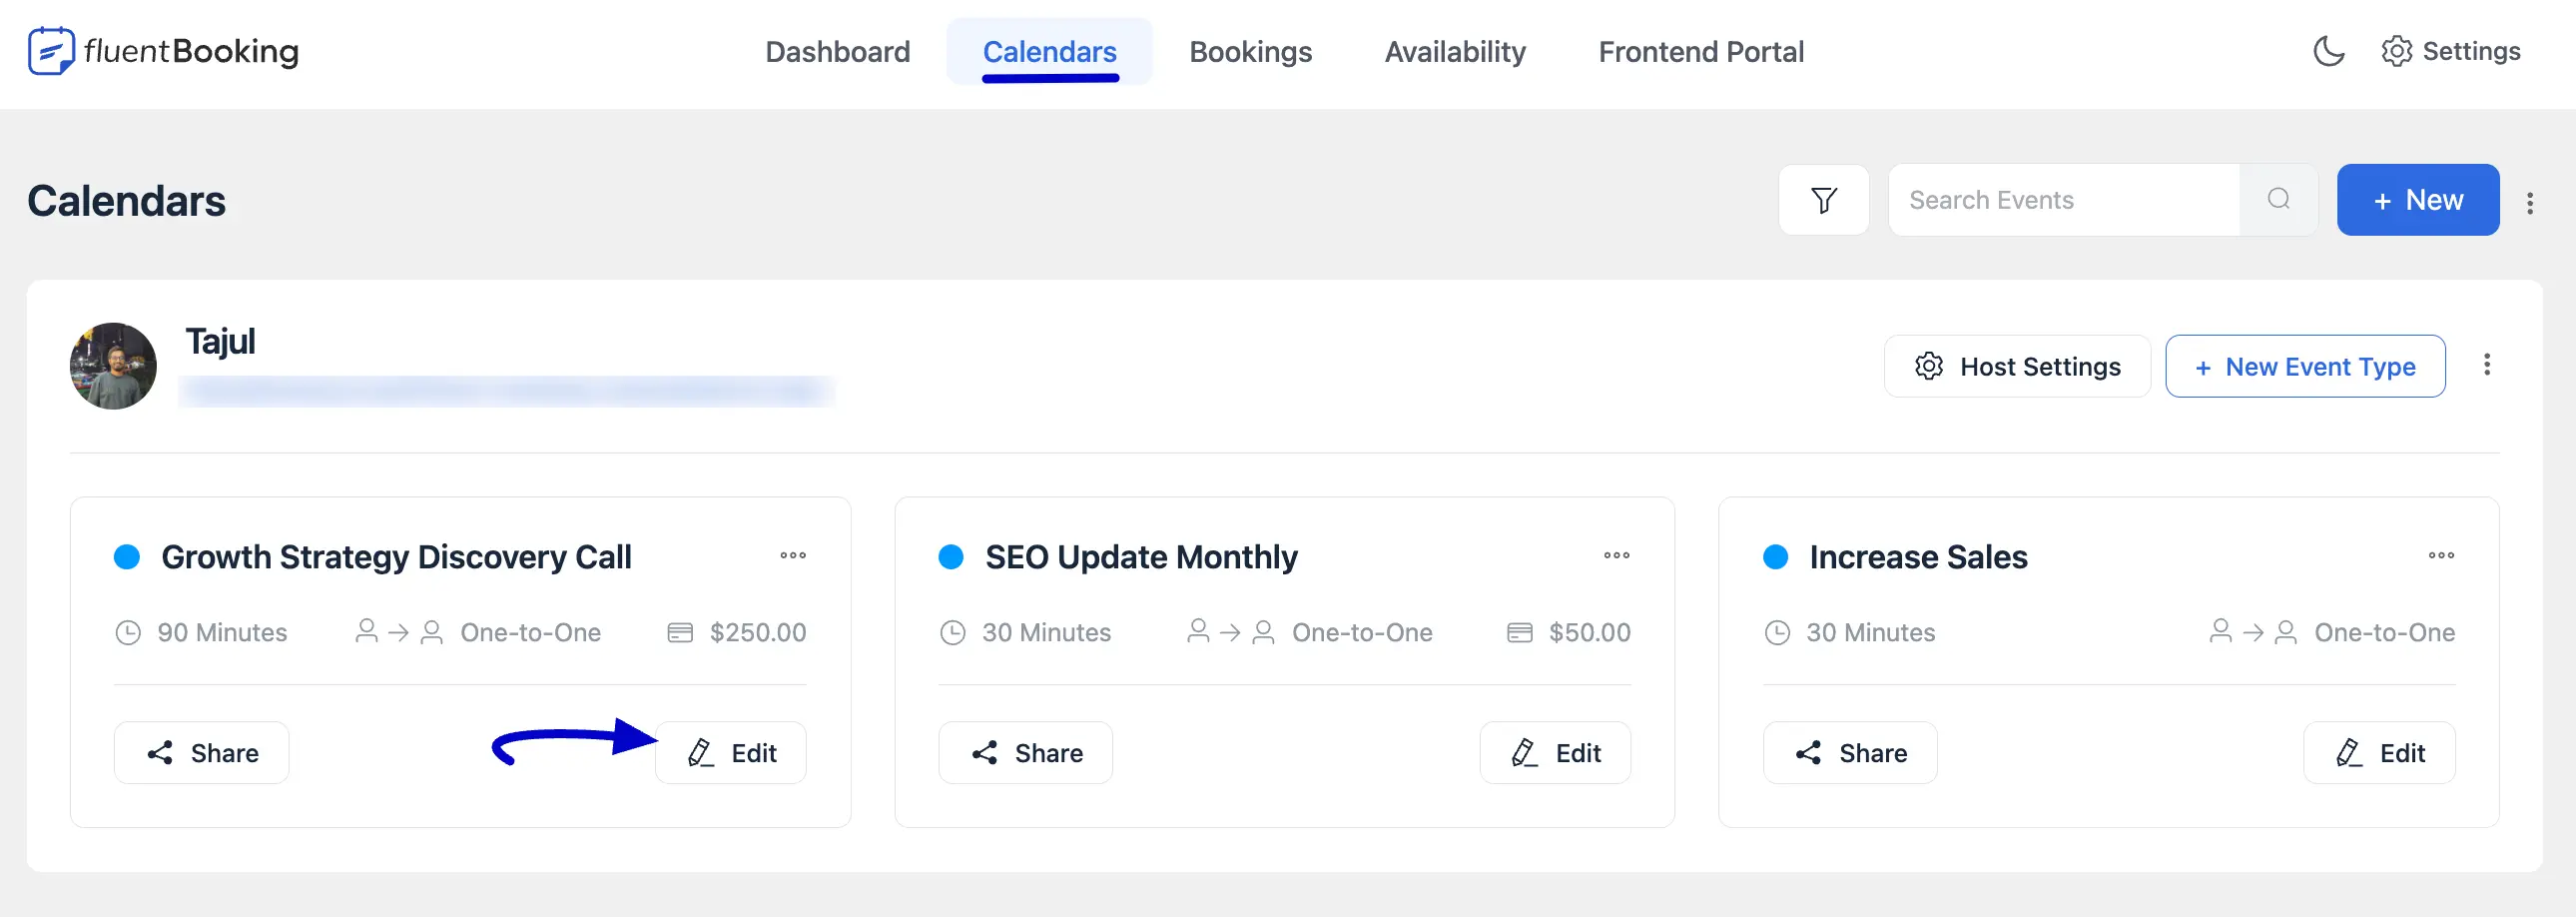
- Head to your FluentBooking dashboard.
- Navigate to Booking Calendars to find your booking events.
- Select the specific event you want to integrate with FluentCRM and click Edit.
Set Up FluentCRM Integration
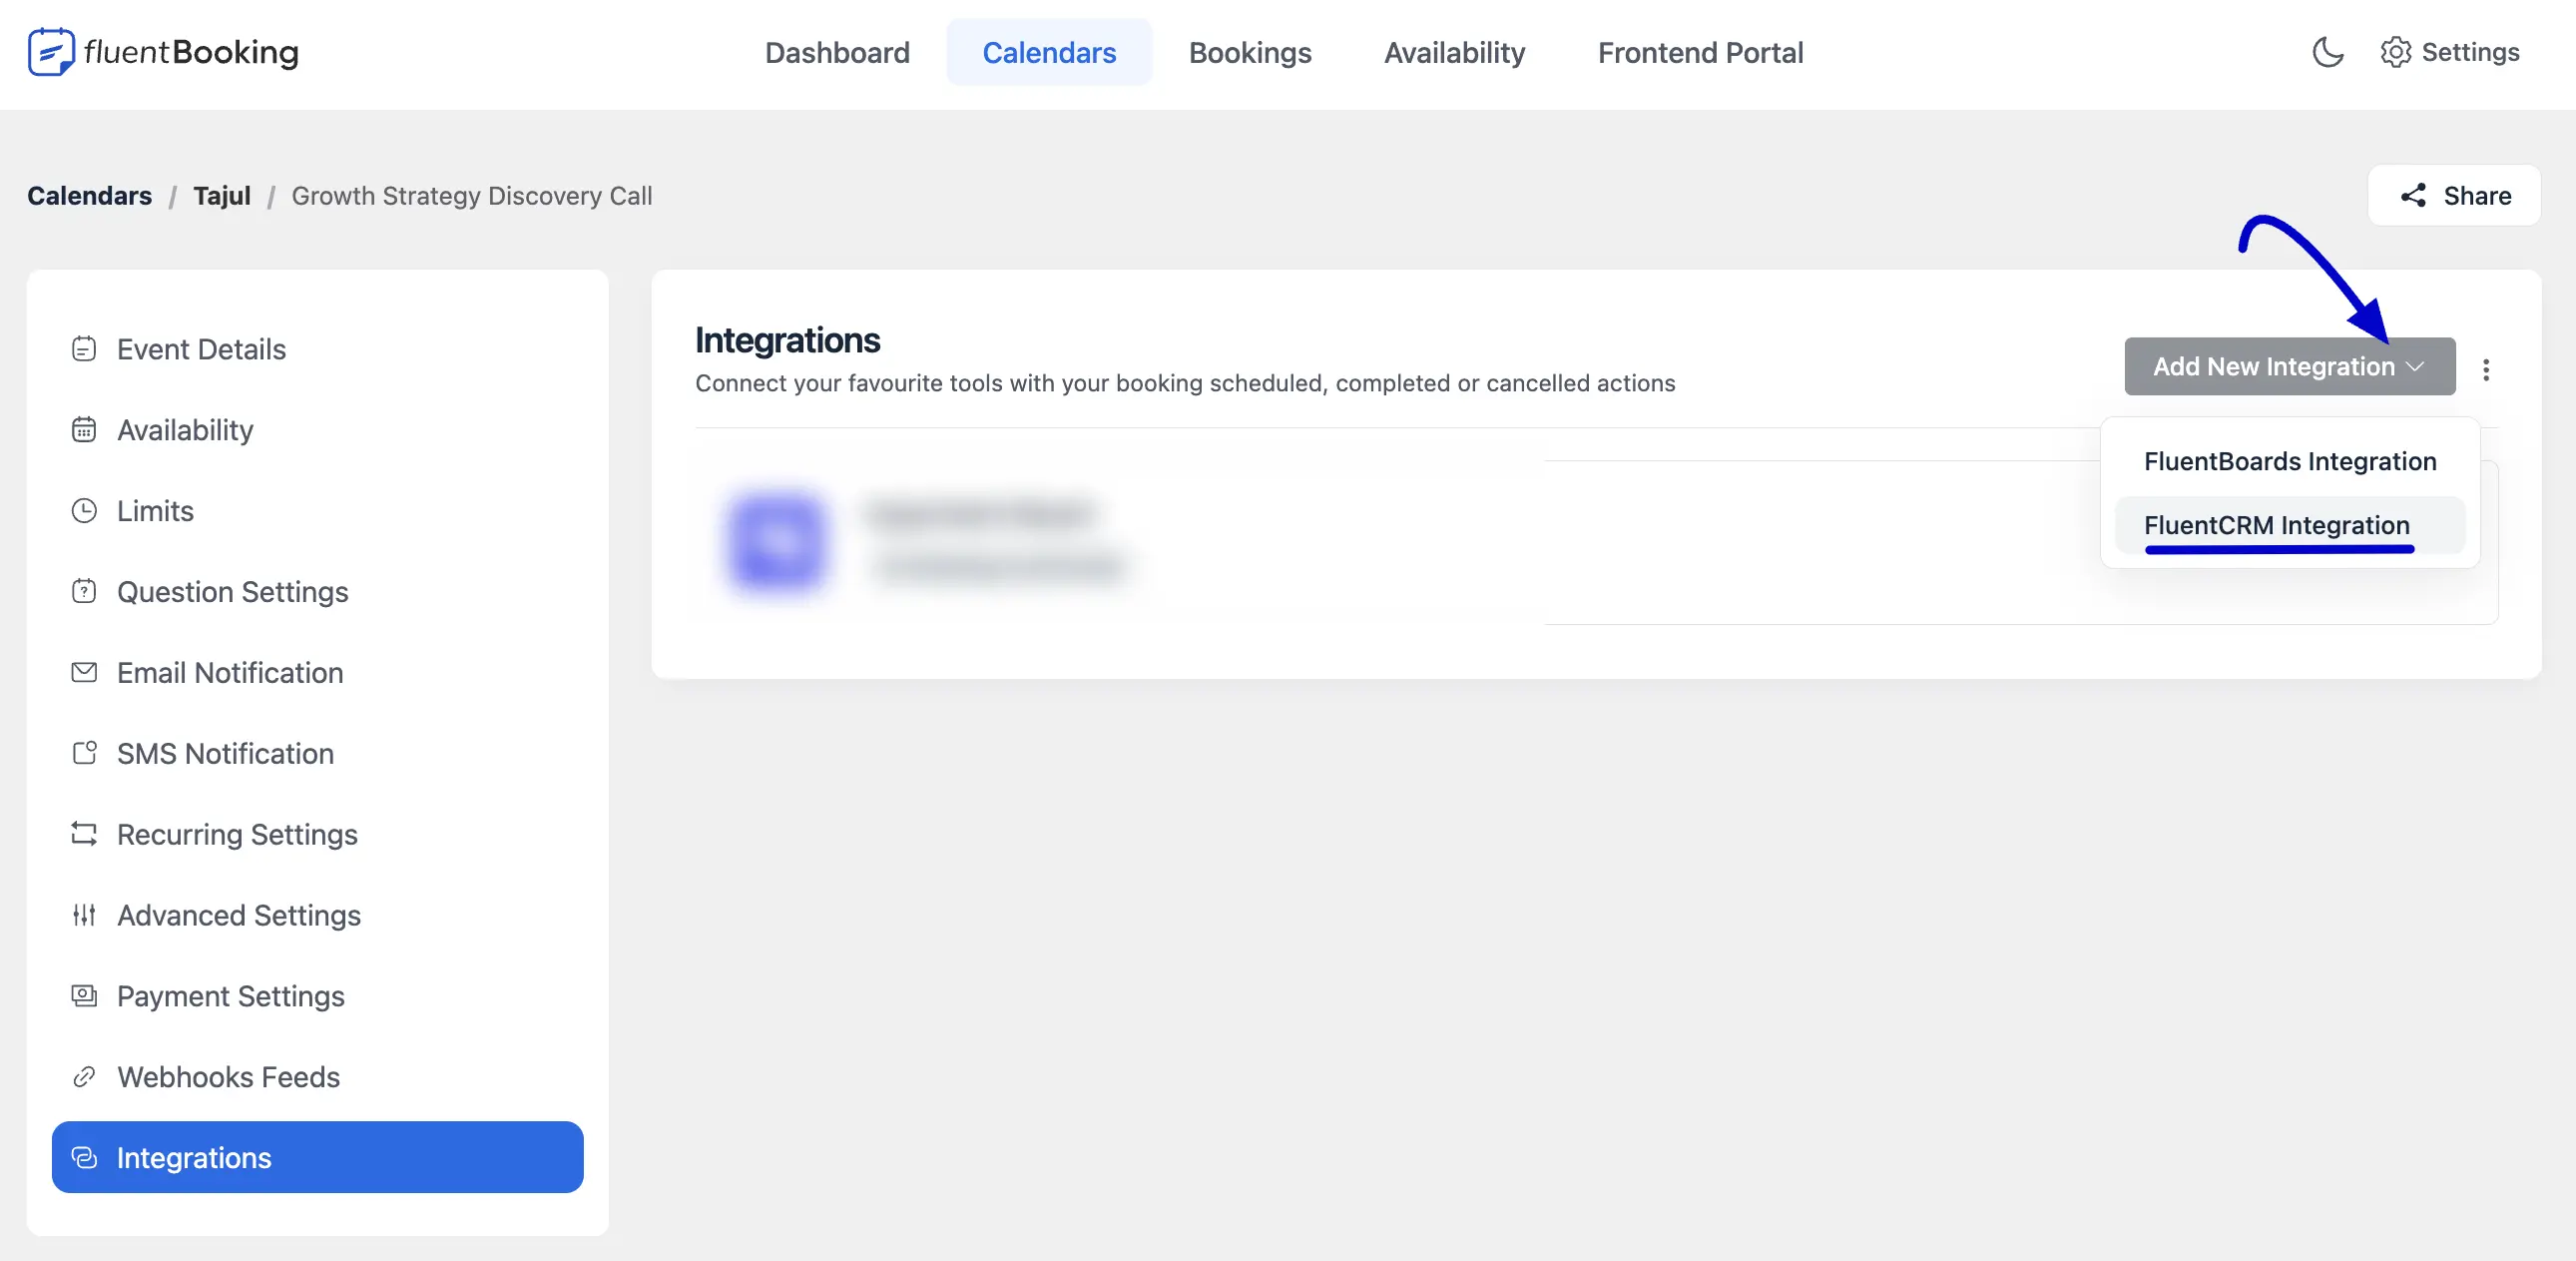
On the event edit page, go to the left sidebar and select Integrations. Now click on Add New Integration and choose FluentCRM Integration.
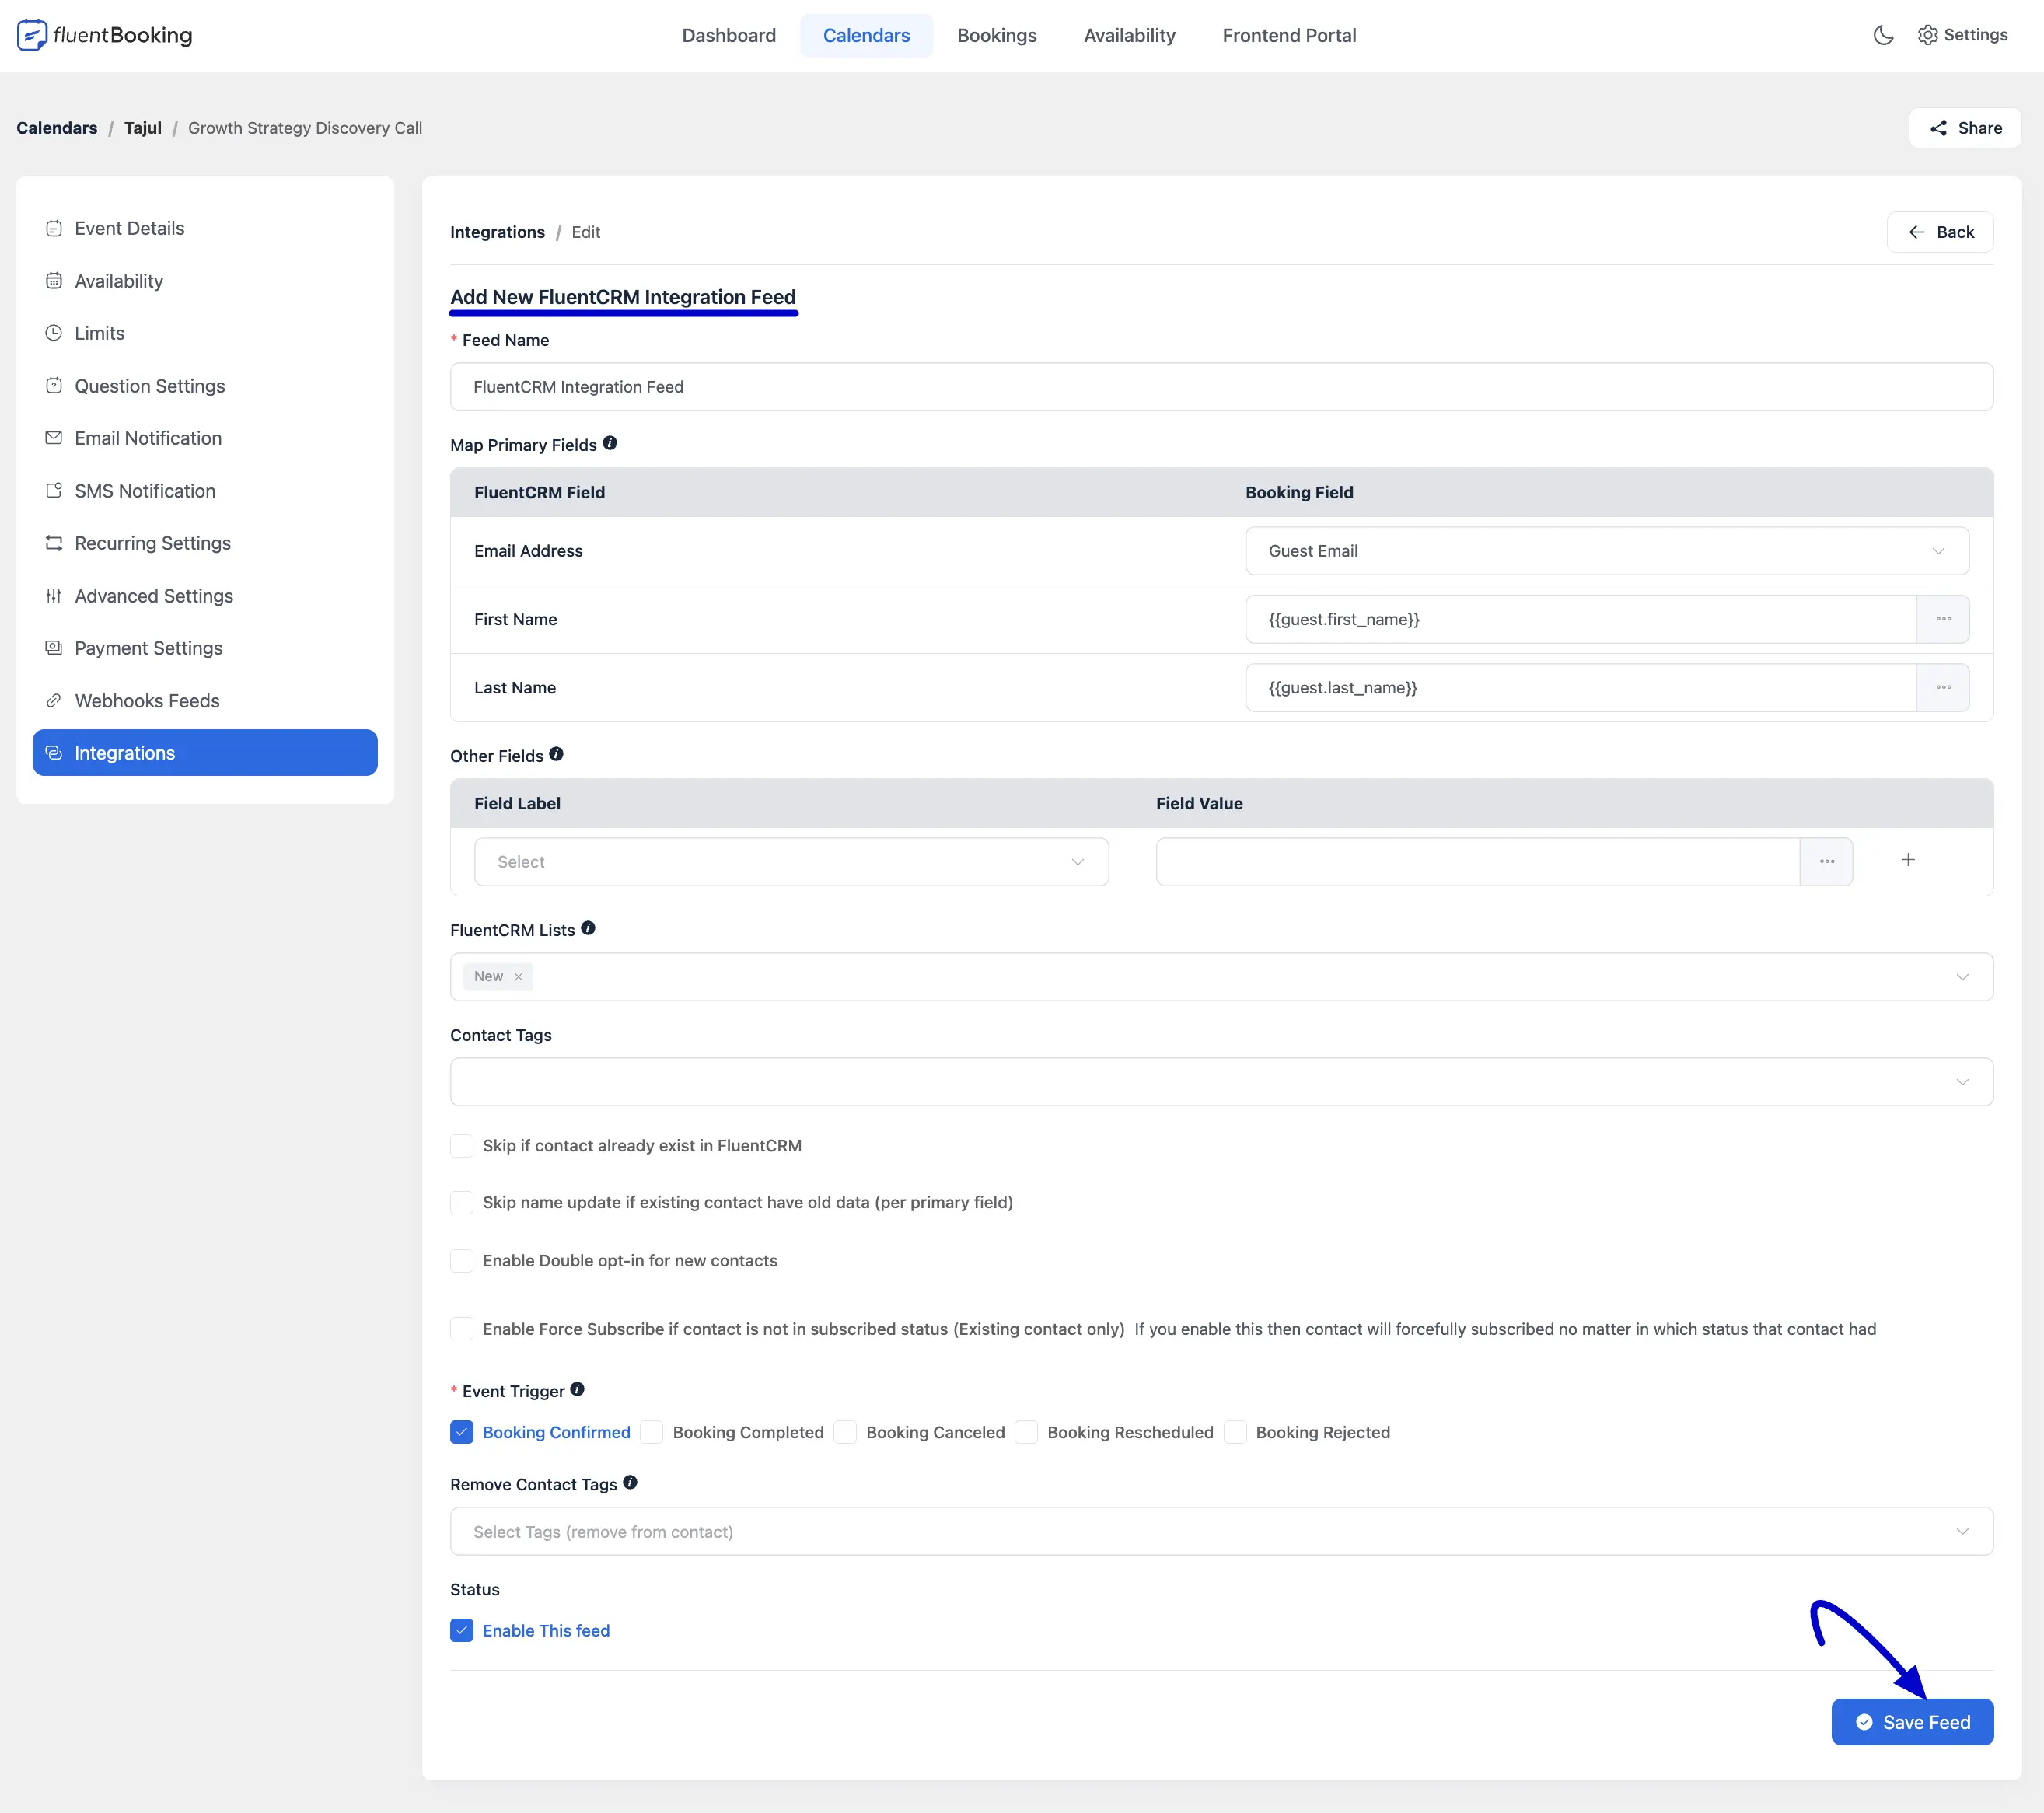
FluentCRM Integration Feeds
You can customize your integration feed using the following settings:
- Feed Name: Assign a unique title to your integration feed for easy identification.
- Map Primary Fields: Align your FluentCRM Fields (Email Address, First Name, Last Name) with the corresponding Booking Fields (e.g.,
{{guest.first_name}},{{guest.last_name}}).
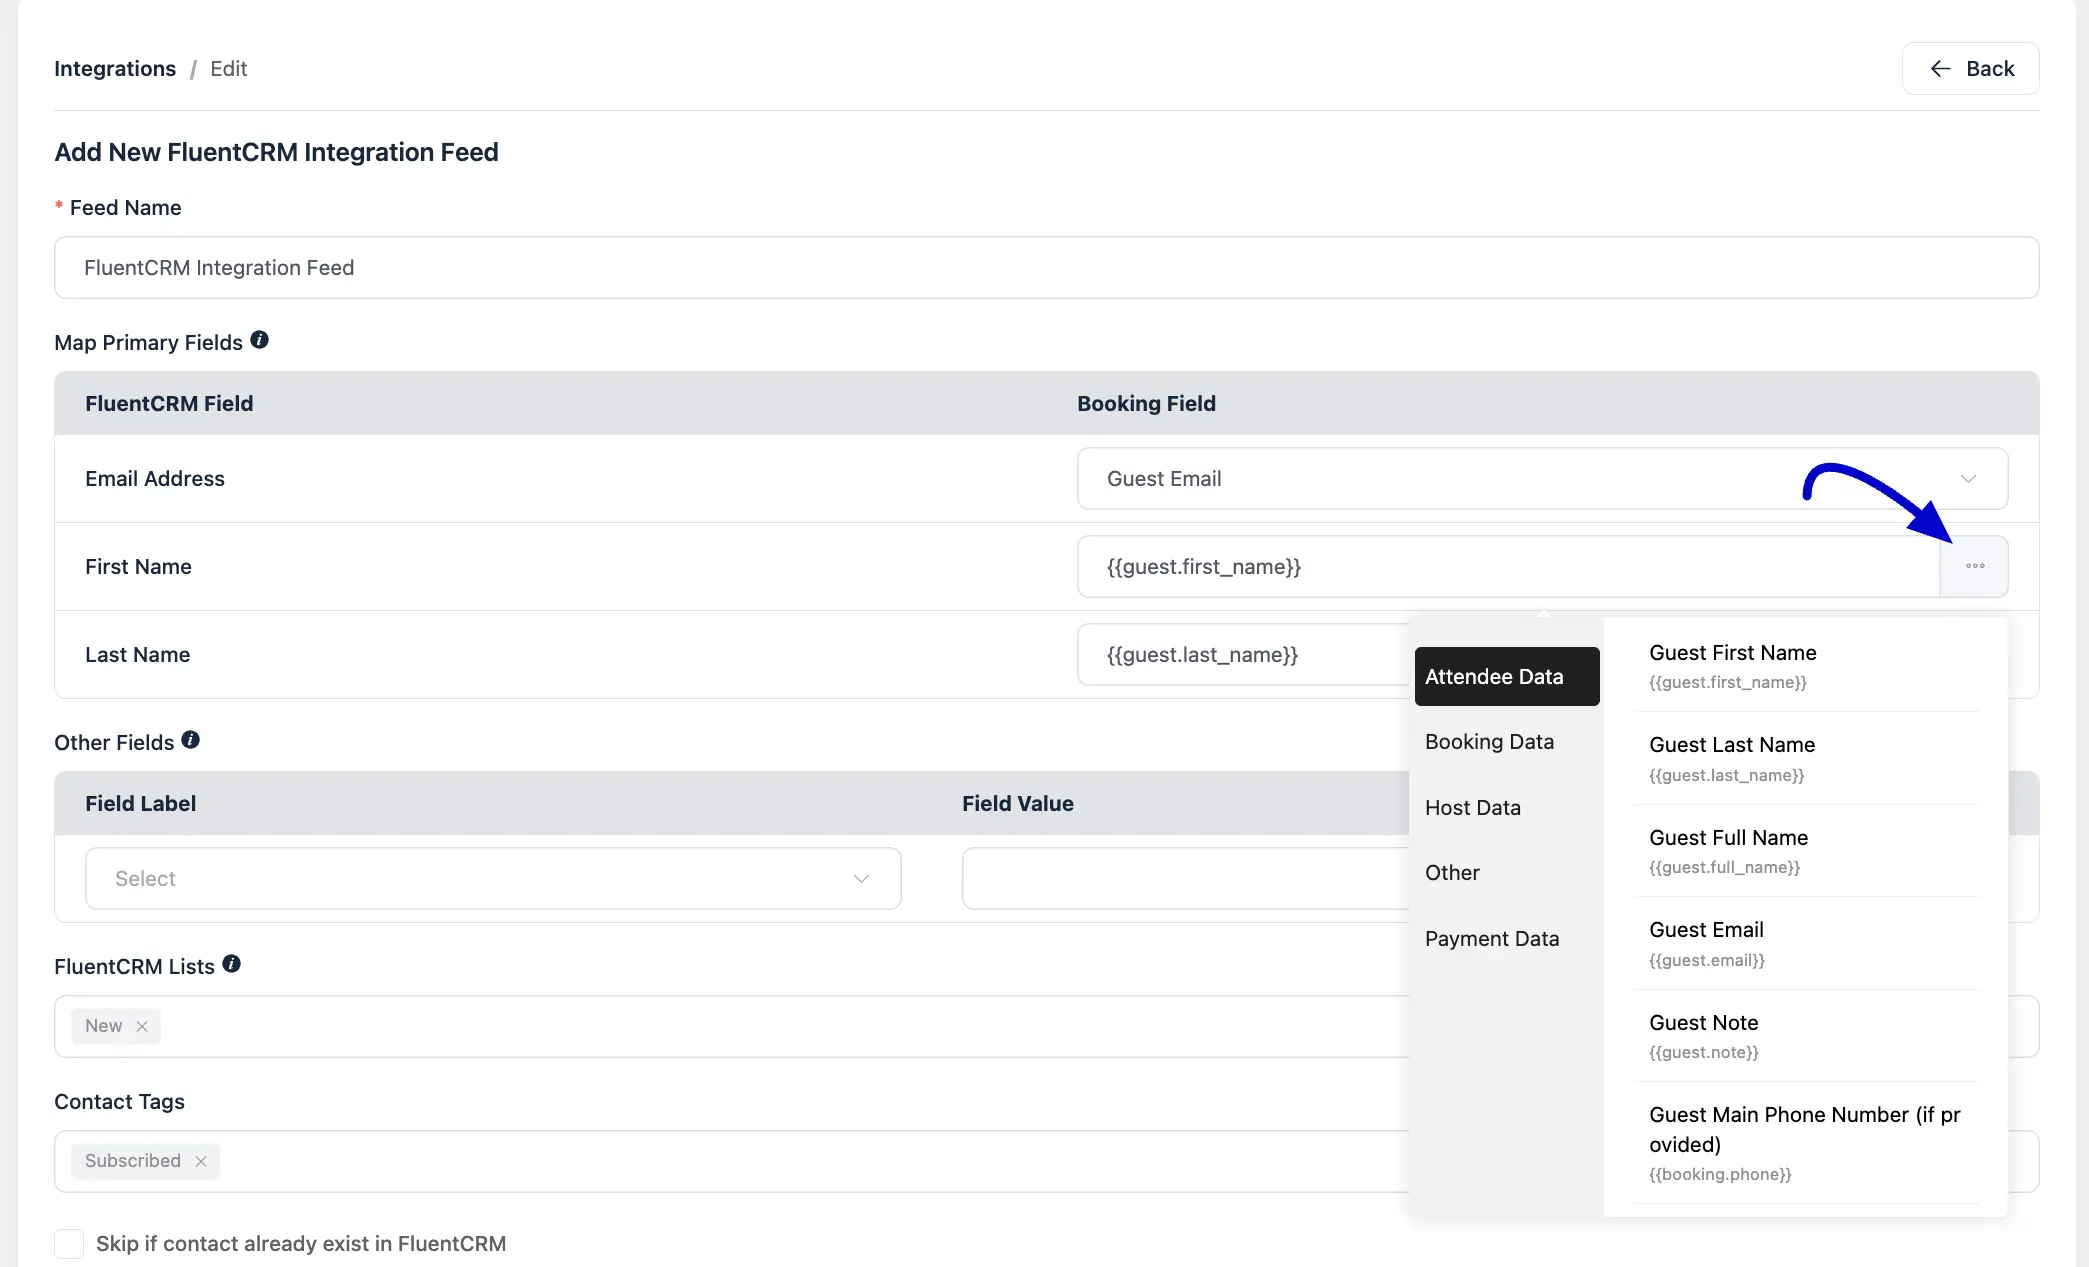
- Other Fields: Use the Field Label and Field Value selectors to map additional custom data using dynamic shortcodes.
- FluentCRM Lists: Select one or more existing customer lists to which your attendees will be added.
- Contact Tags: Assign specific tags to attendees to segment them within your CRM.
- Automation Options: Fine-tune contact behavior with dedicated checkboxes:
- Skip if contact already exists in FluentCRM: Prevents duplicate entries.
- Skip name update if existing contact have old data: Protects existing contact information from being overwritten.
- Enable Double opt-in for new contacts: Sends a confirmation email to new subscribers.
- Enable Force Subscribe: Forcibly updates a contact to "Subscribed" status regardless of their previous state.
- Event Trigger: Select which booking actions will fire this integration feed. You can choose from Booking Confirmed, Completed, Canceled, Rescheduled, Rejected, or No Show.
- Remove Contact Tags: Choose specific tags to be automatically removed from a contact when the selected trigger occurs.
- Status: Toggle the Enable This feed checkbox to activate or deactivate the integration.
After configuring these settings, click the Save Feed button to finalize your integration.
Automation Setup in FluentCRM
To create a new automation in FluentCRM, go to the FluentCRM Dashboard and click on the Automations section from the top navigation menu. Then click New Automation.
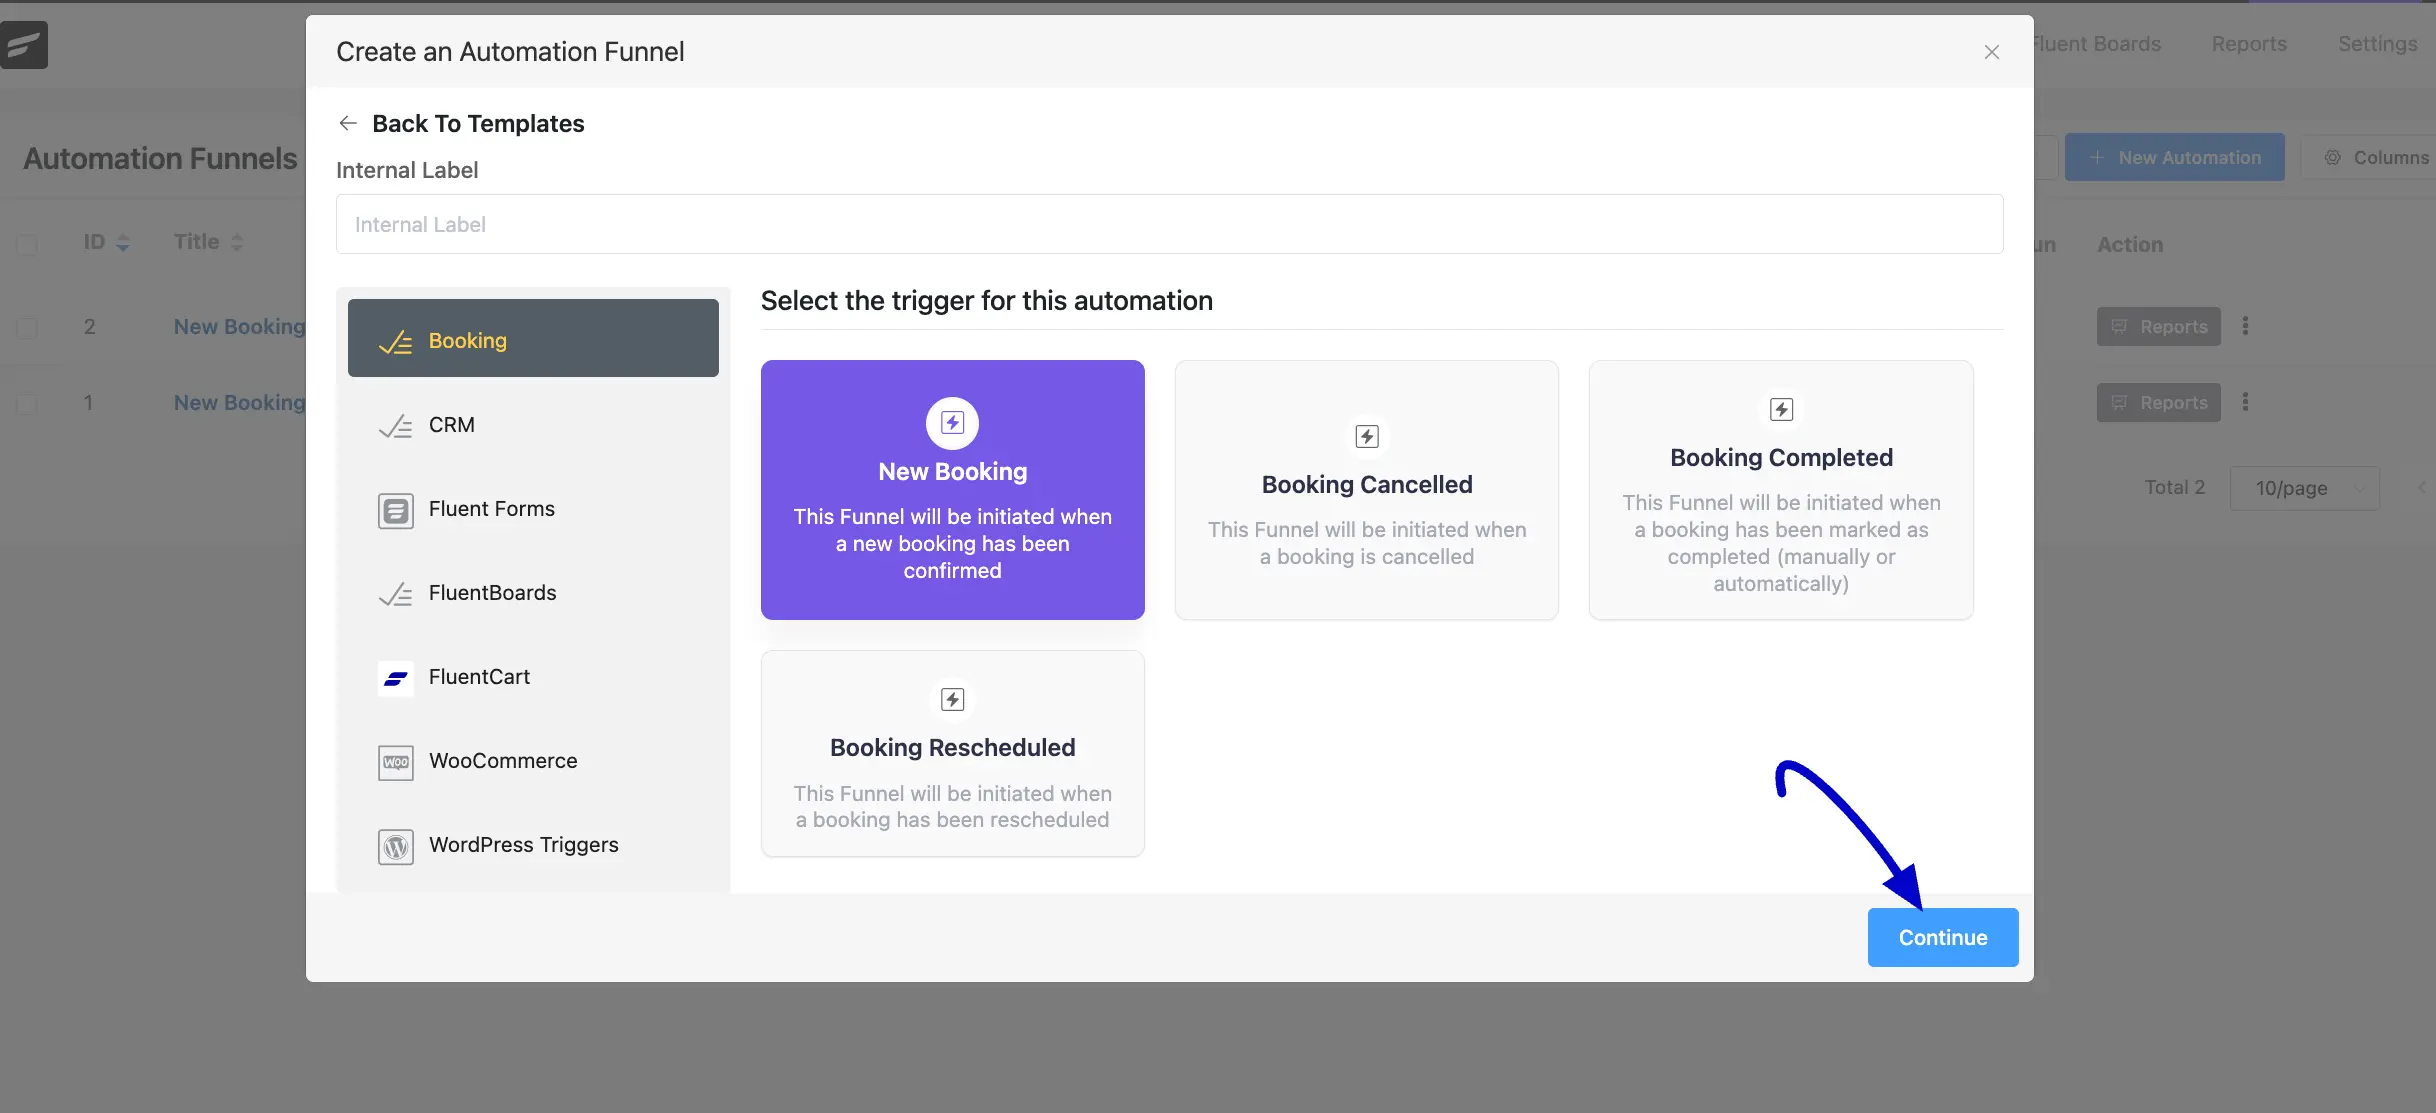
A popup window will appear. From the sidebar, select Booking, then choose a trigger to define when the automation should start.
Available triggers include:
- New Booking: Runs the automation when a new booking is confirmed.
- Booking Cancelled: Runs the automation when a booking is canceled.
- Booking Complete: Runs the automation when a booking is marked as completed, either manually or automatically.
- Booking Rescheduled: Runs the automation when an existing booking is moved to a new date or time.
- Booking No Show: Runs the automation when a booking is marked as no-show by the host.
After selecting a trigger, click the Continue button to start setting up the funnel.
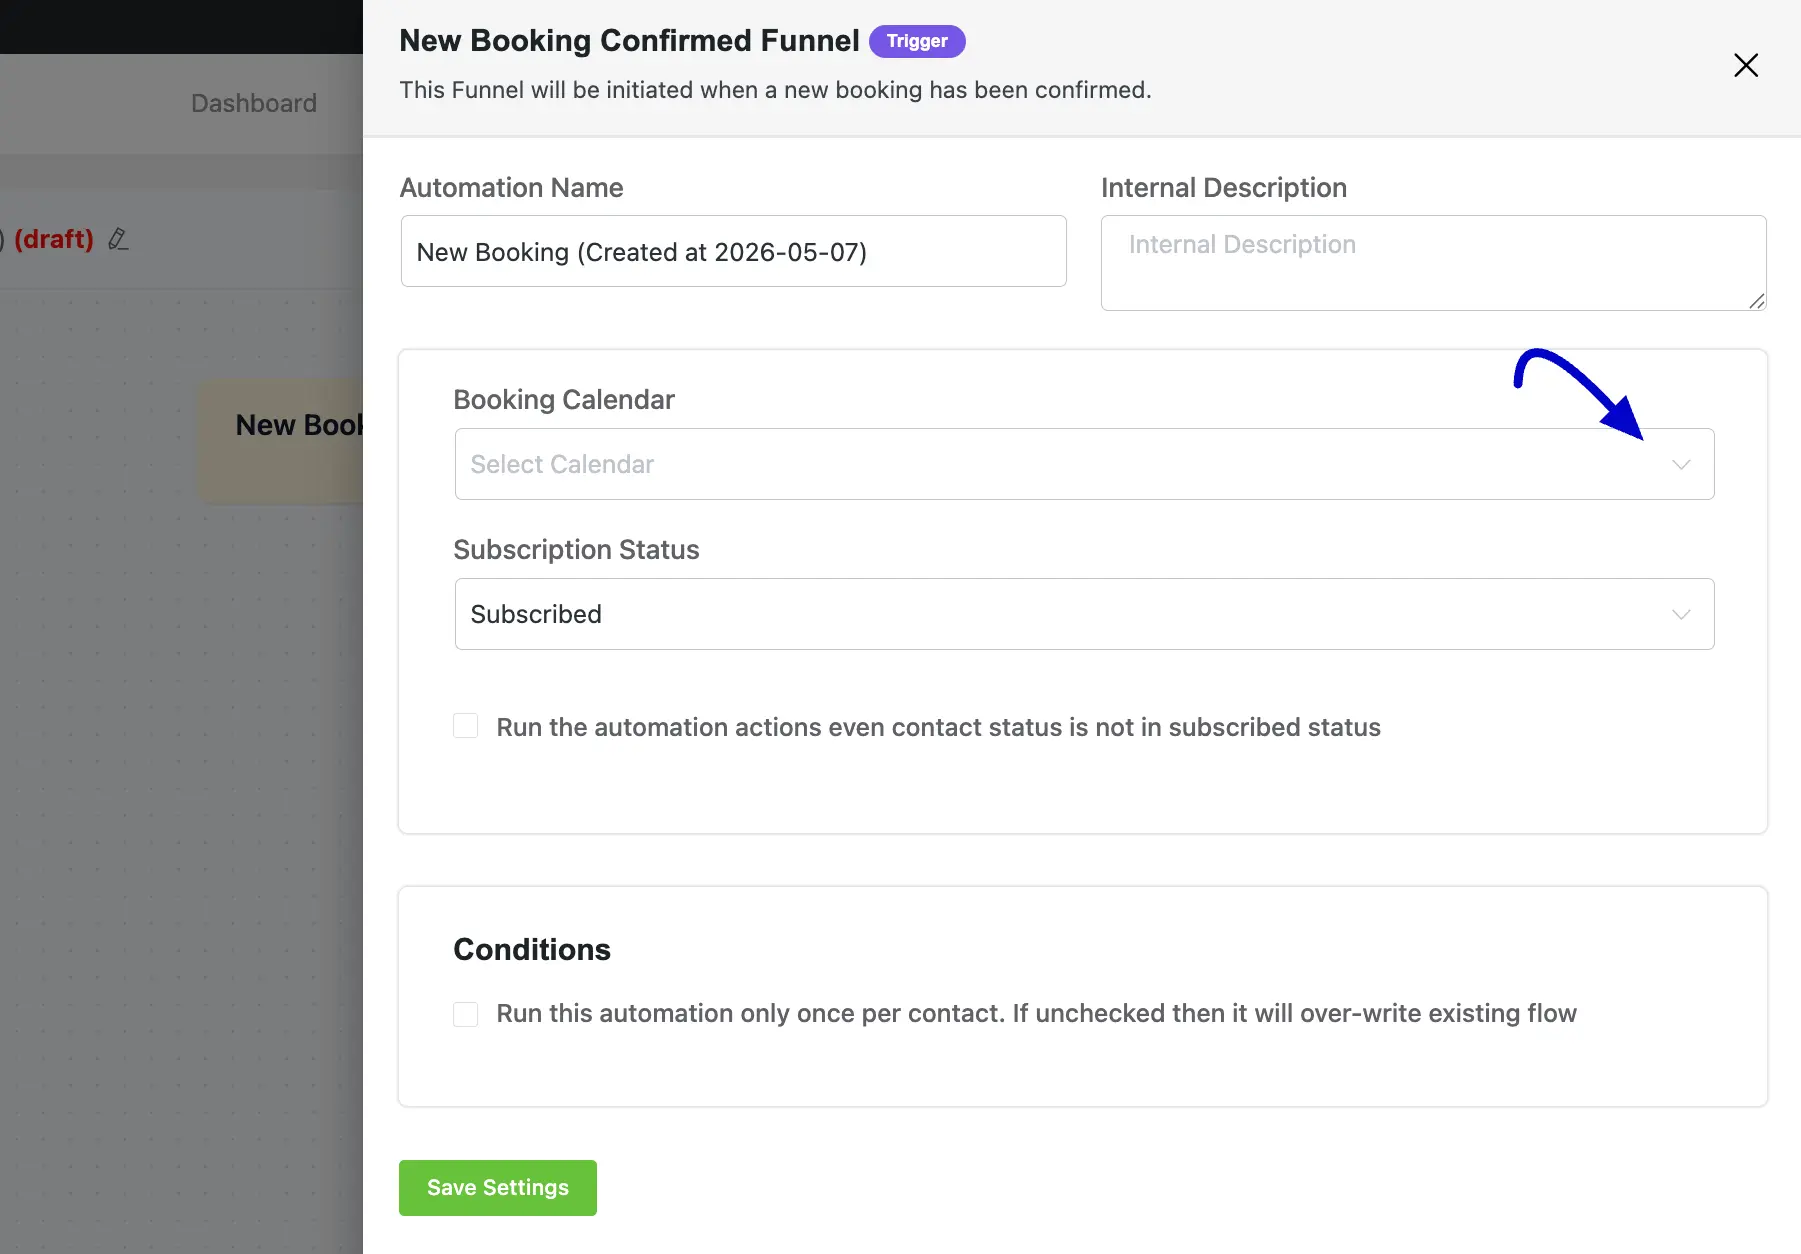
In the next popup, configure the funnel settings:
- Automation Name: Displays the automation name. You can edit it if needed.
- Internal Description: Add an internal note or description for the automation.
- Booking Calendar: Select the booking calendar you created earlier.
- Subscription Status: Choose which contact status will be included in the automation. Available options are Subscribed, Unsubscribed, and Pending.
- Conditions: Enable the checkbox to run the automation only once per contact. If unchecked, the automation can run multiple times when new matching data is detected.
Manage CRM Tags and Lists from Booking Details
When viewing any individual booking in FluentBooking, a CRM Profile Card appears in the sidebar with the attendee’s FluentCRM data. You can add or remove tags and lists directly from this card without switching to FluentCRM.
This is useful for tagging a new lead, adding an attendee to a nurture list, or cleaning up CRM data while you are already reviewing their booking.
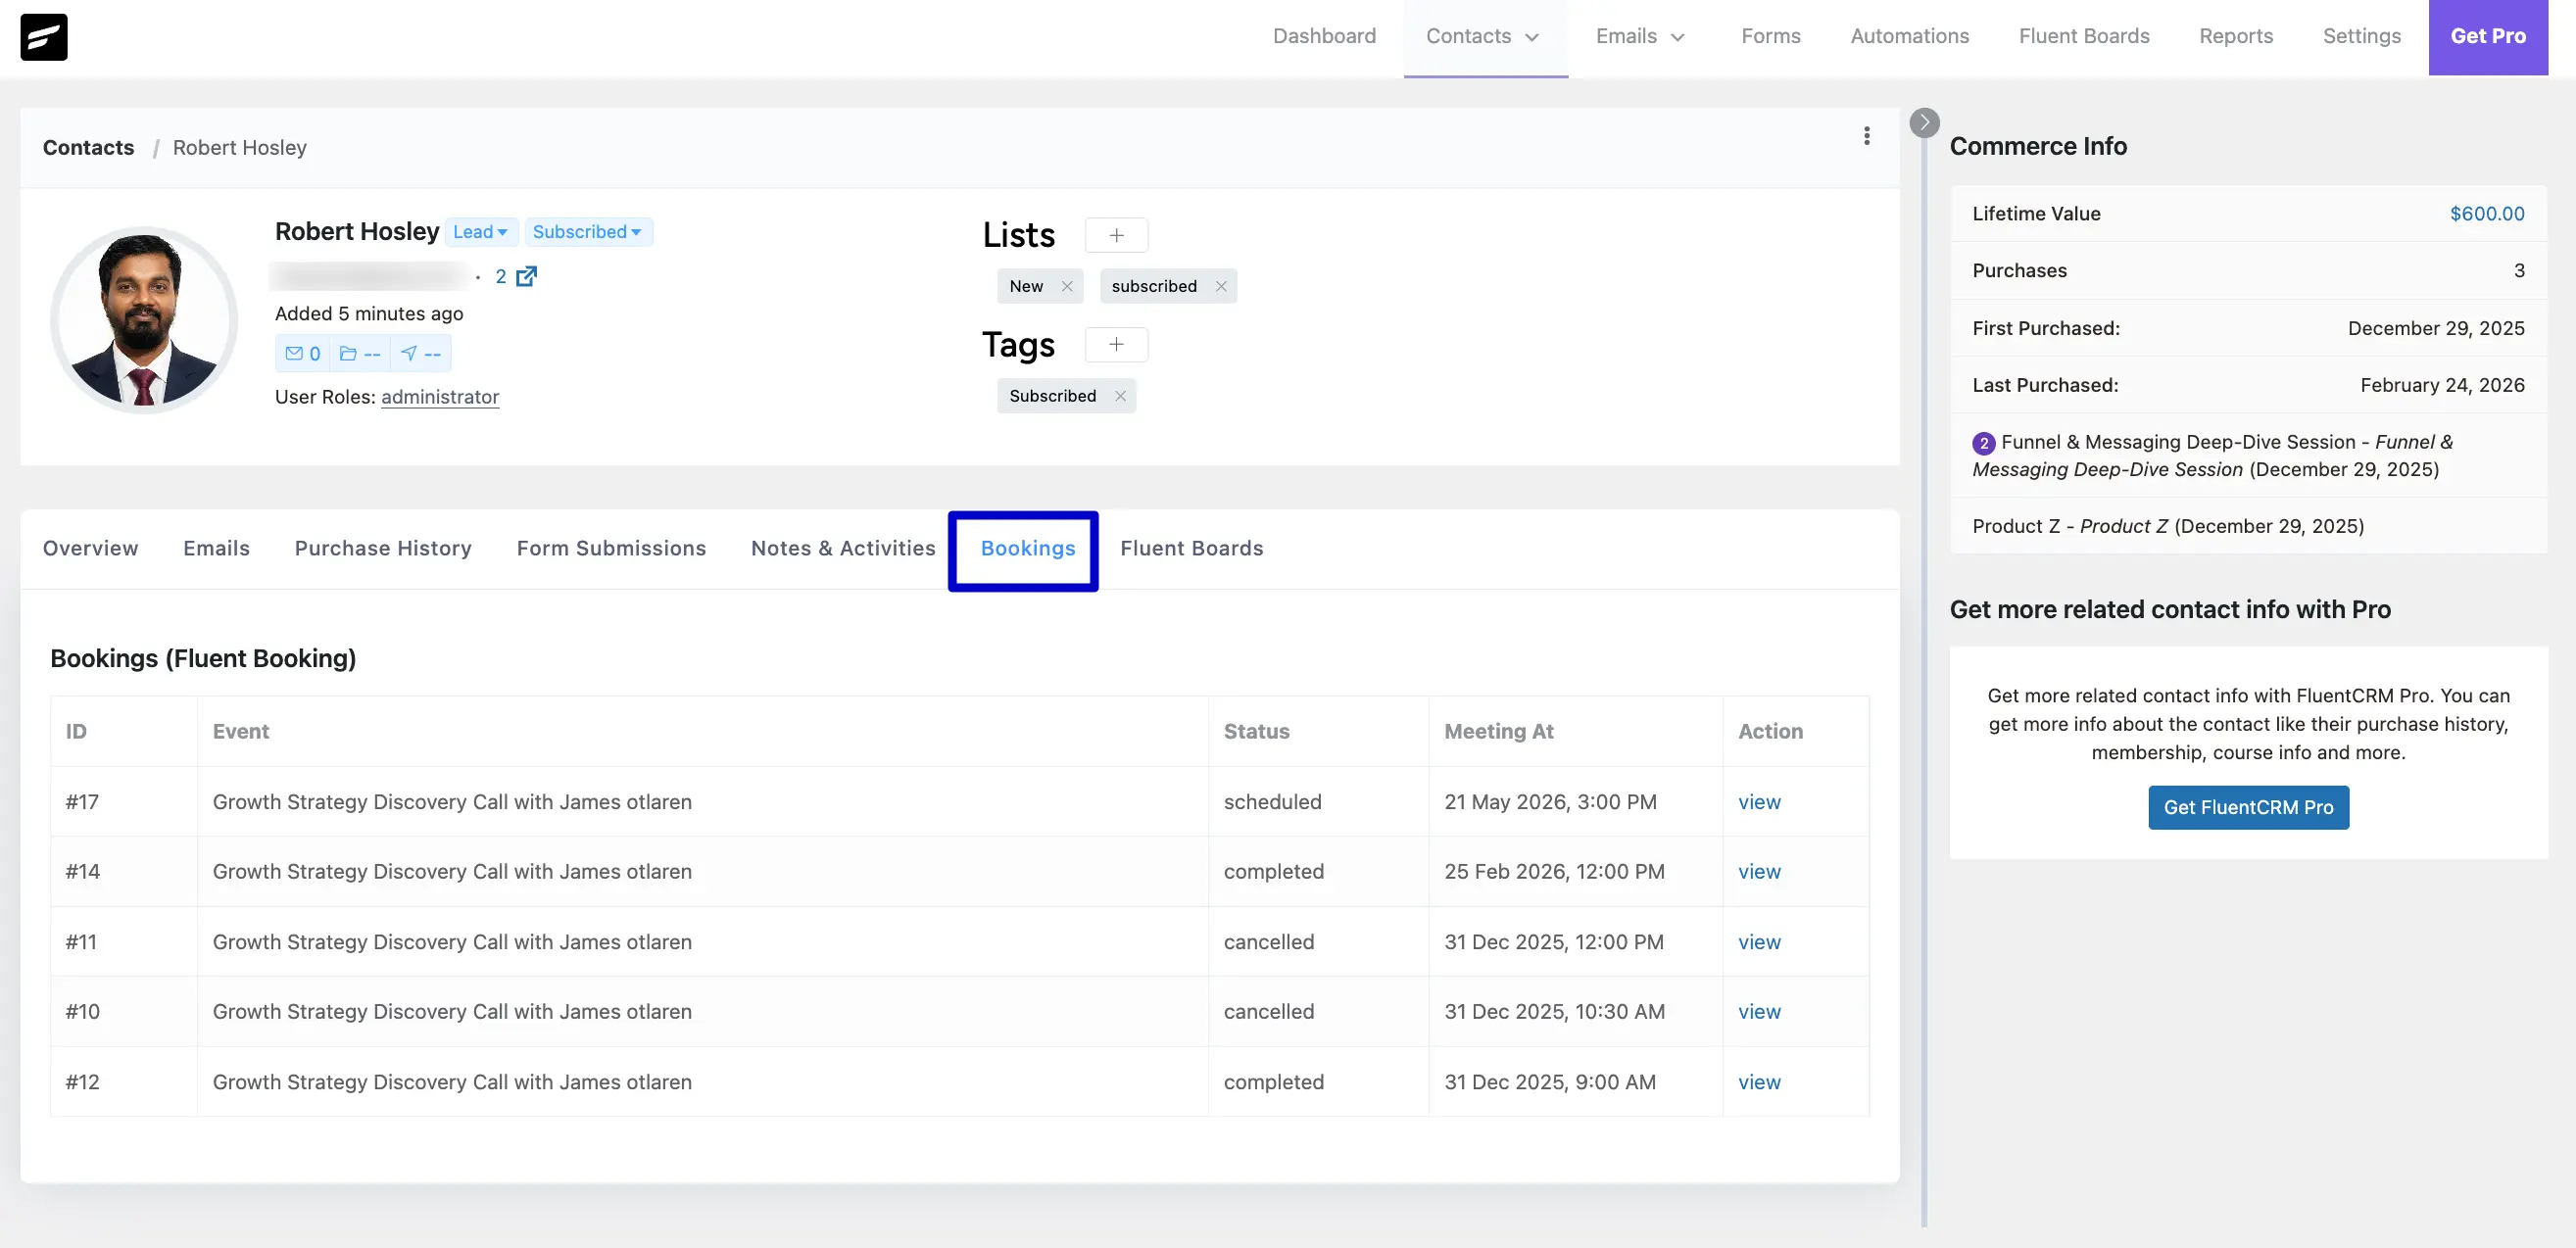
Viewing Synced Data
Once the integration is active:
You can view attendees’ FluentCRM data inside the Booking Details page.
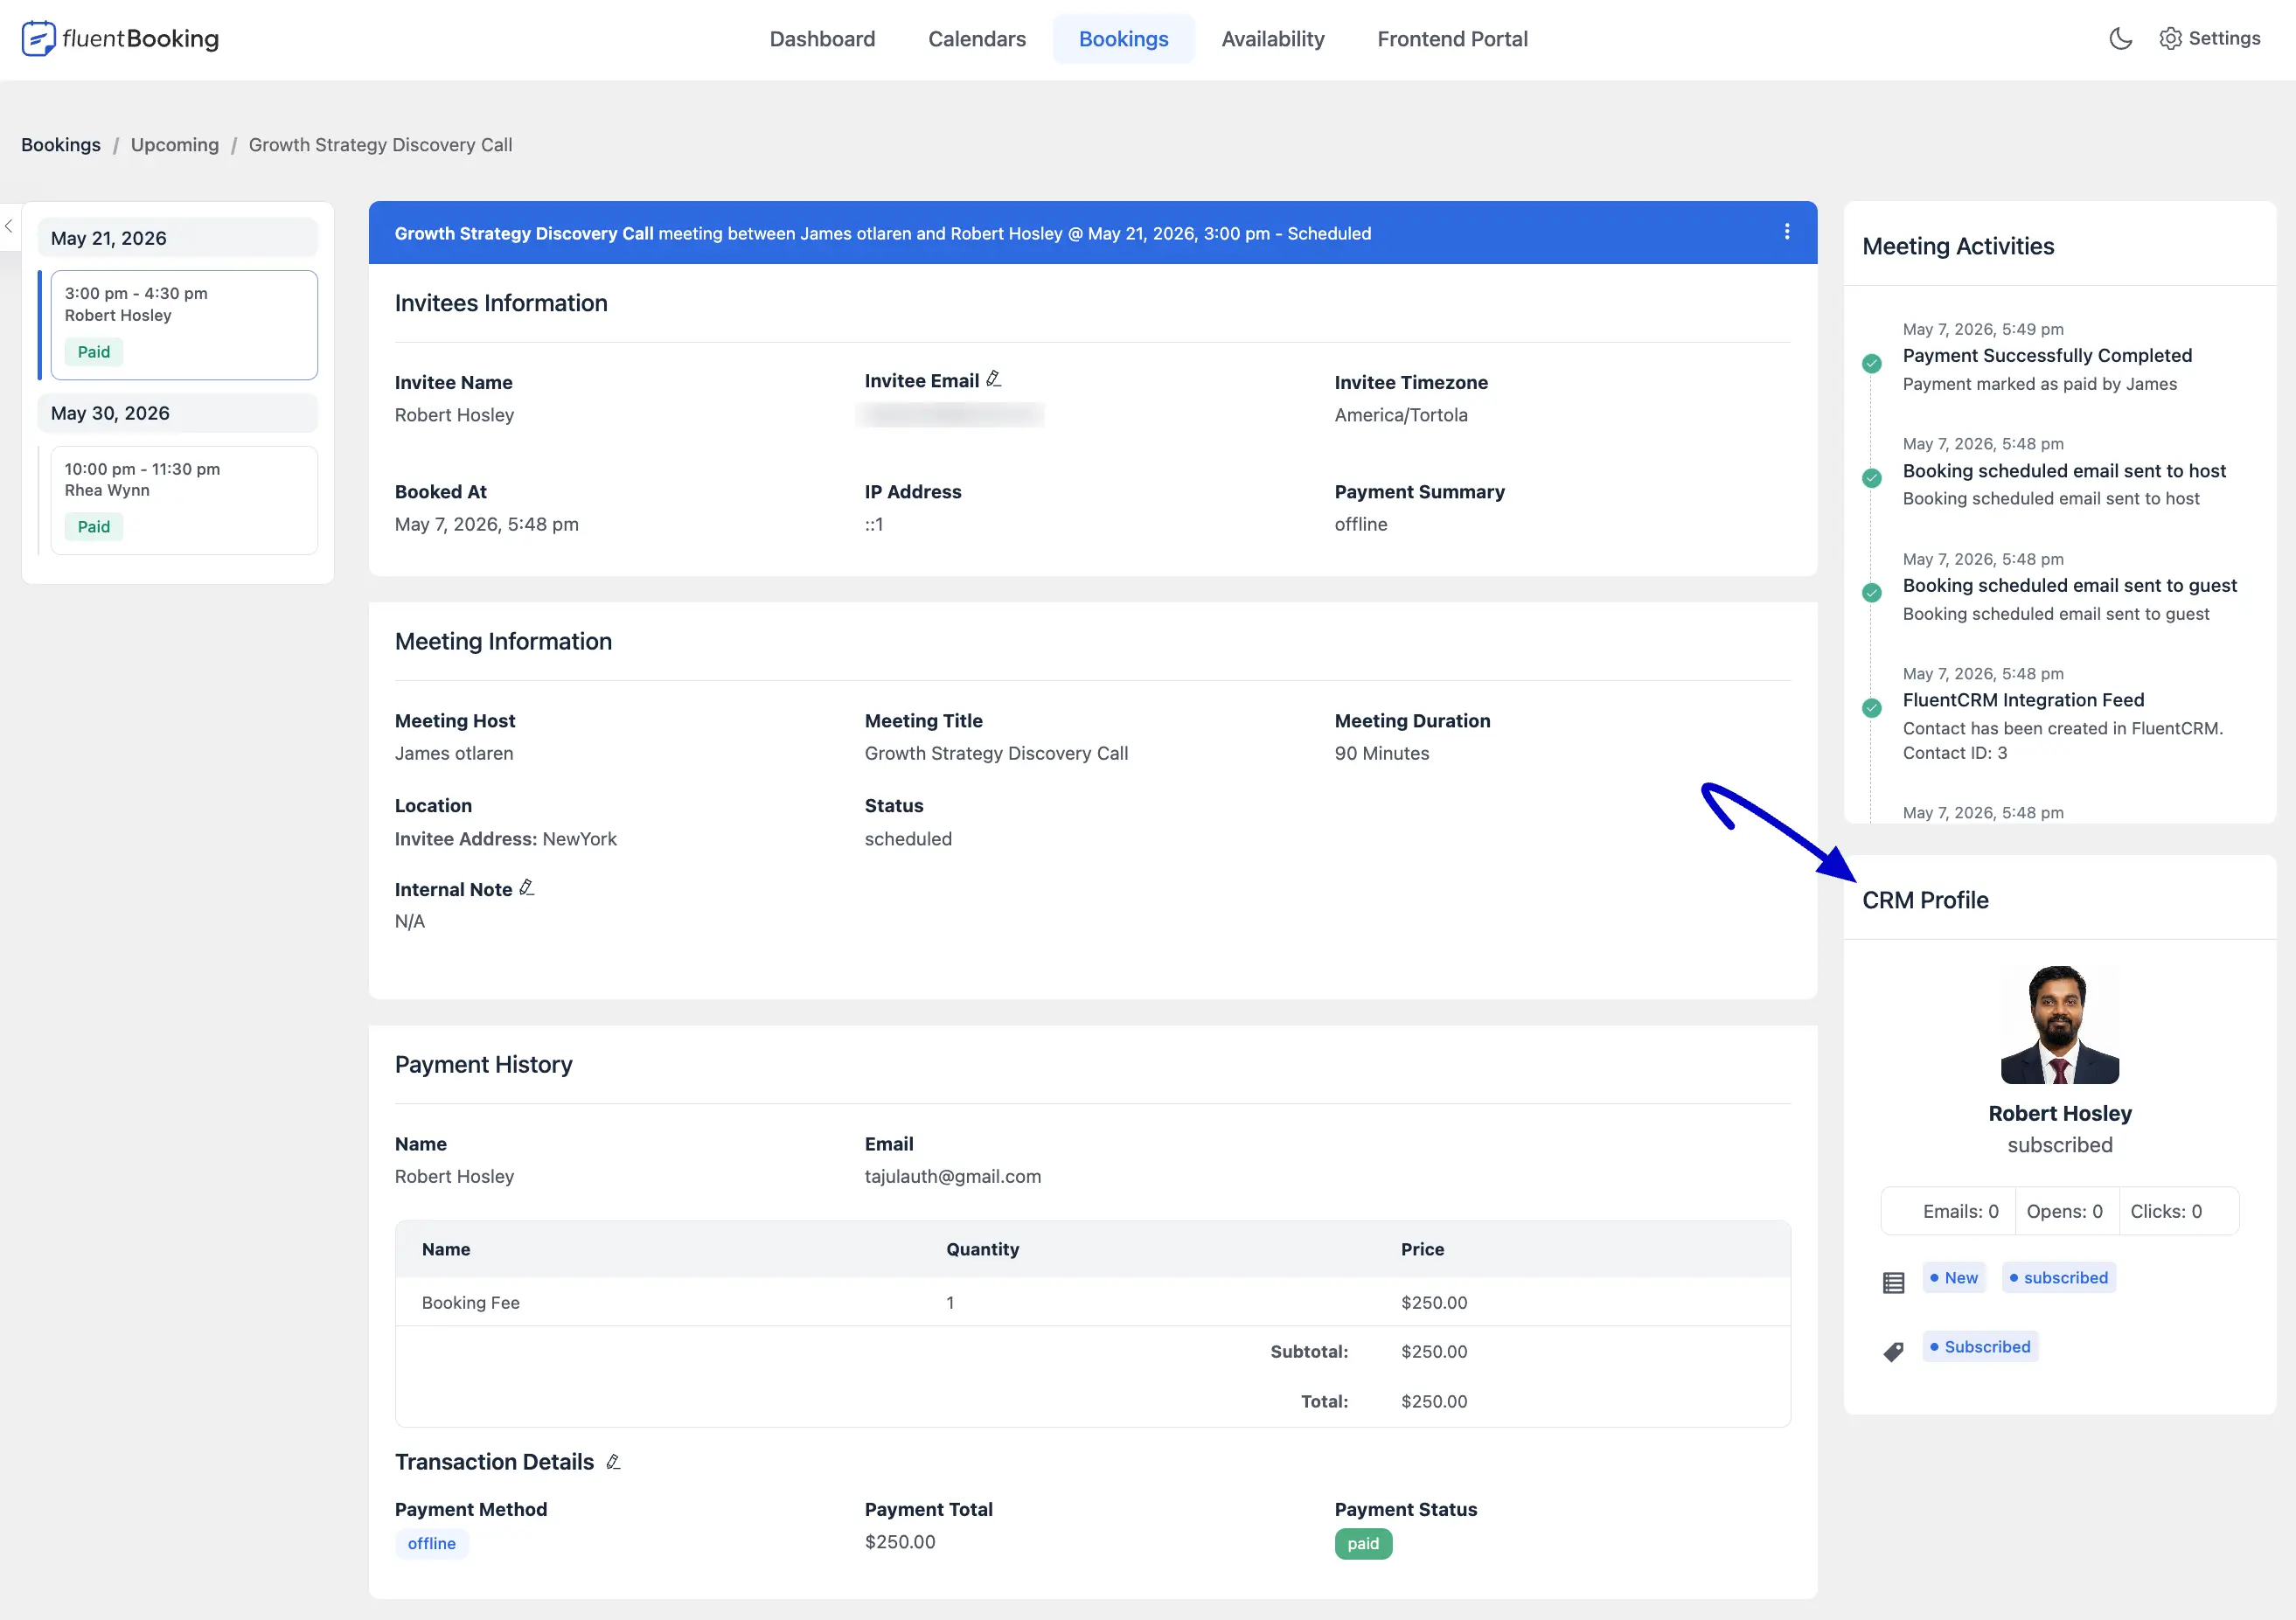
Booking information will also appear in the attendee’s FluentCRM Contact Profile.
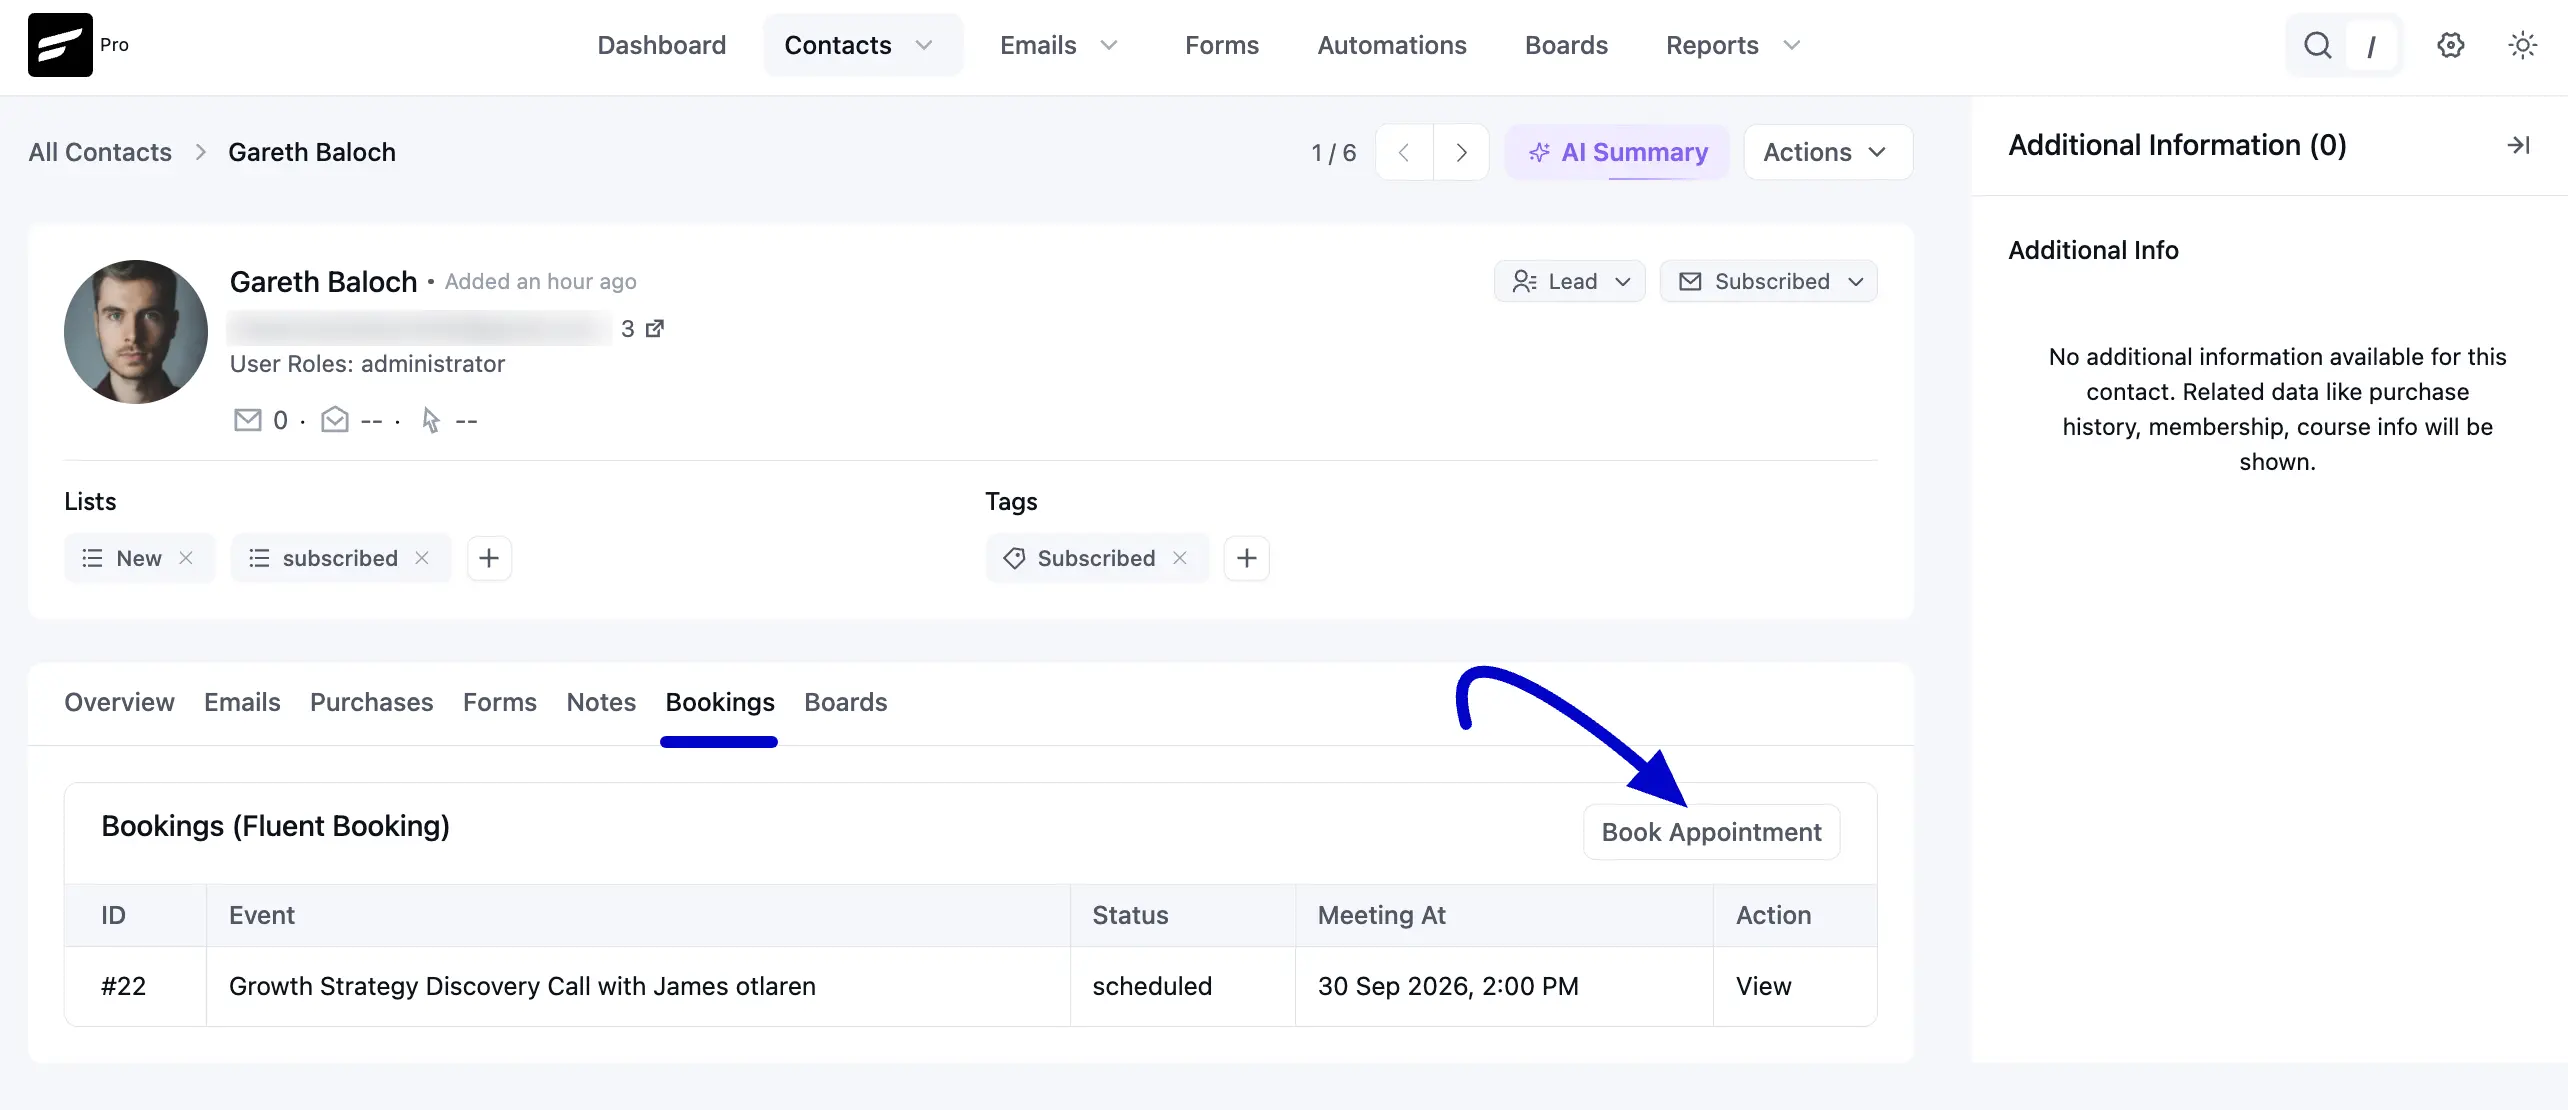
Book Appointment from a FluentCRM Contact
If FluentCRM is installed and active, you can start a booking directly from a contact’s profile — no need to copy details between tabs.
Open any contact in FluentCRM and scroll to the FluentBooking section on their profile. It lists the contact’s existing meetings and shows a Book Appointment button. Click it to open the admin booking form with that contact’s name and email already filled in. From there, select the event, date, and time as usual.