Appearance
Nextcloud Calendar Integration With FluentBooking
FluentBooking connects easily with Nextcloud Calendar, allowing you to sync your booking events without extra effort. Once integrated, your scheduled meetings will automatically appear in your Nextcloud Calendar, helping you manage availability and avoid conflicts.
Follow the steps below to set up the integration and start syncing your booking events with Nextcloud Calendar.
The Nextcloud Calendar integration is only available in FluentBooking Pro. You will need the FluentBooking Pro plugin to access this feature.
Important
Before connecting Nextcloud Calendar, make sure you have created at least one host in FluentBooking. You will also need your Nextcloud server URL and an app password from your Nextcloud account.
Enabling Nextcloud Calendar
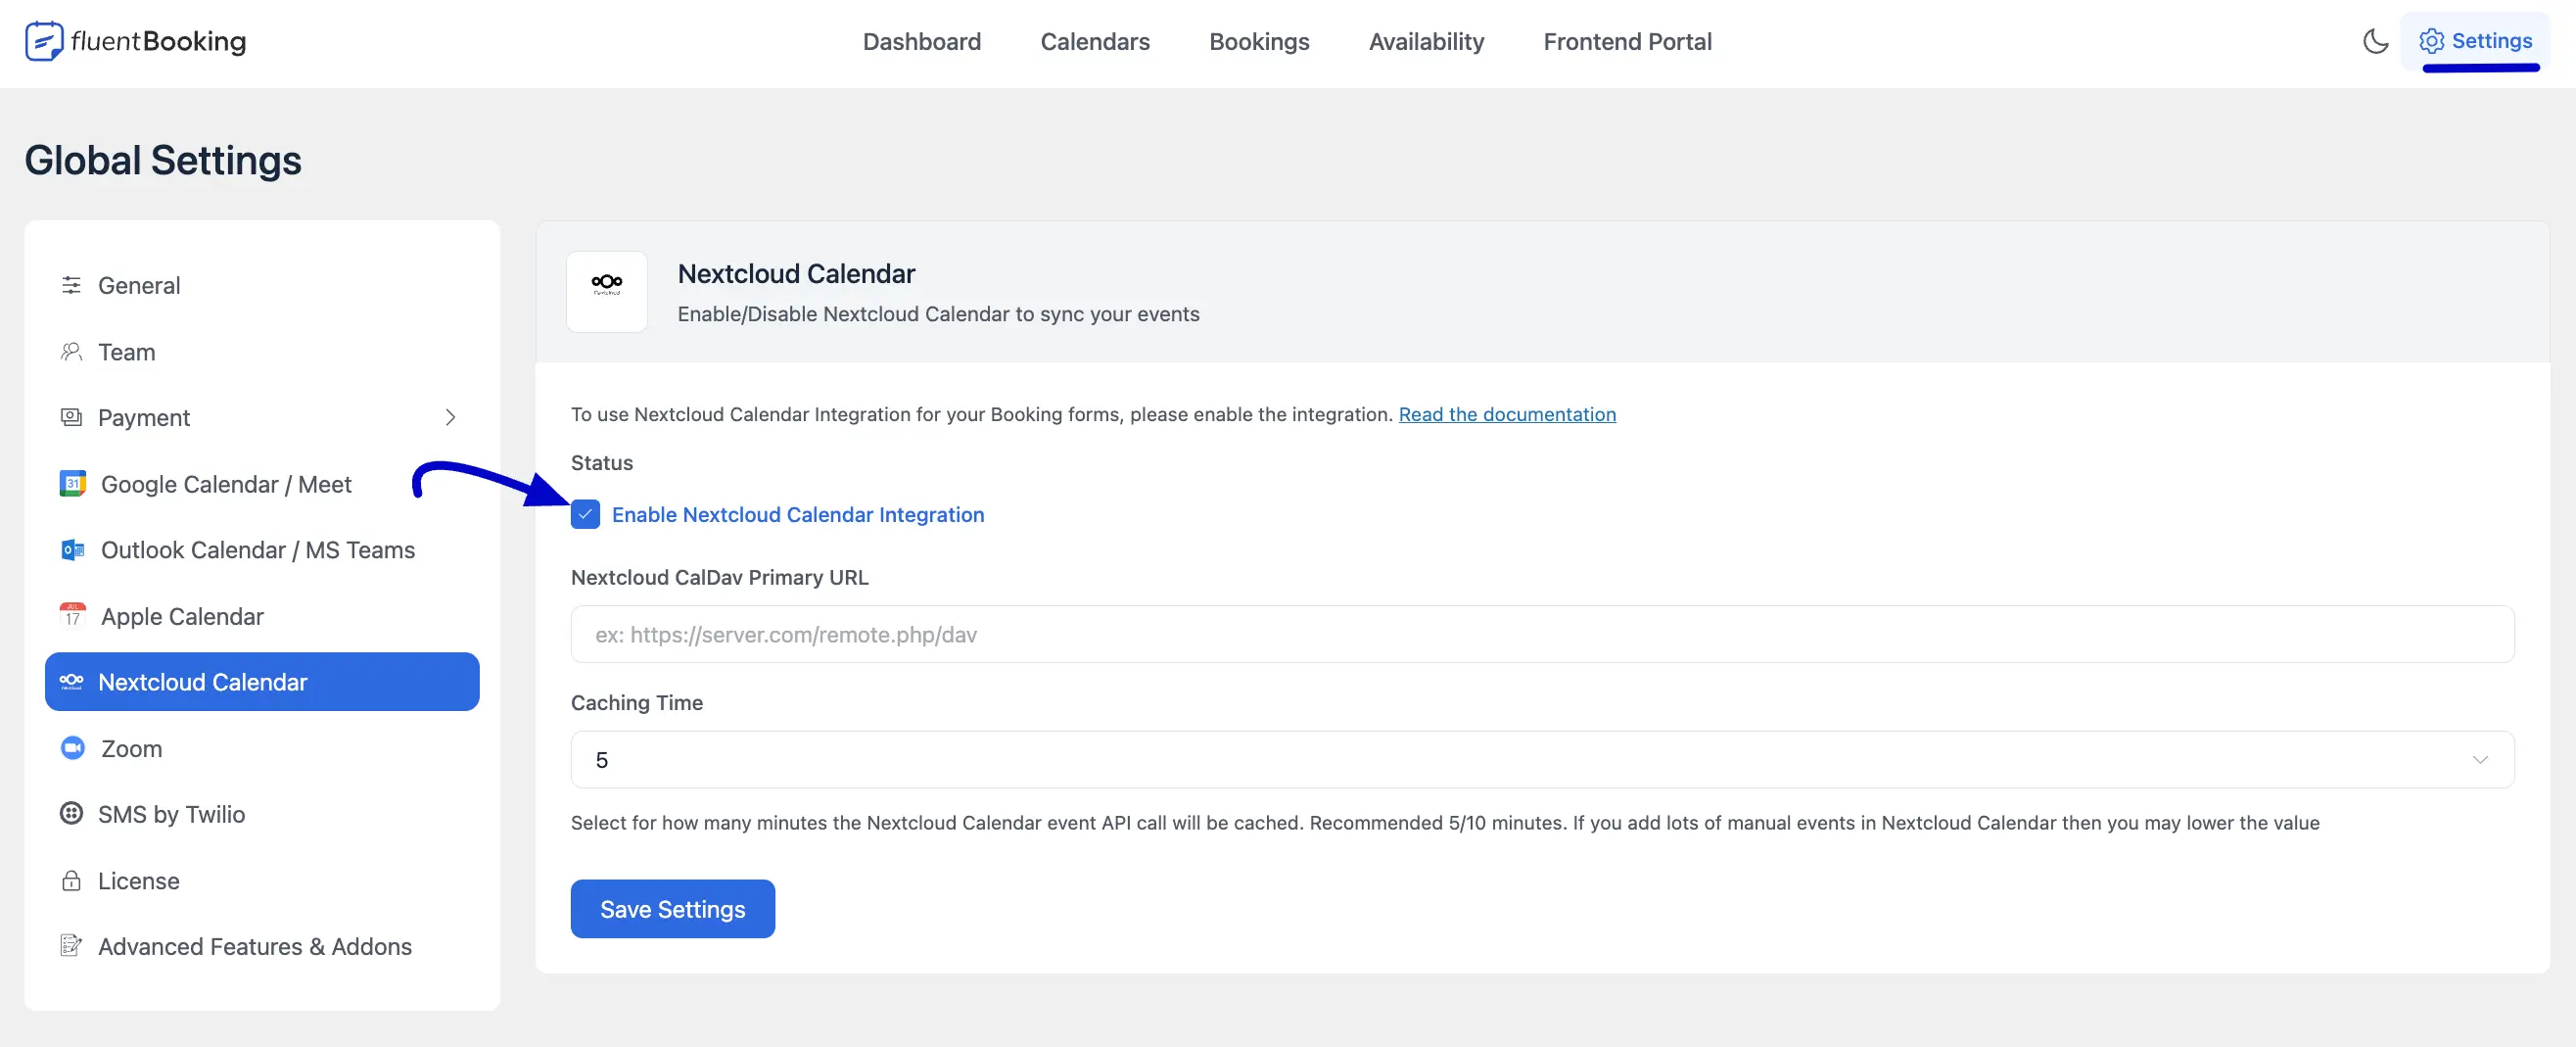
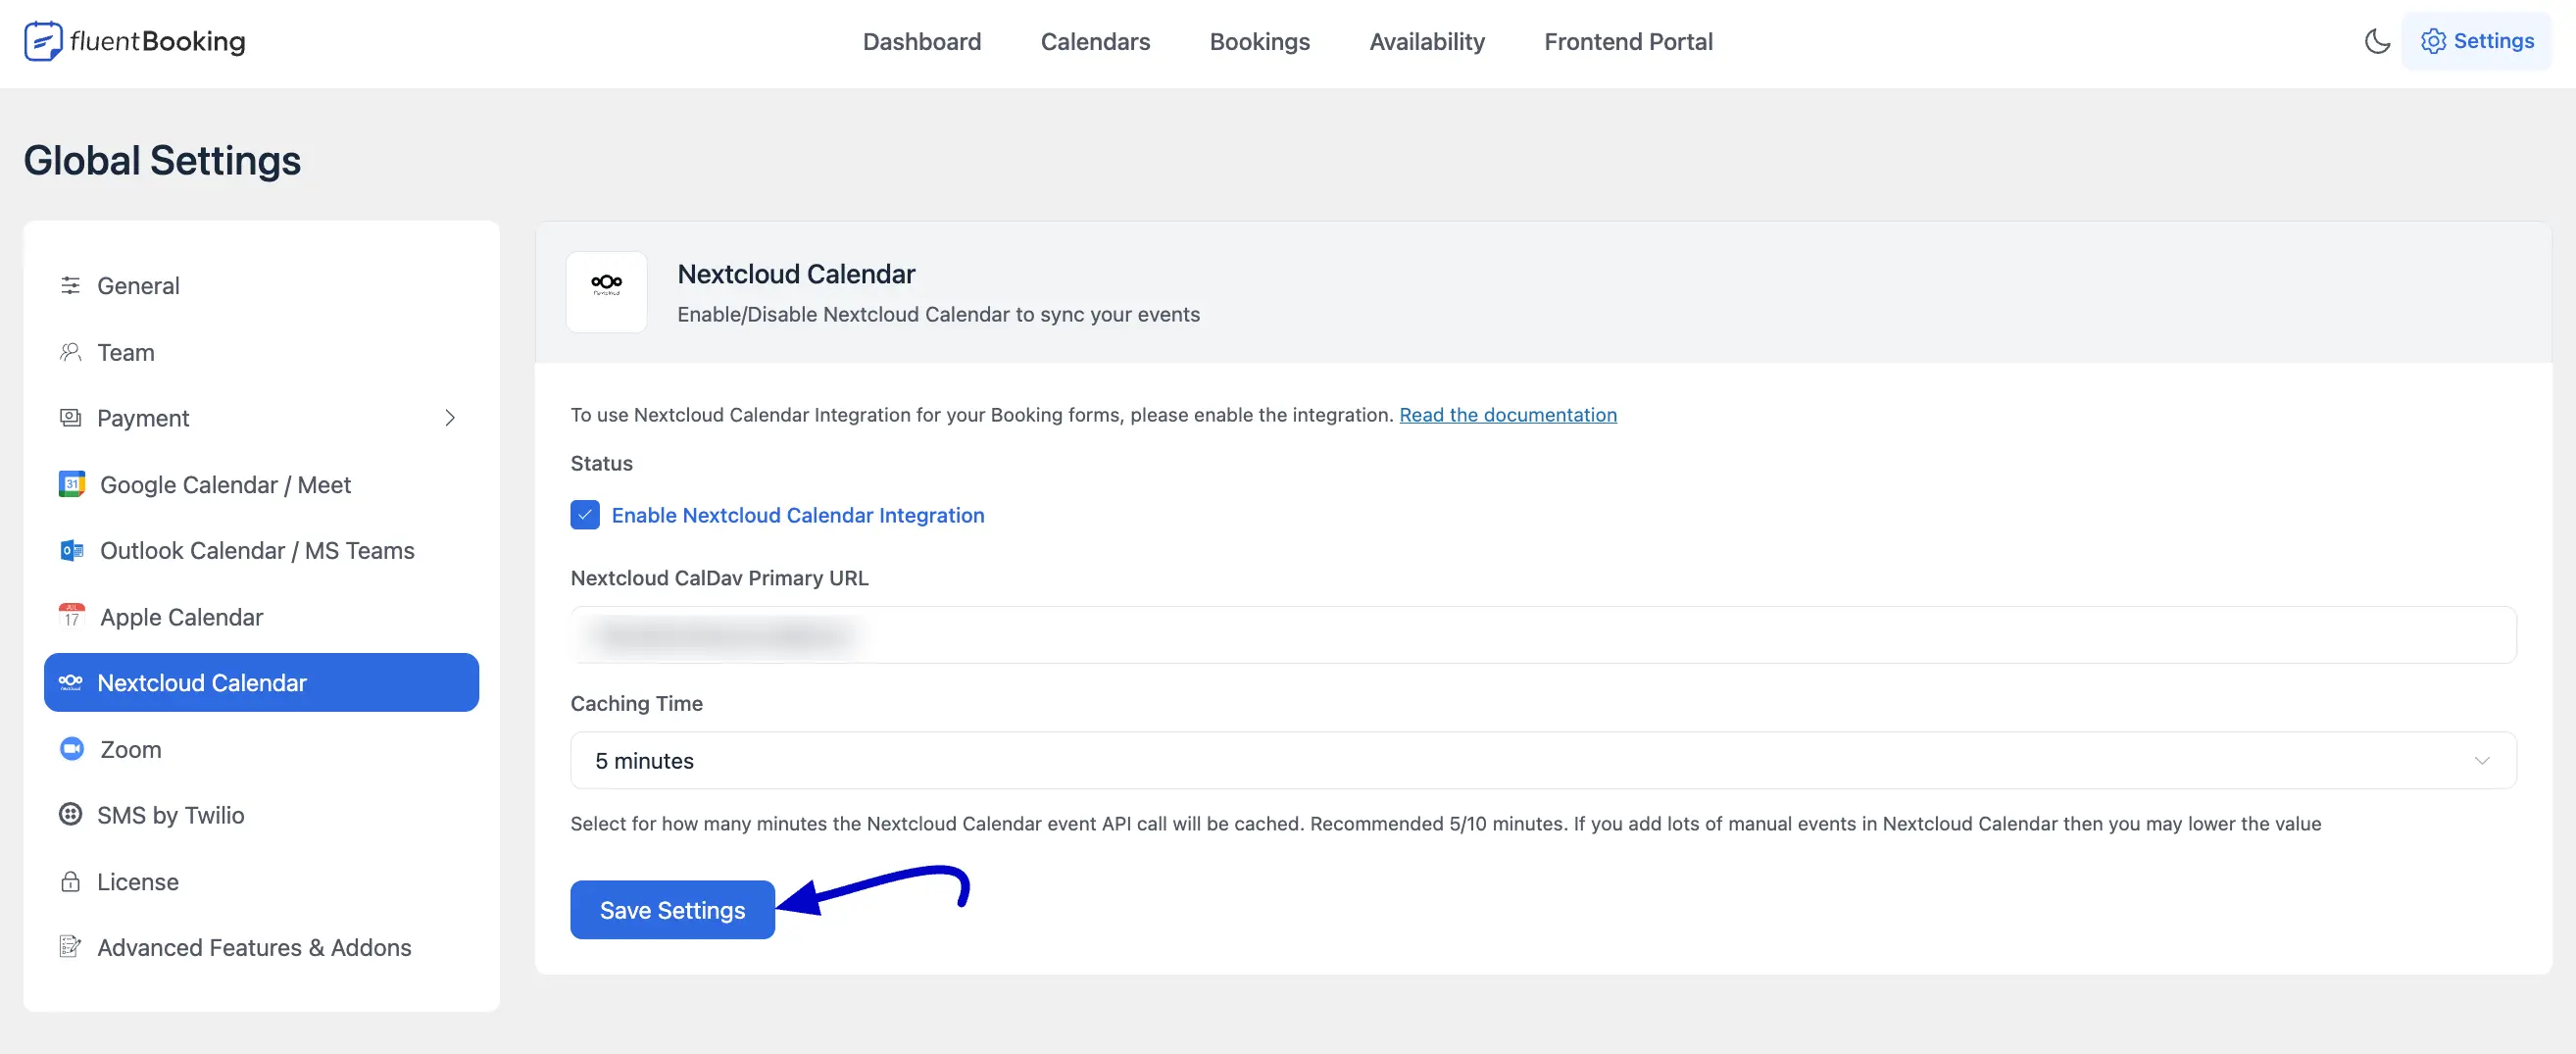
To enable Nextcloud Calendar go to your FluentBooking Settings and here you will find your Nextcloud Calendar settings in the left sidebar. Now click on the Checkbox to enable the Nextcloud Calendar. Also, you have to give here the Nextcloud CalDav Primary URL and set the caching time from the dropdown option.
Nextcloud CalDav Primary URL
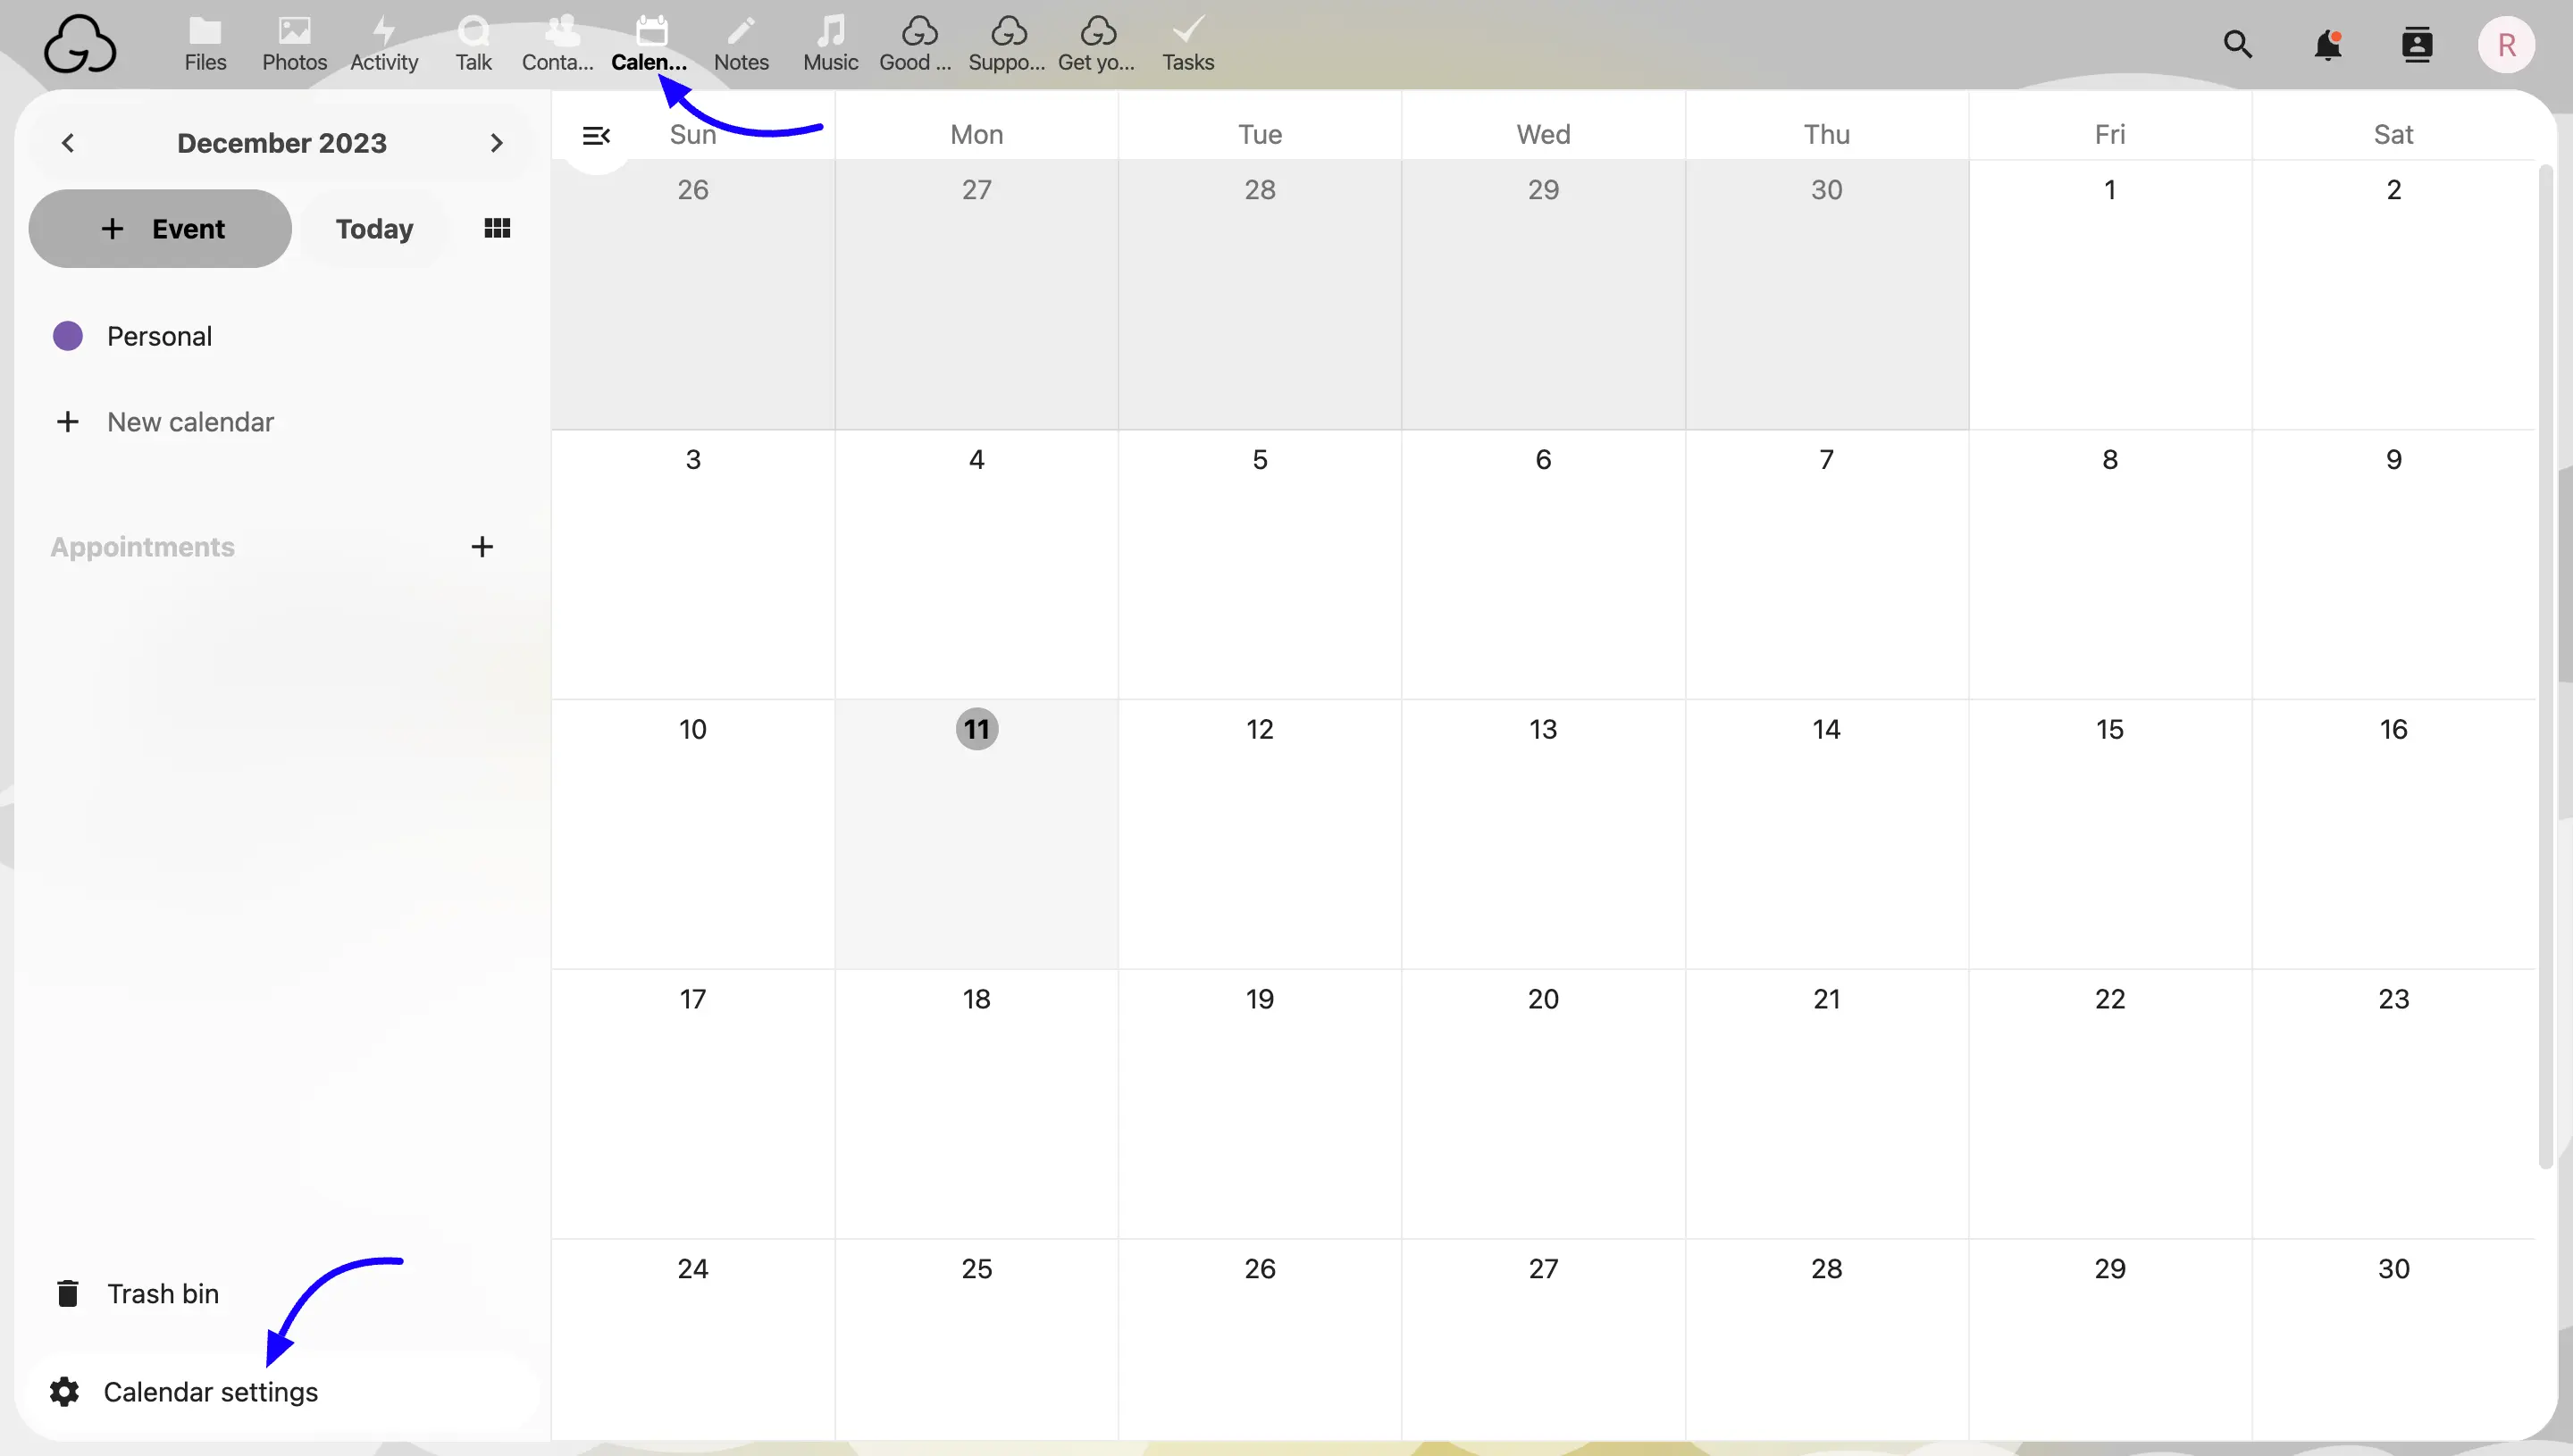
Login to your Nextcloud Developer Account to get the Primary CalDav URL. Now select Calendar from your Nextcloud account and click on the Calendar Settings.
Now Scroll down to get the CalDav Primary URL and copy the URL from here.
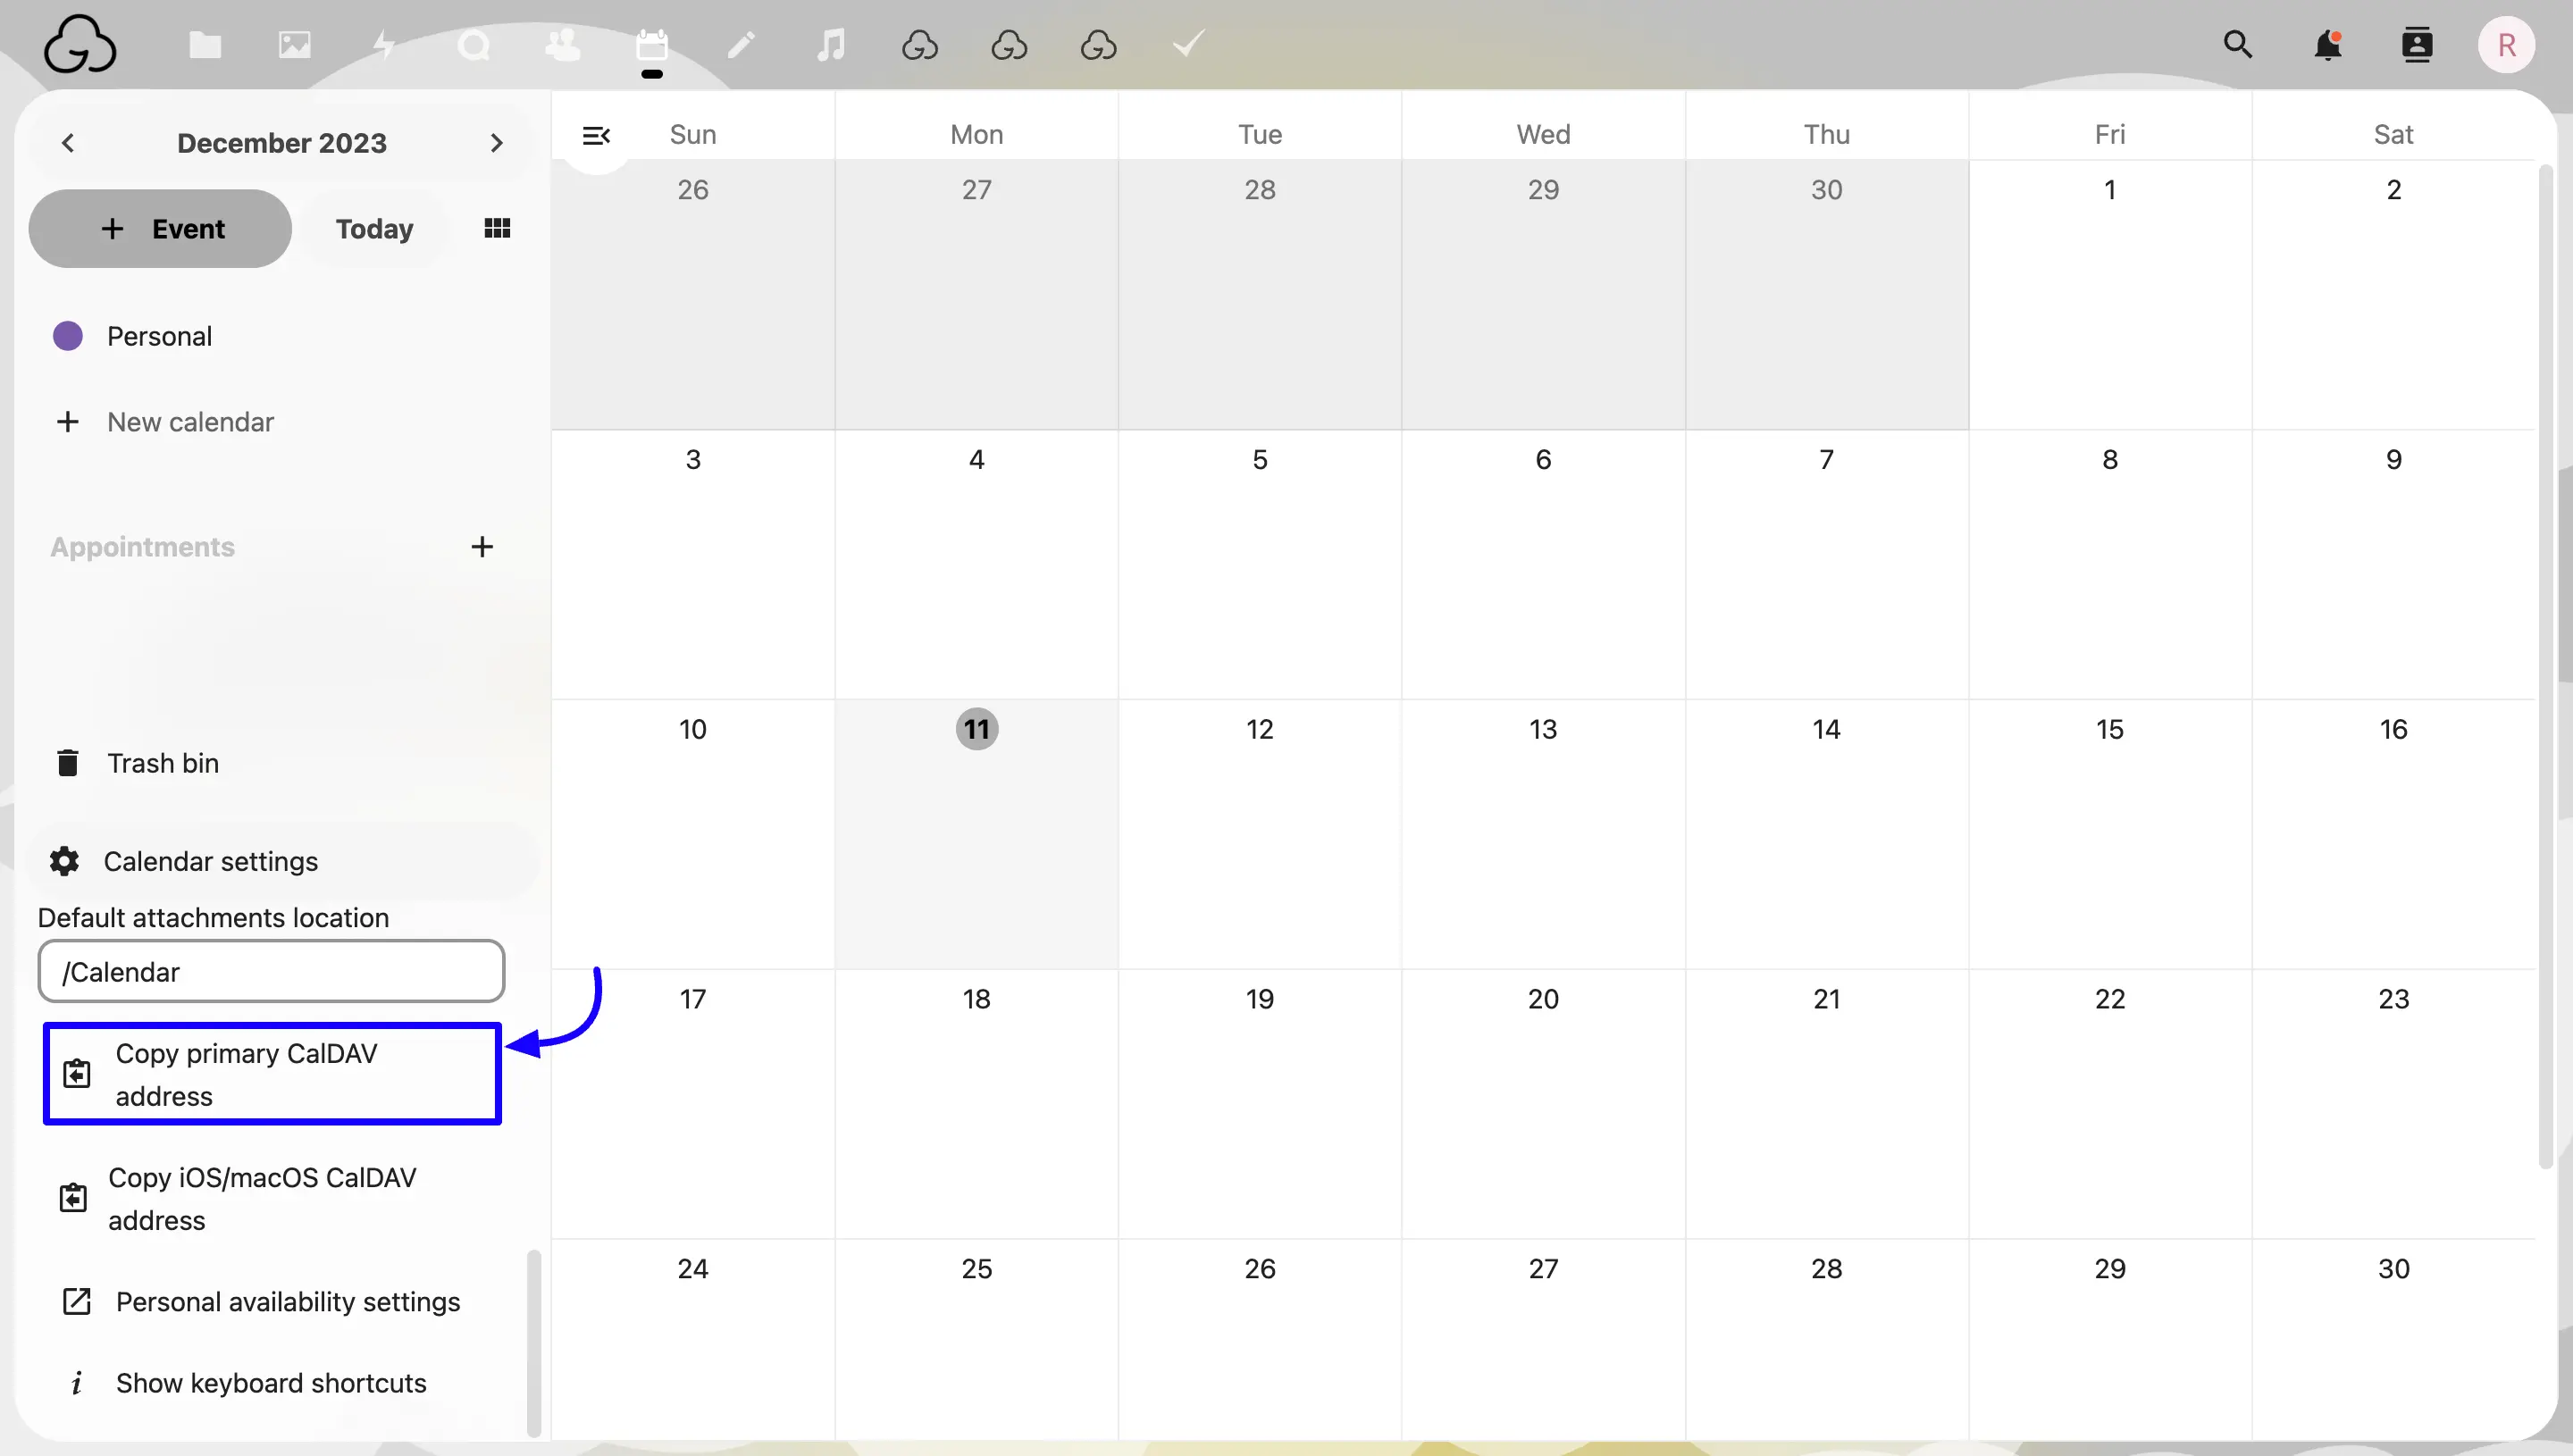
Paste the URL on your FluentBooking Nextcloud Calendar Settings then click on the Save Settings button like the below screenshot.
Nextcloud Calendar for Host
After enabling your Nextcloud Calendar, you need to add your Nextcloud Calendar to your Host profile.
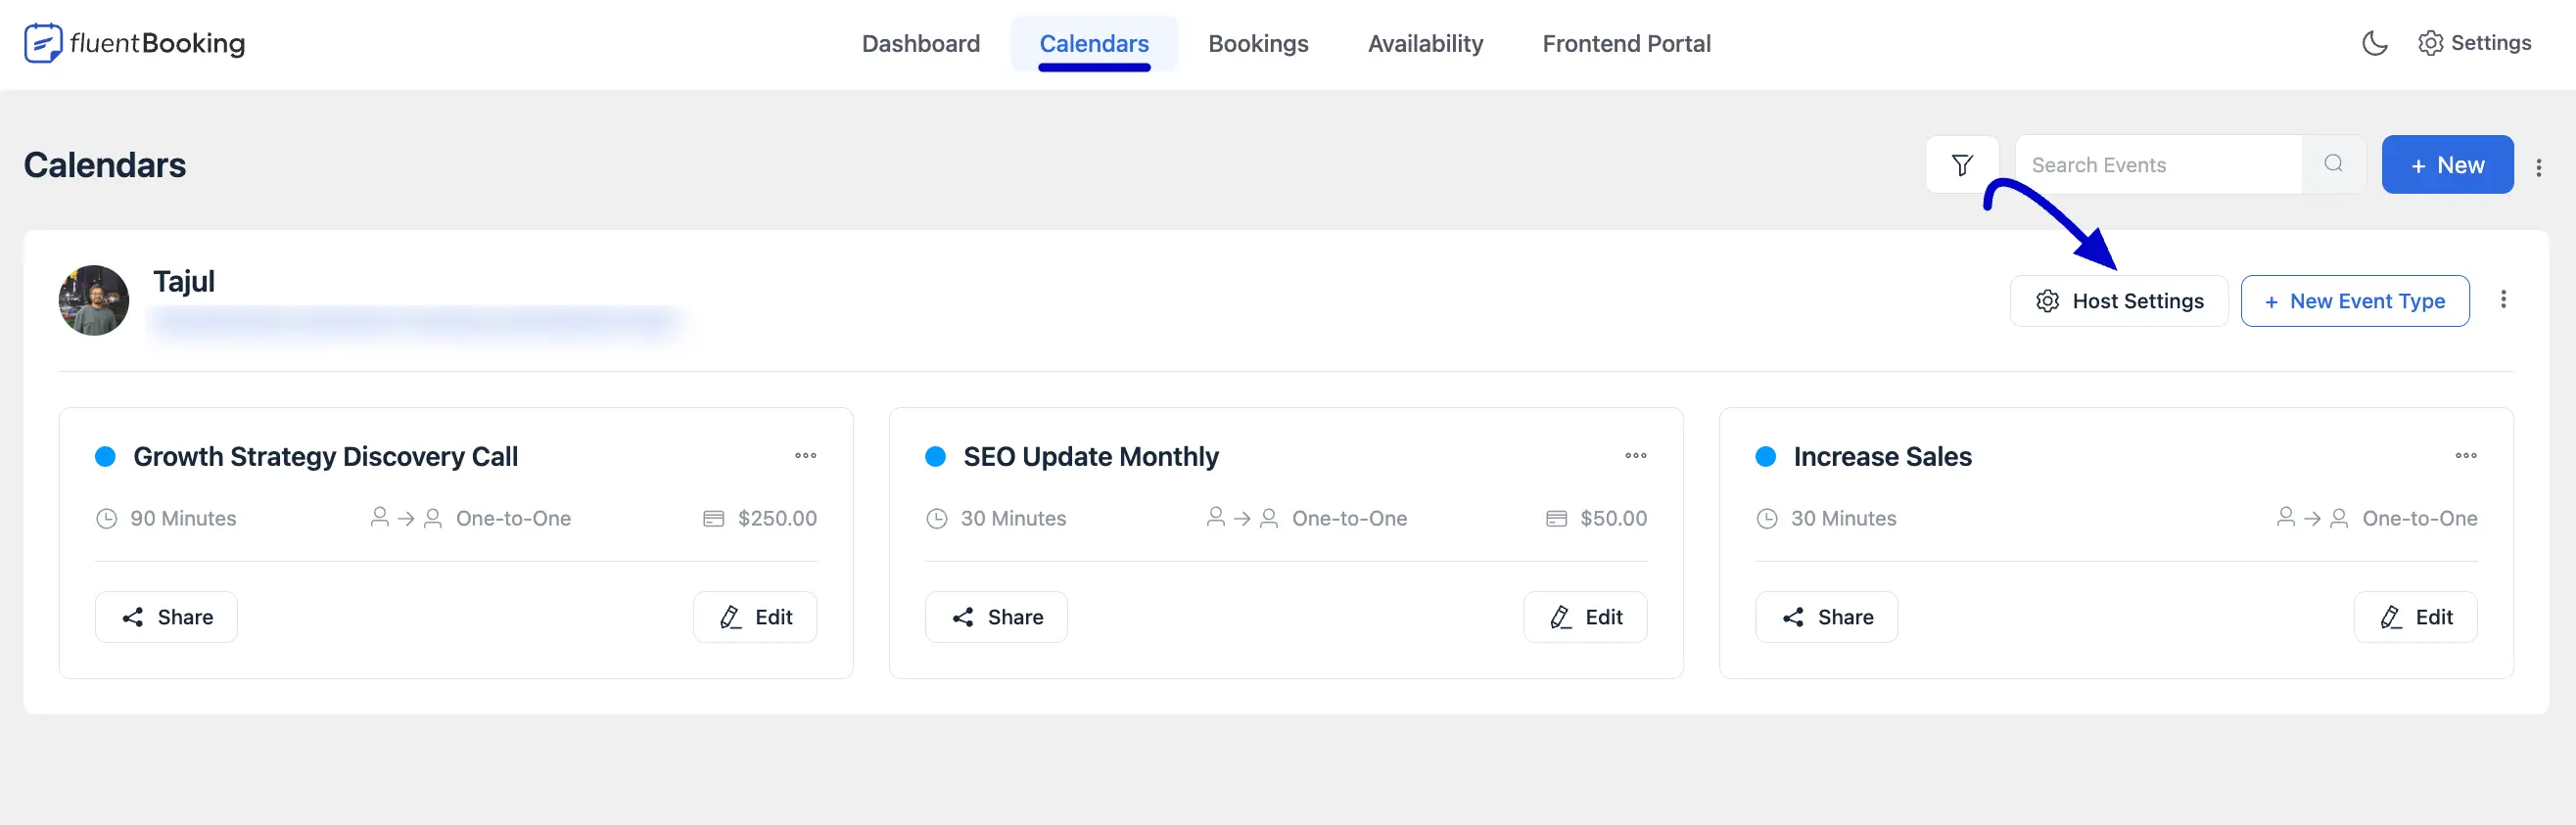
Go to your Host settings of the host for whom you want to add the Nextcloud Calendar.
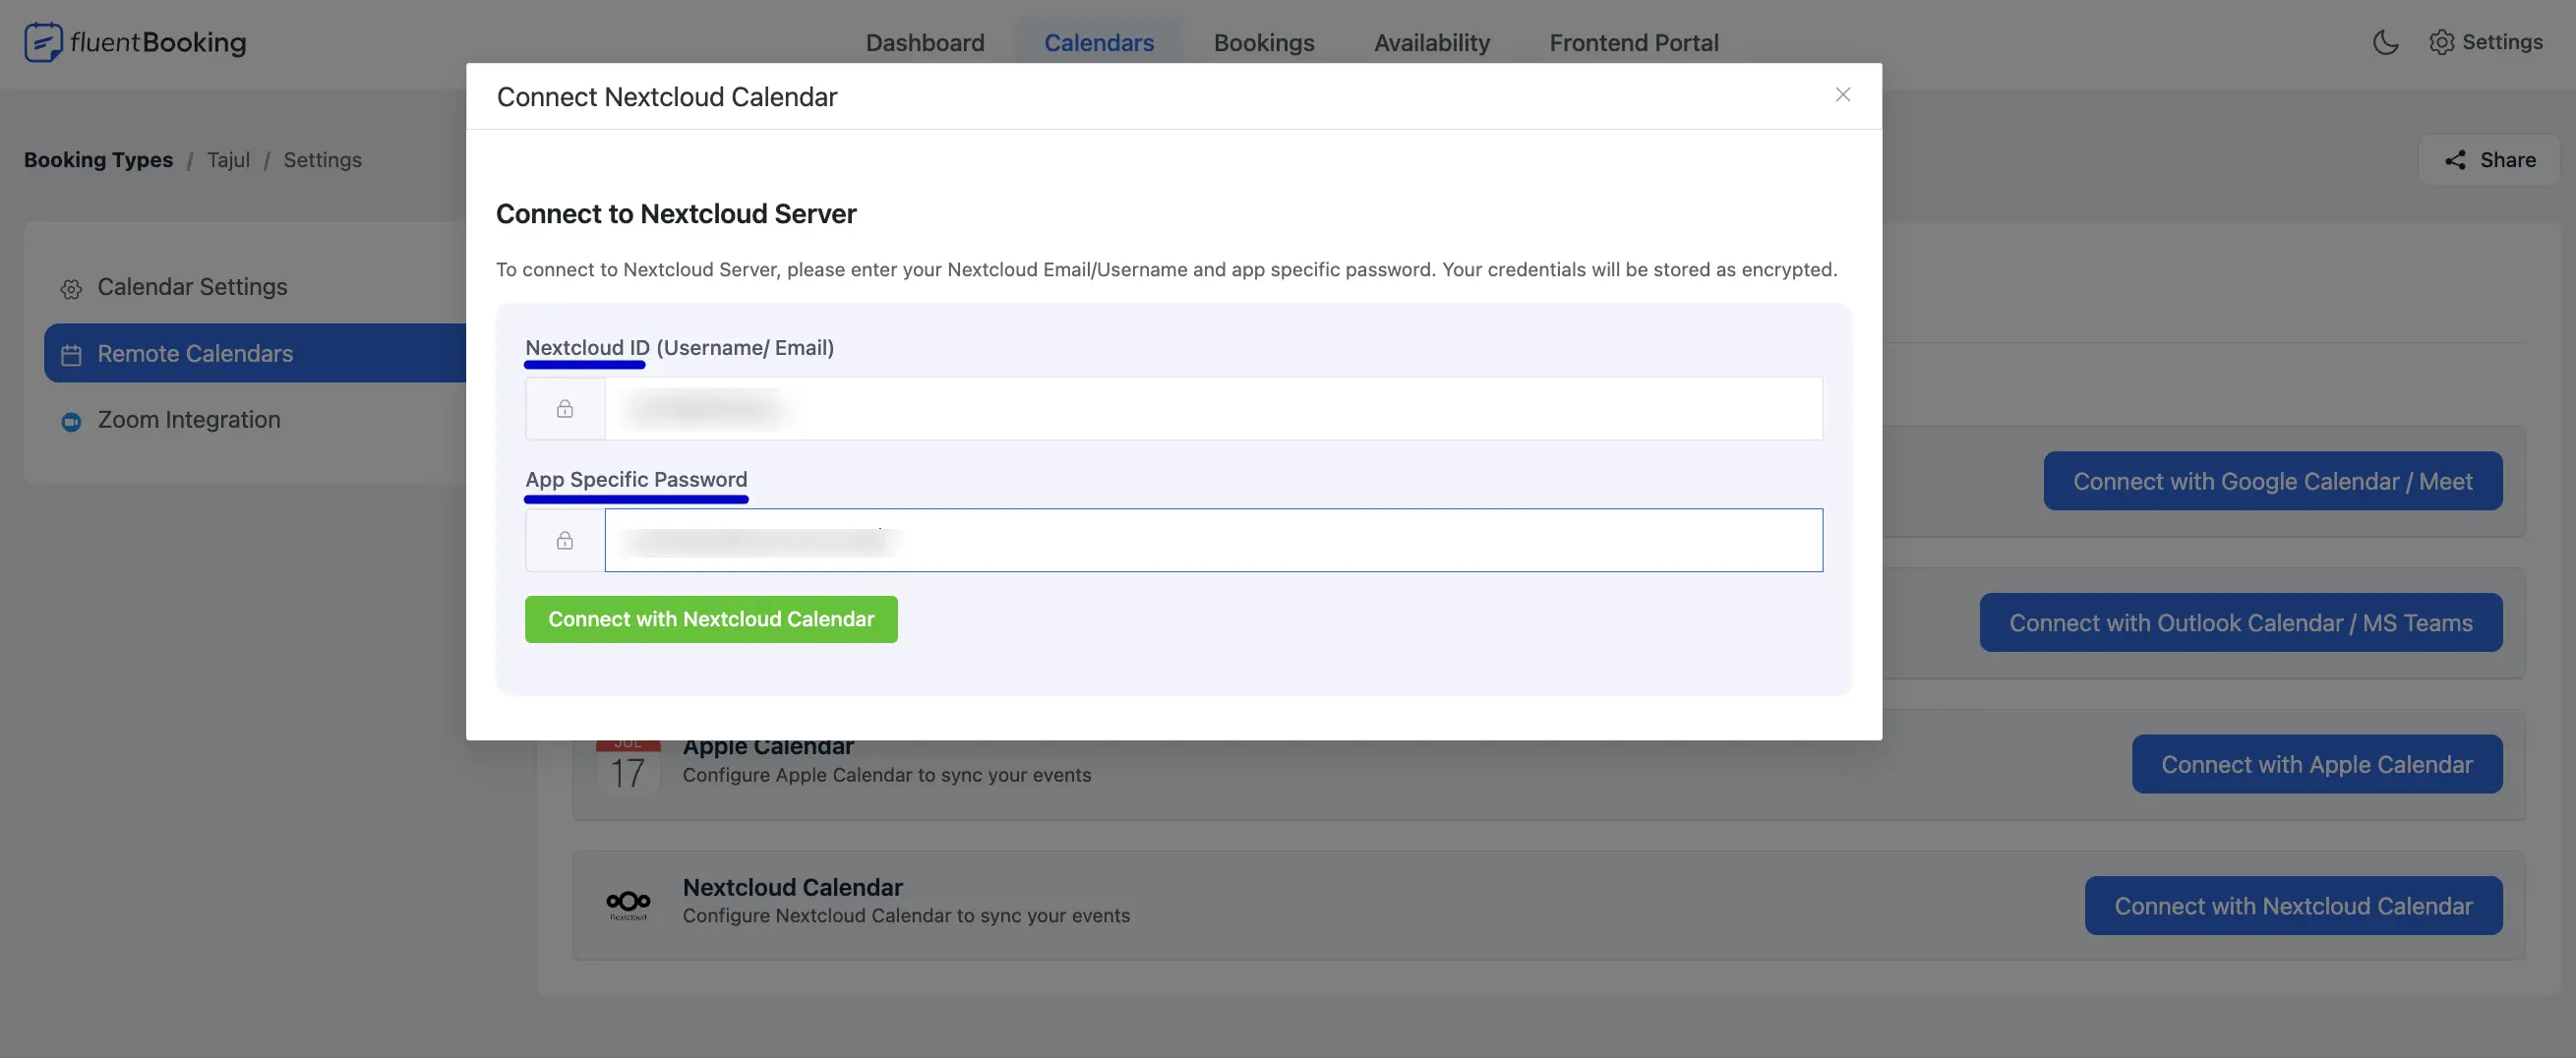
Now select the Remote Calendar from the left sidebar and select the Connect with Nextcloud Calendar button.
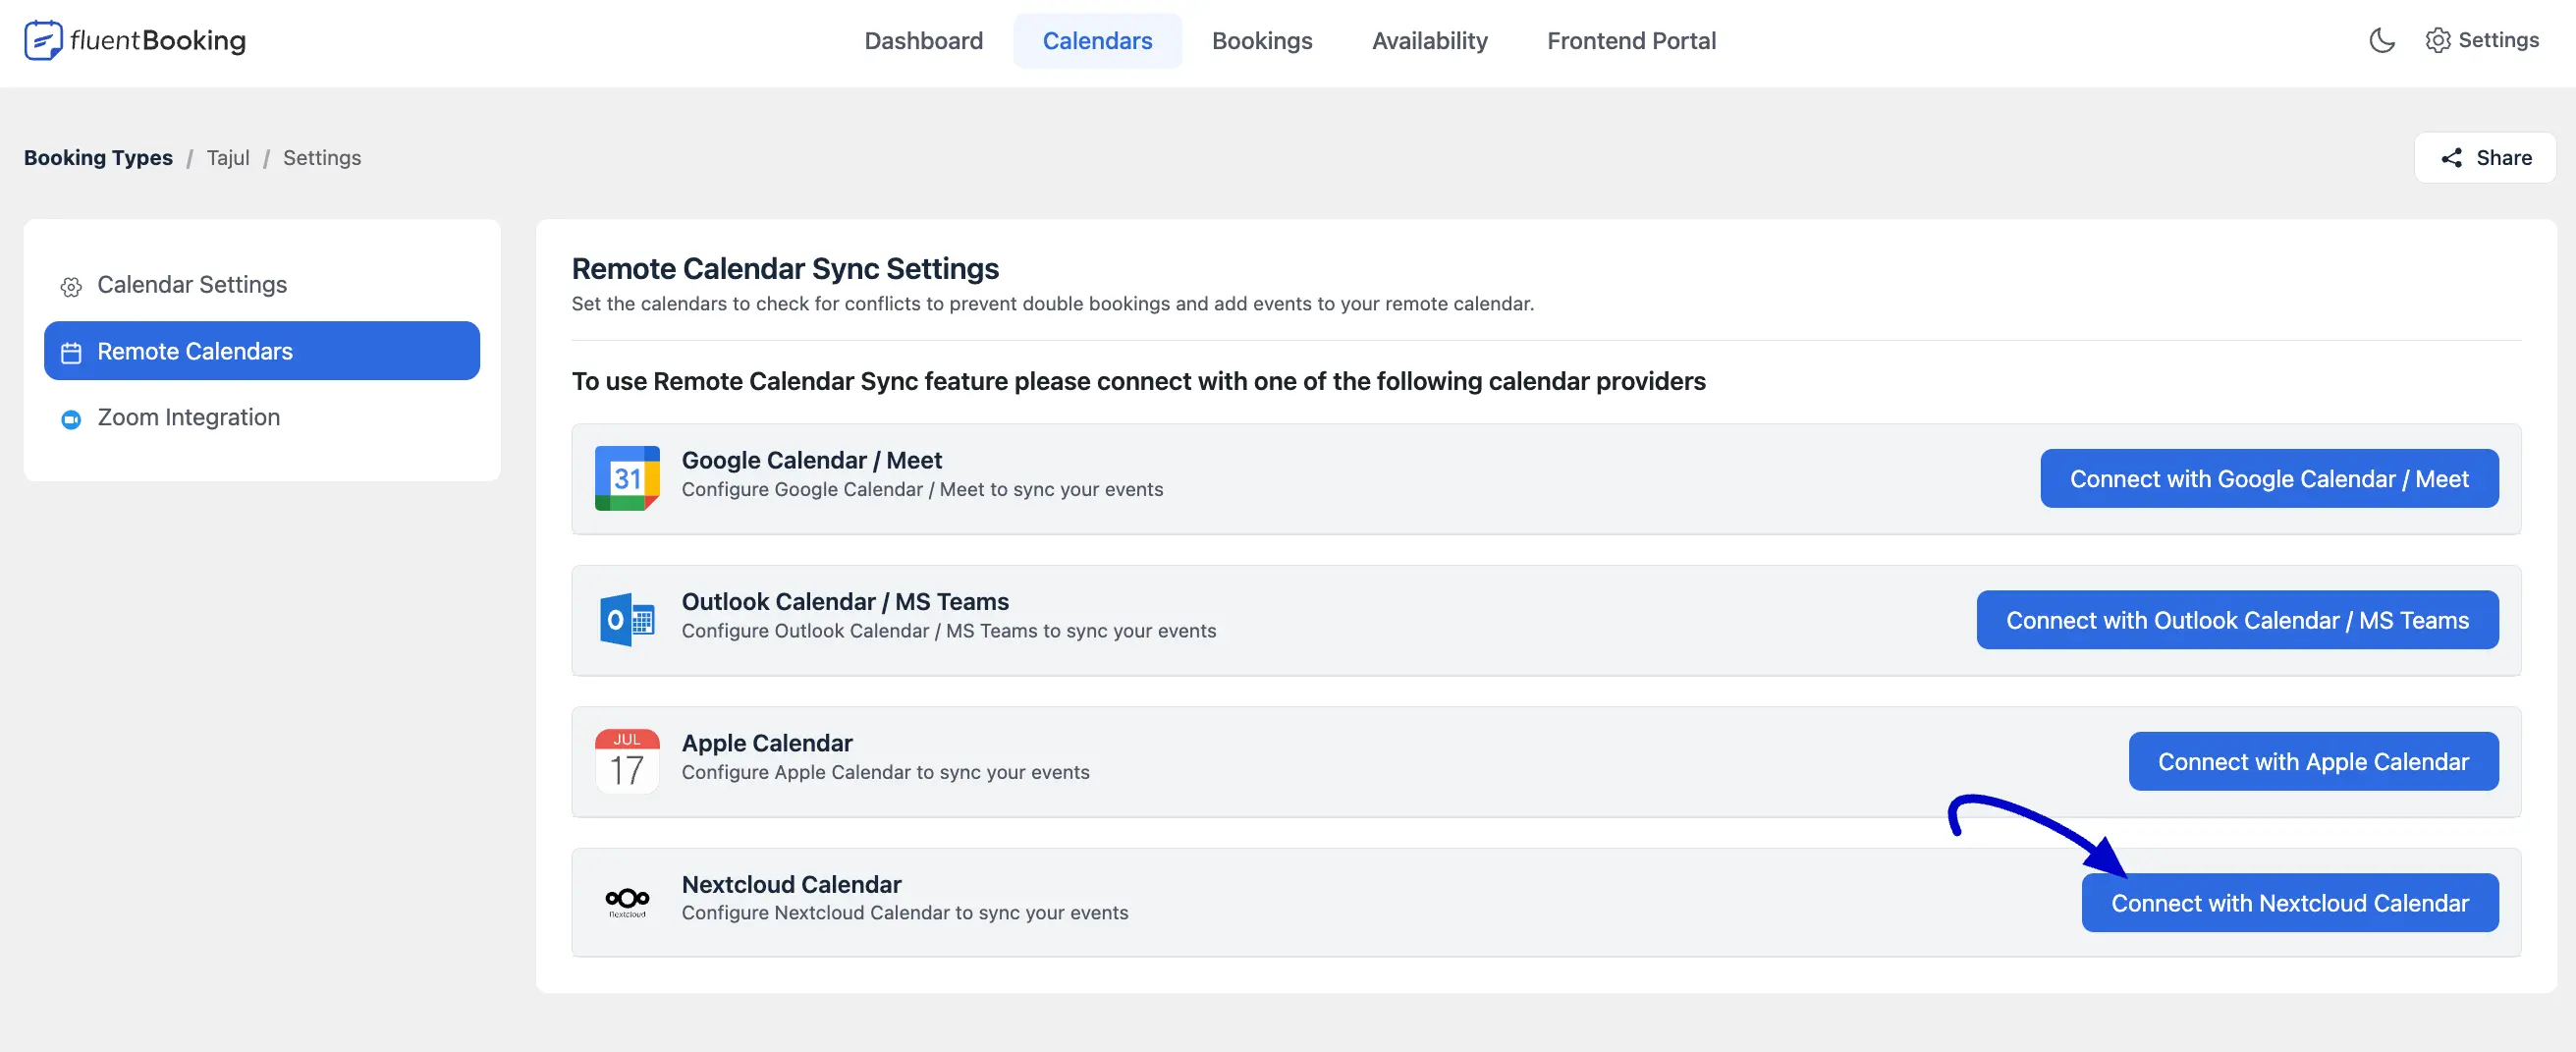
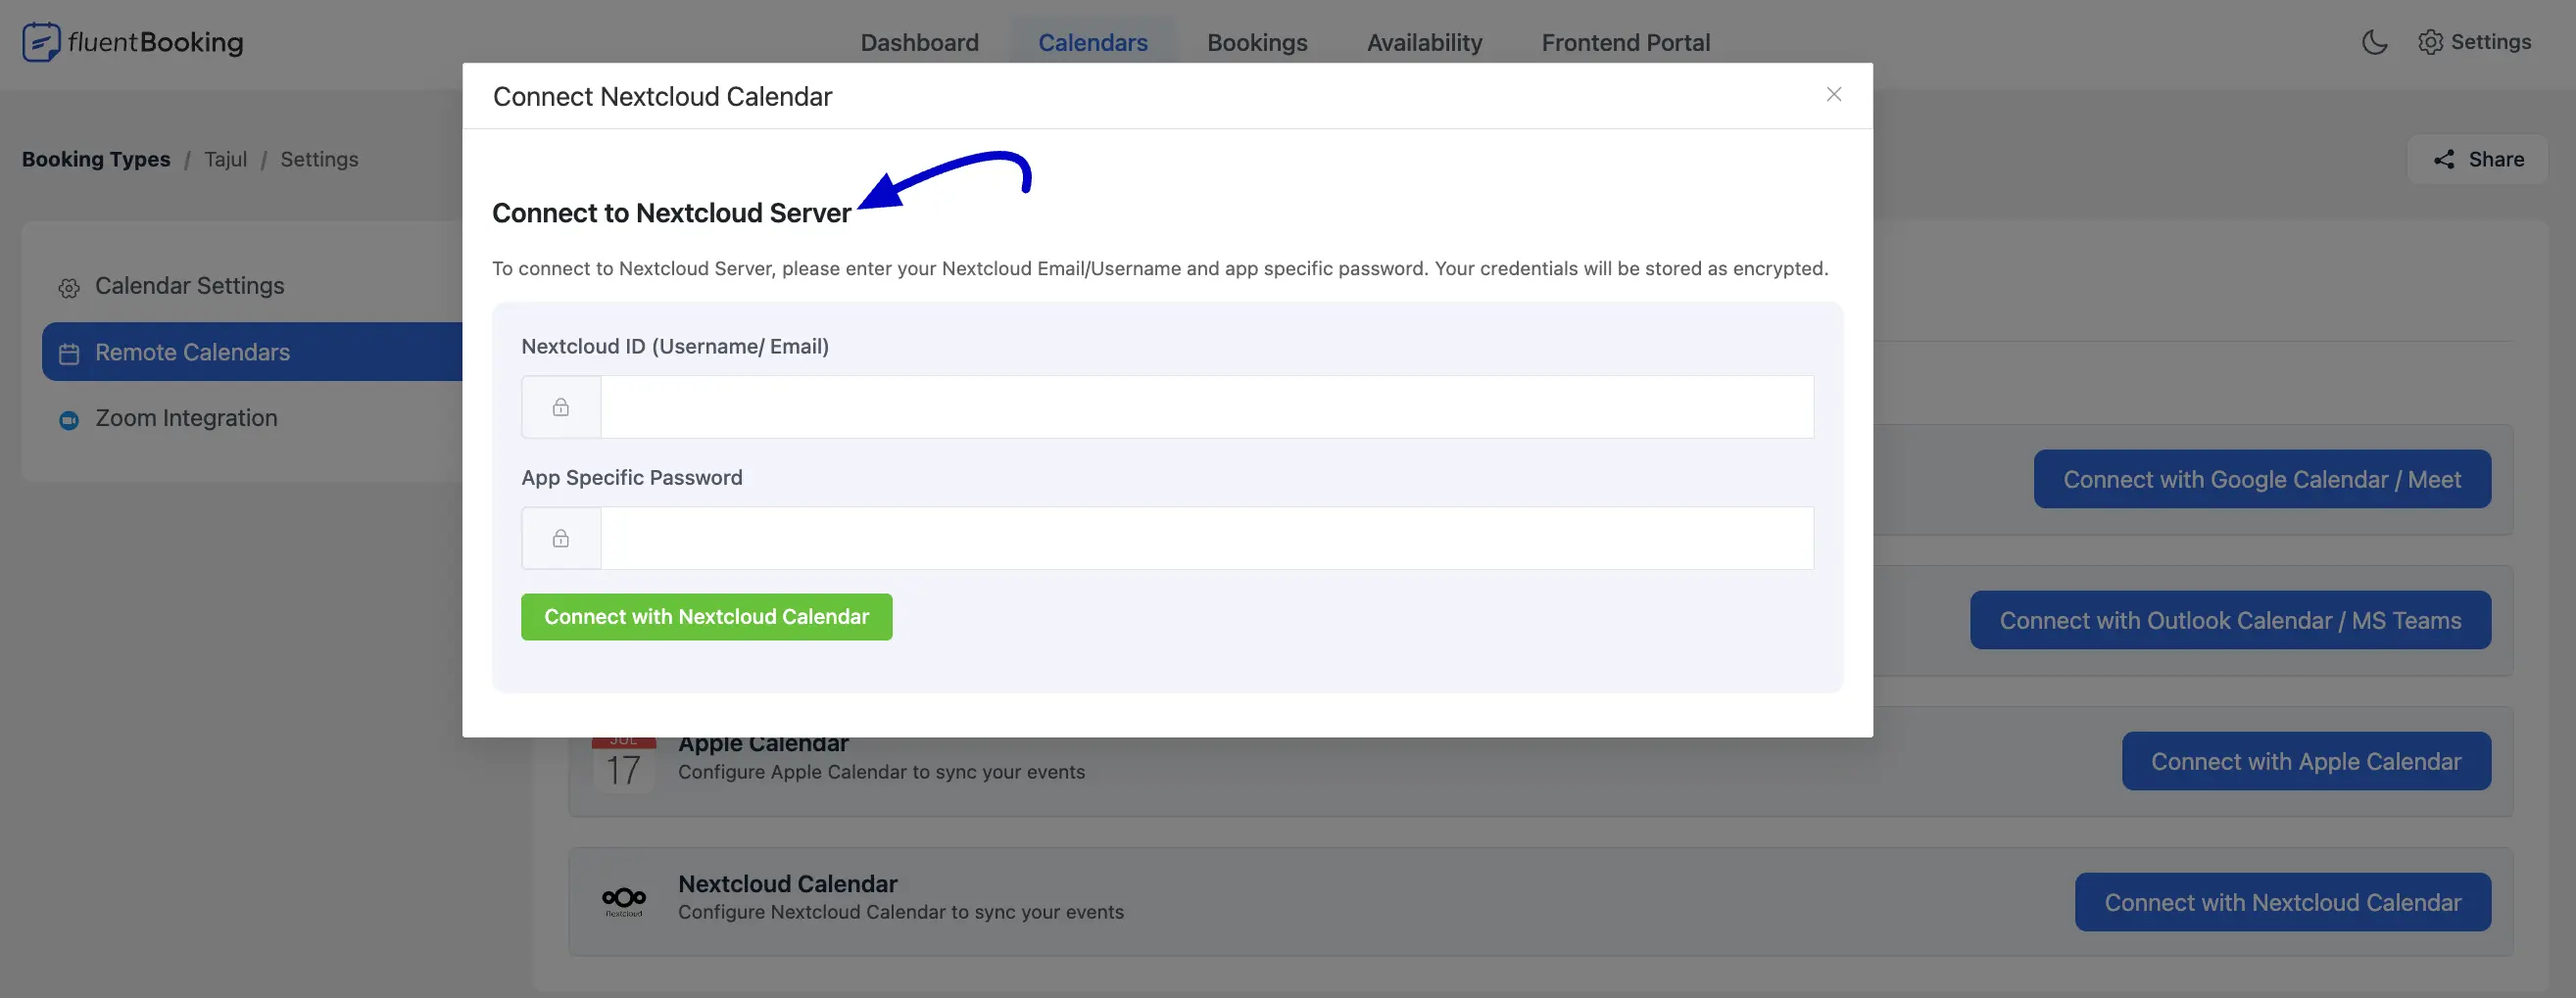
You will need the Nextcloud ID (Username/Email) and an App Specific Password here. To get these credentials you need to go to your Nextcloud Account again.
Nextcloud Calendar App Credentials
Login to your Nextcloud Account and go to your Nextcloud Profile Settings.
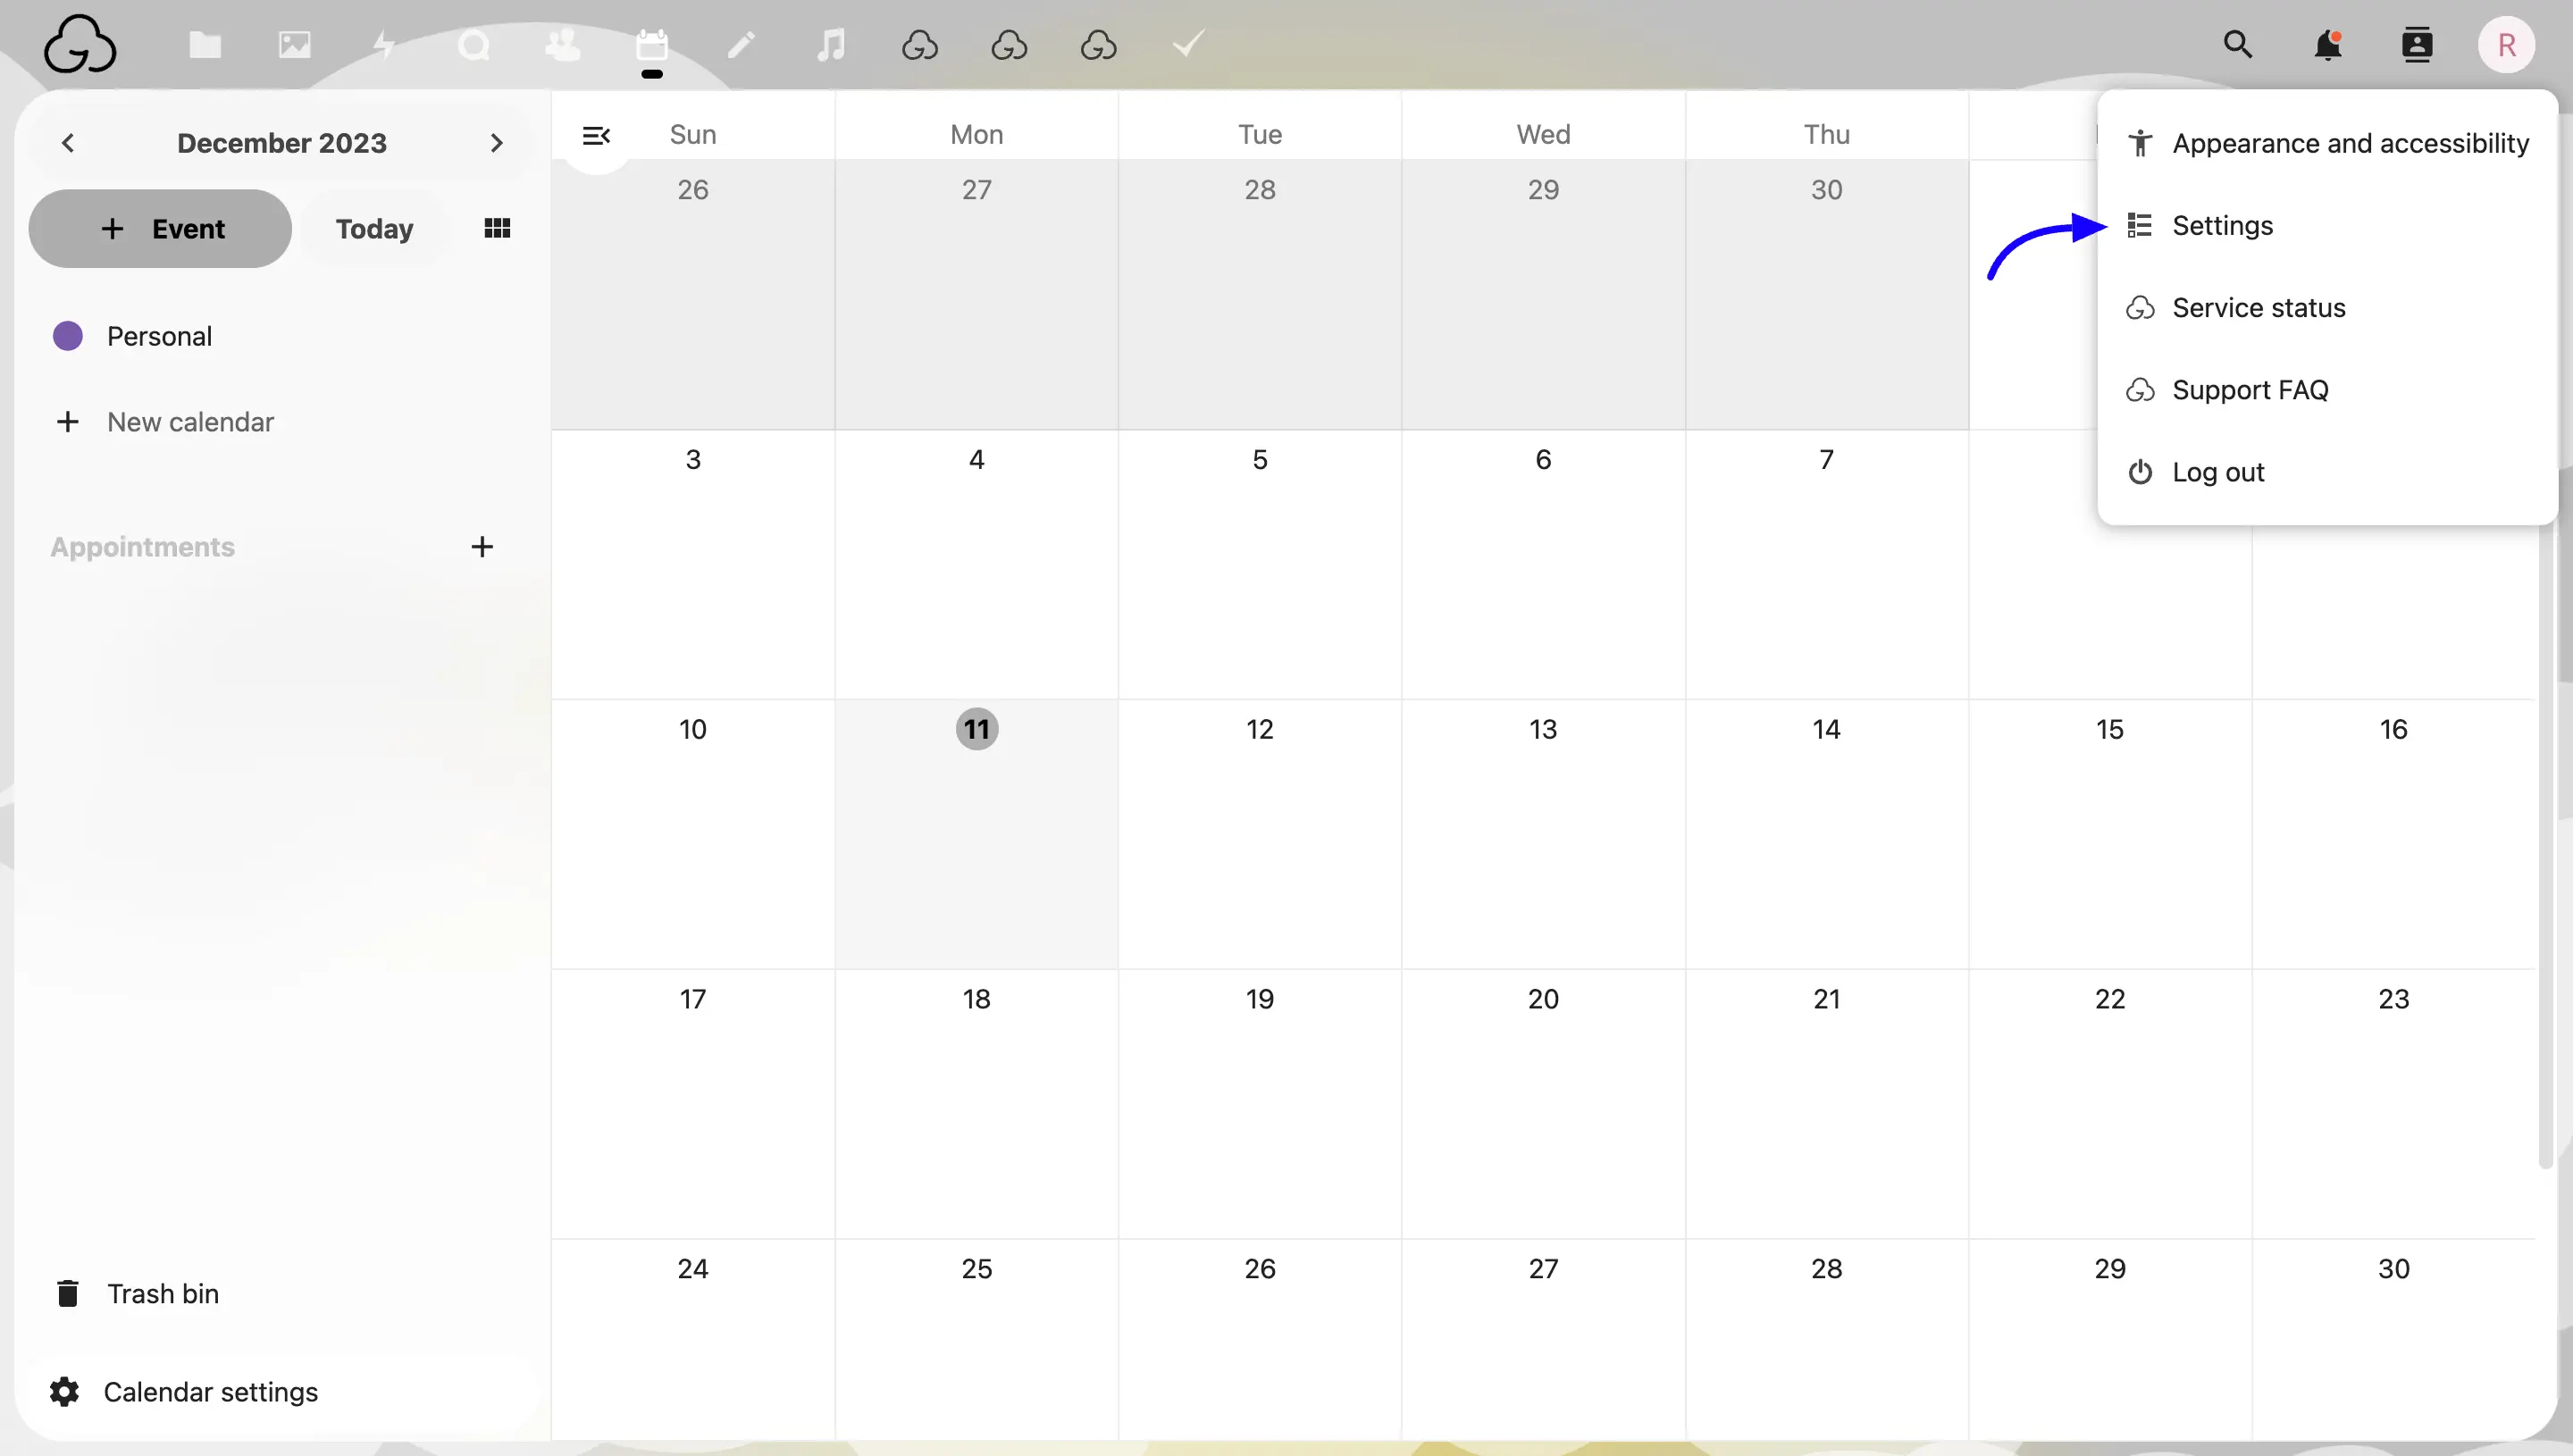
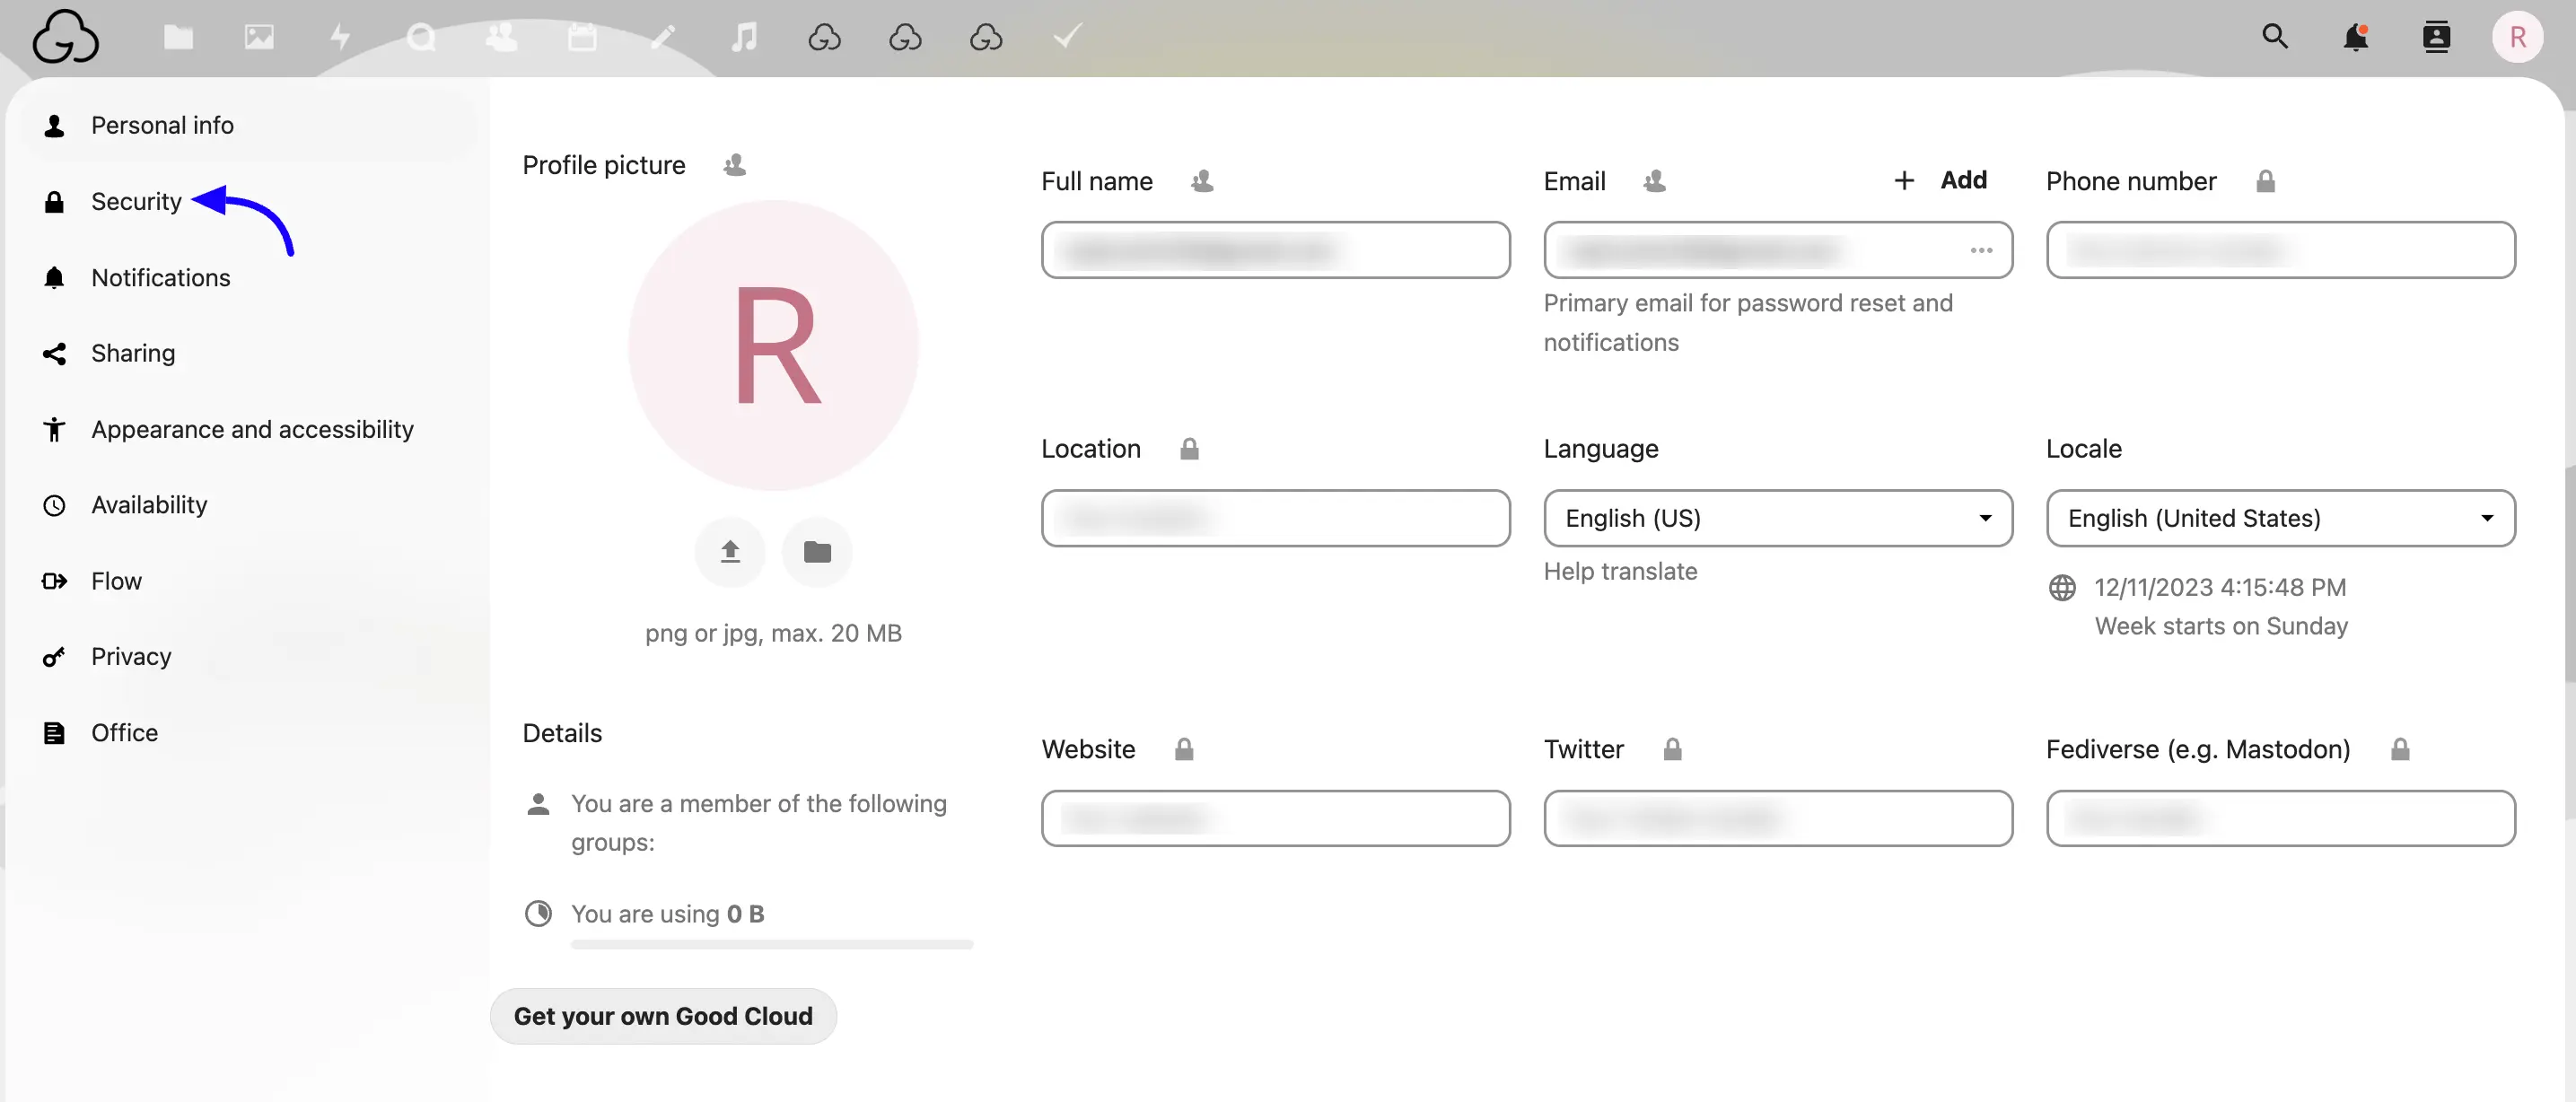
Select the Security from the left sidebar.
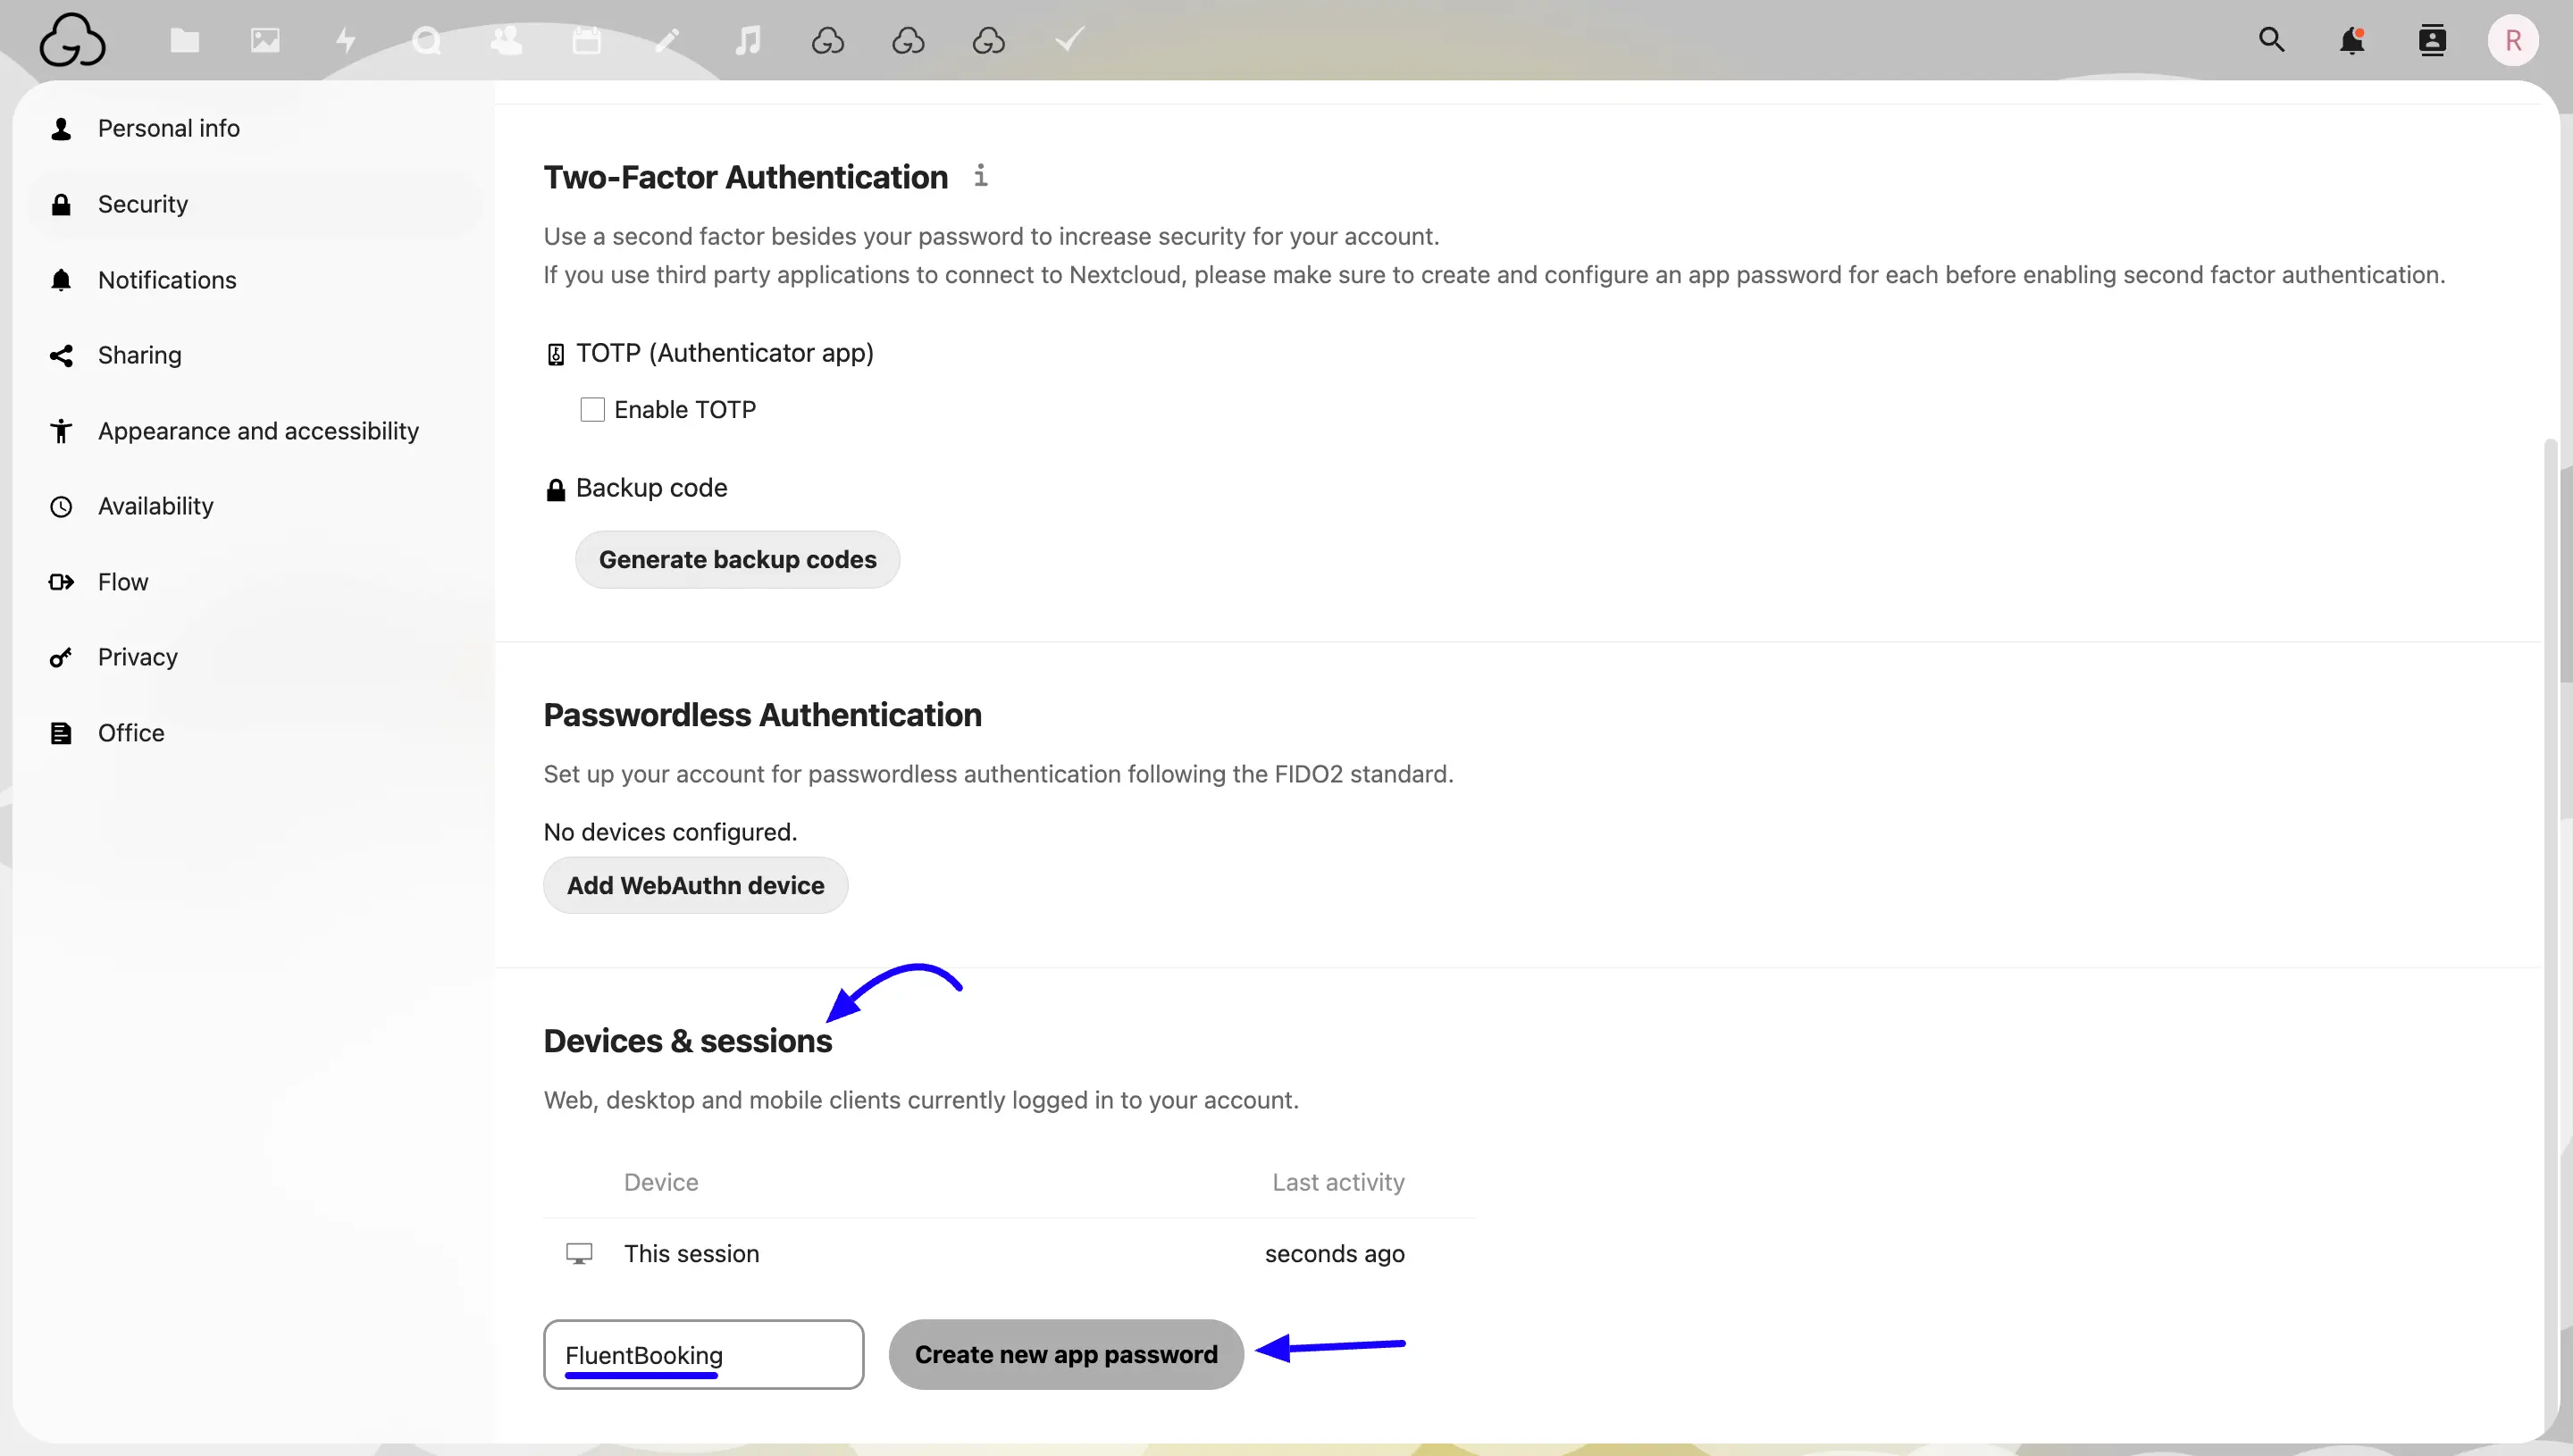
Scroll down and go to the Devices & Sessions section, you have to create an App here. Give the App name and click on the Create new app password button.
You will get your Nextcloud ID (Username/Email) and App Specific Password here. Copy these credentials and click on the Done button.
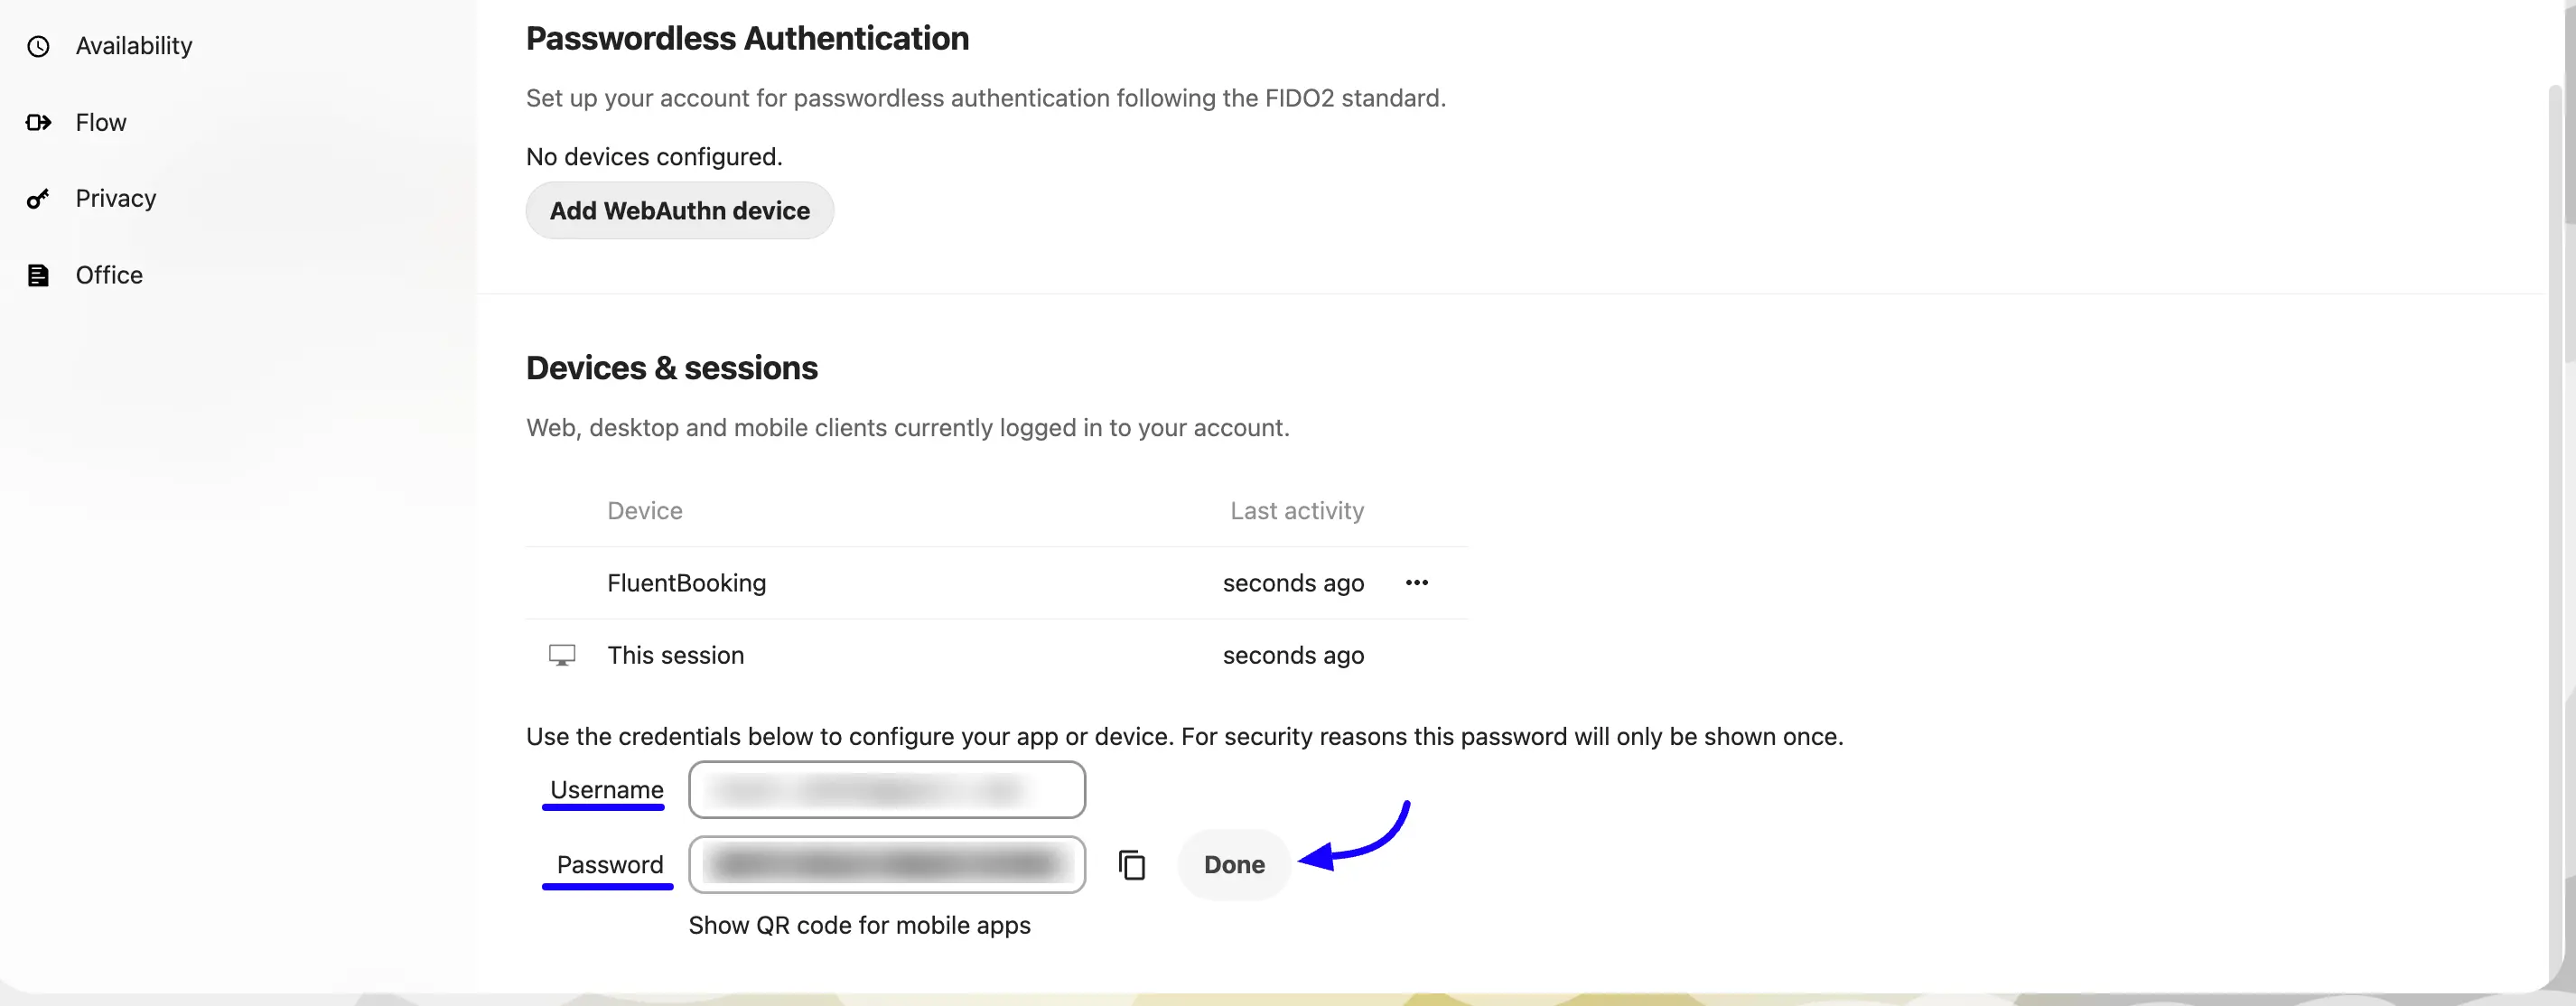
Paste the credentials to your FluentBooking host’s Remote Calendar settings and click on the Connect with Nextcloud Calendar button.
Now select the Nextcloud calendar to add the booking events on the selected calendar.
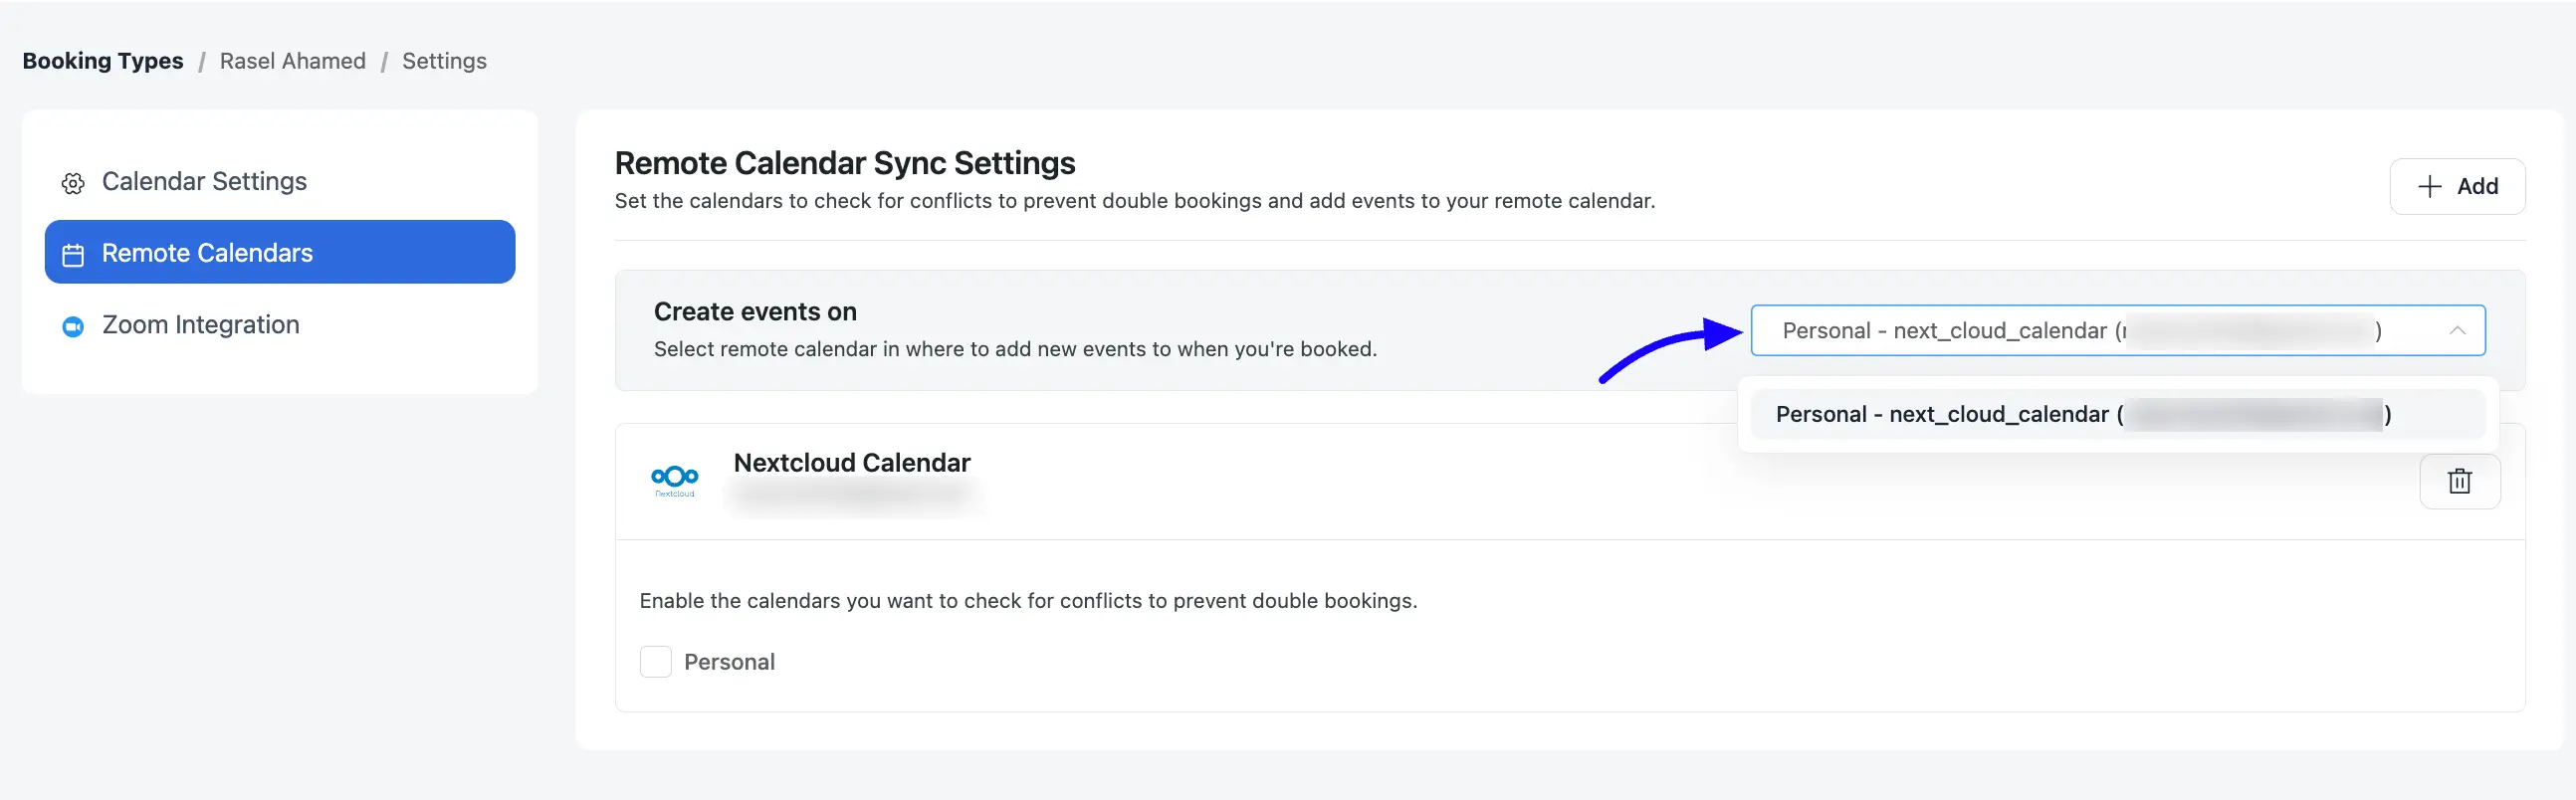
And that’s it. Your FluentBooking integration with Nextcloud Calendar is done.
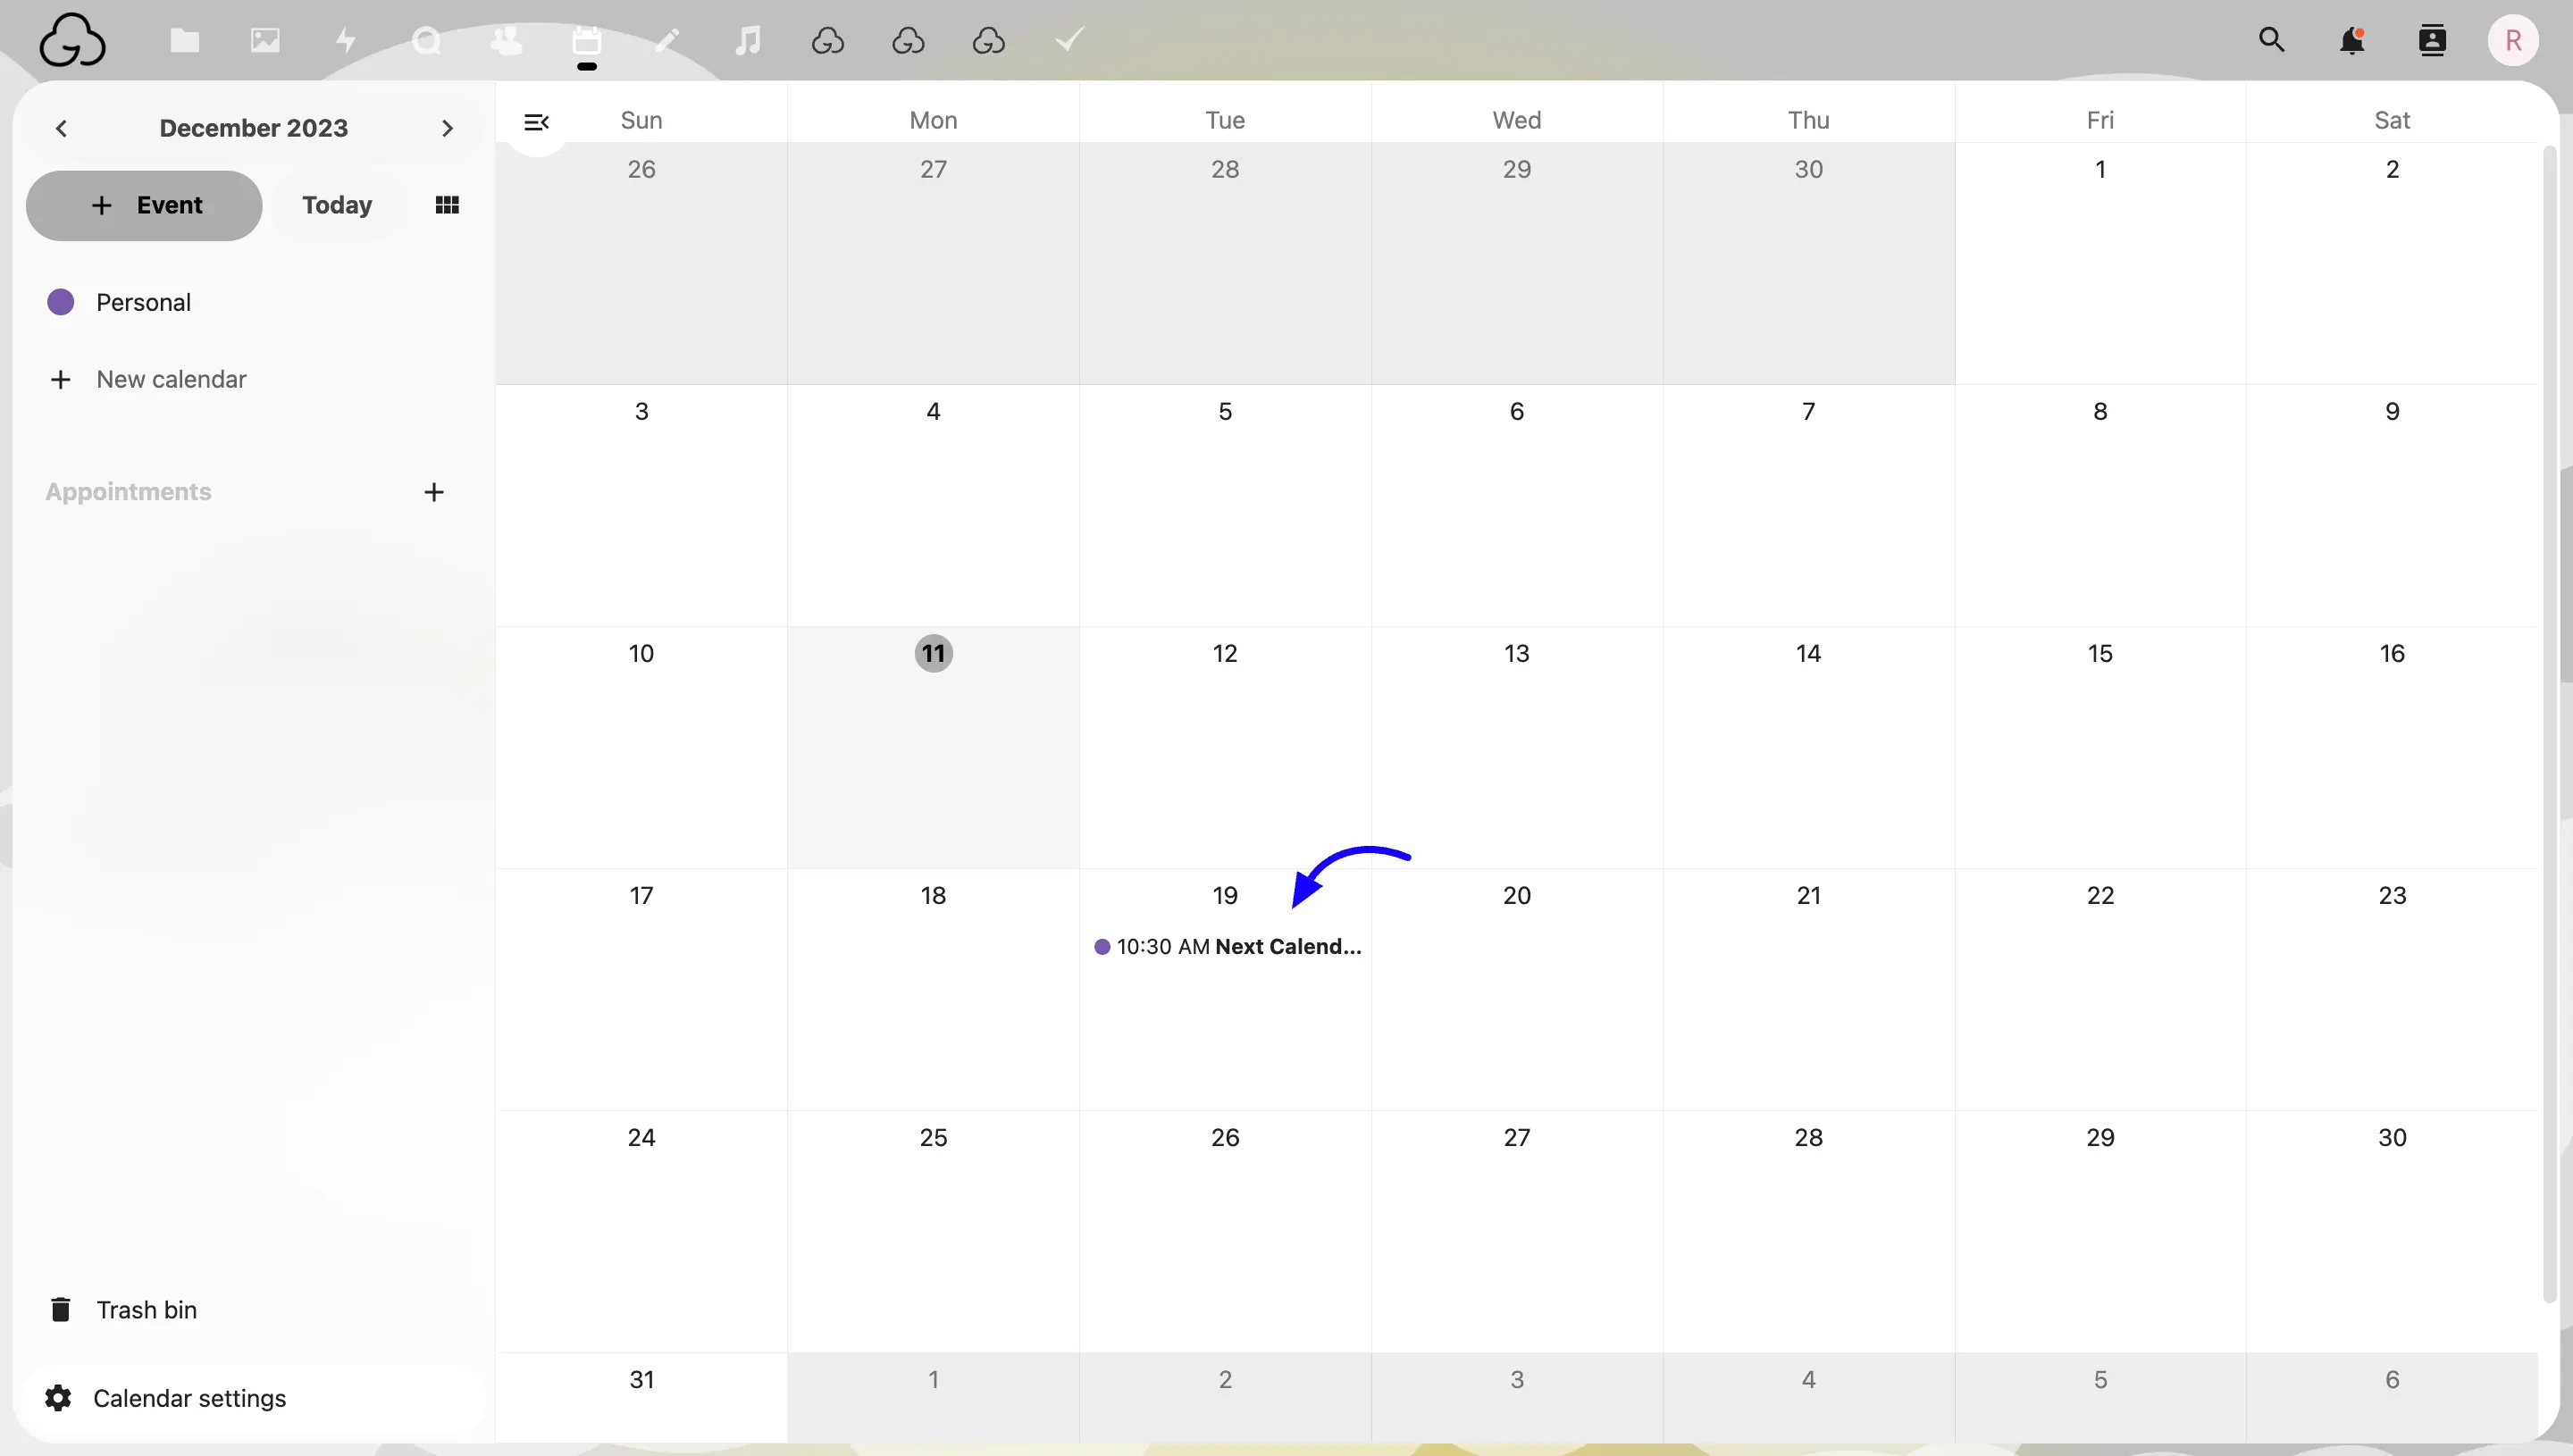
Booking Event Preview on Nextcloud Calendar
In your Nextcloud Calendar, you’ll be shown your booking events like this.