Appearance
Google Calendar/Meet integration with FluentBooking
FluentBooking offers seamless integration with your Google Calendar and Google Meet, making your scheduling experience even more efficient and effective. There are two ways to integrate Google Calendar with FluentBooking. We'll show you both.
Two-way Google Calendar sync and automatic Google Meet links are FluentBooking Pro features. You will need the FluentBooking Pro plugin to access them.
Important
Before connecting Google Calendar, make sure you have created at least one host in FluentBooking.
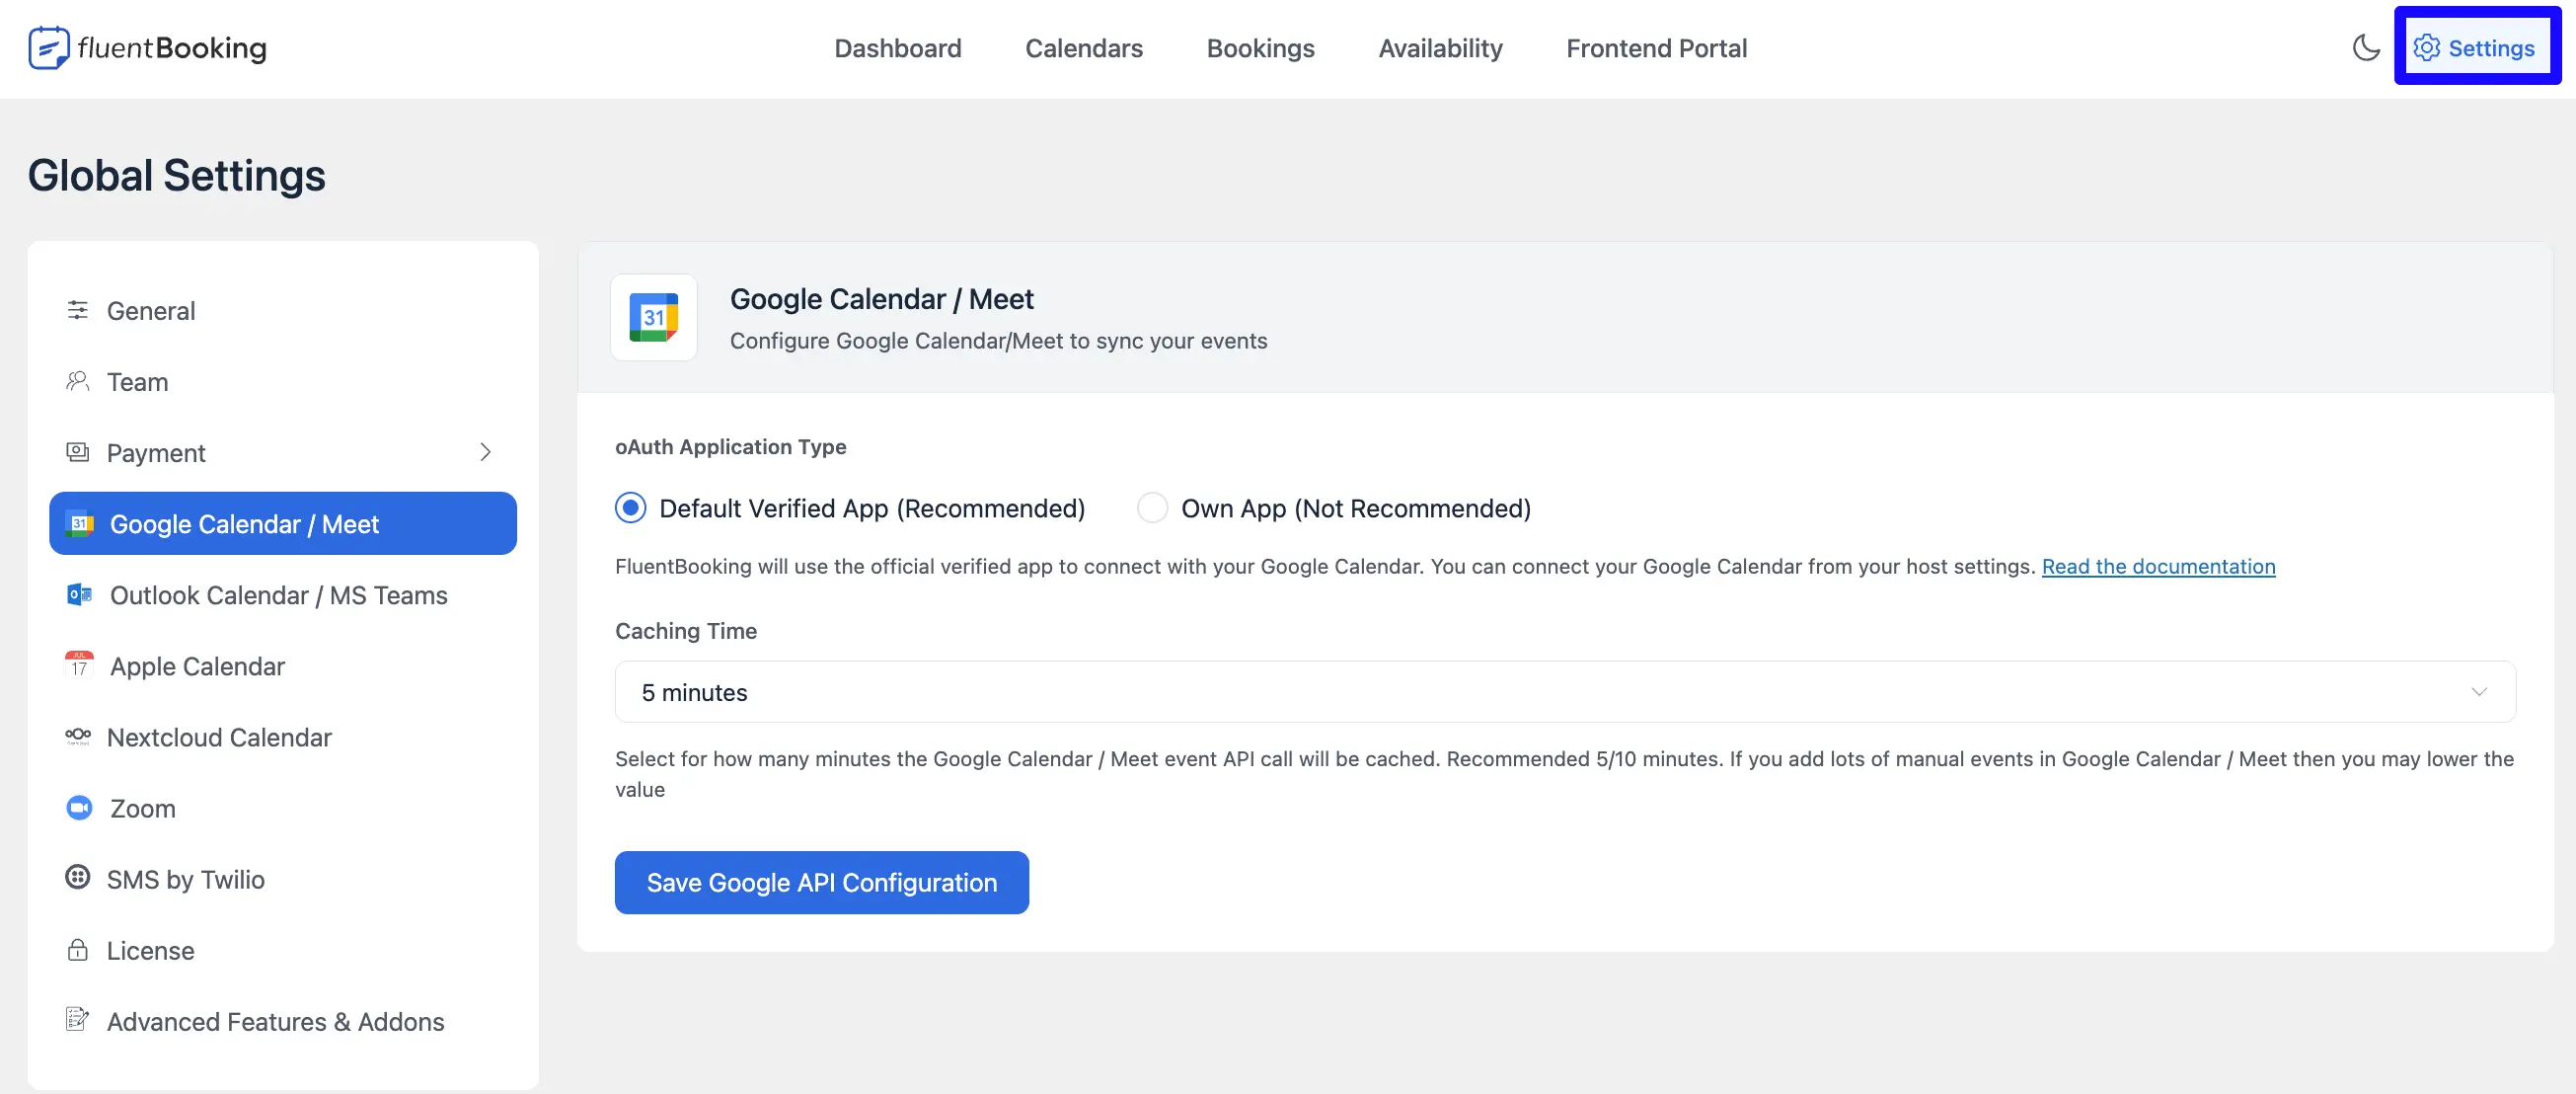
Default Verified App
Unlike any other WordPress appointment plugin, we have a default verified app to integrate Google Calendar.
To use this, go to Settings and switch to Google Calendar/Meet. Then, choose Default Verified App and set your caching time. The recommended setting is 5 minutes however, you can set any duration.
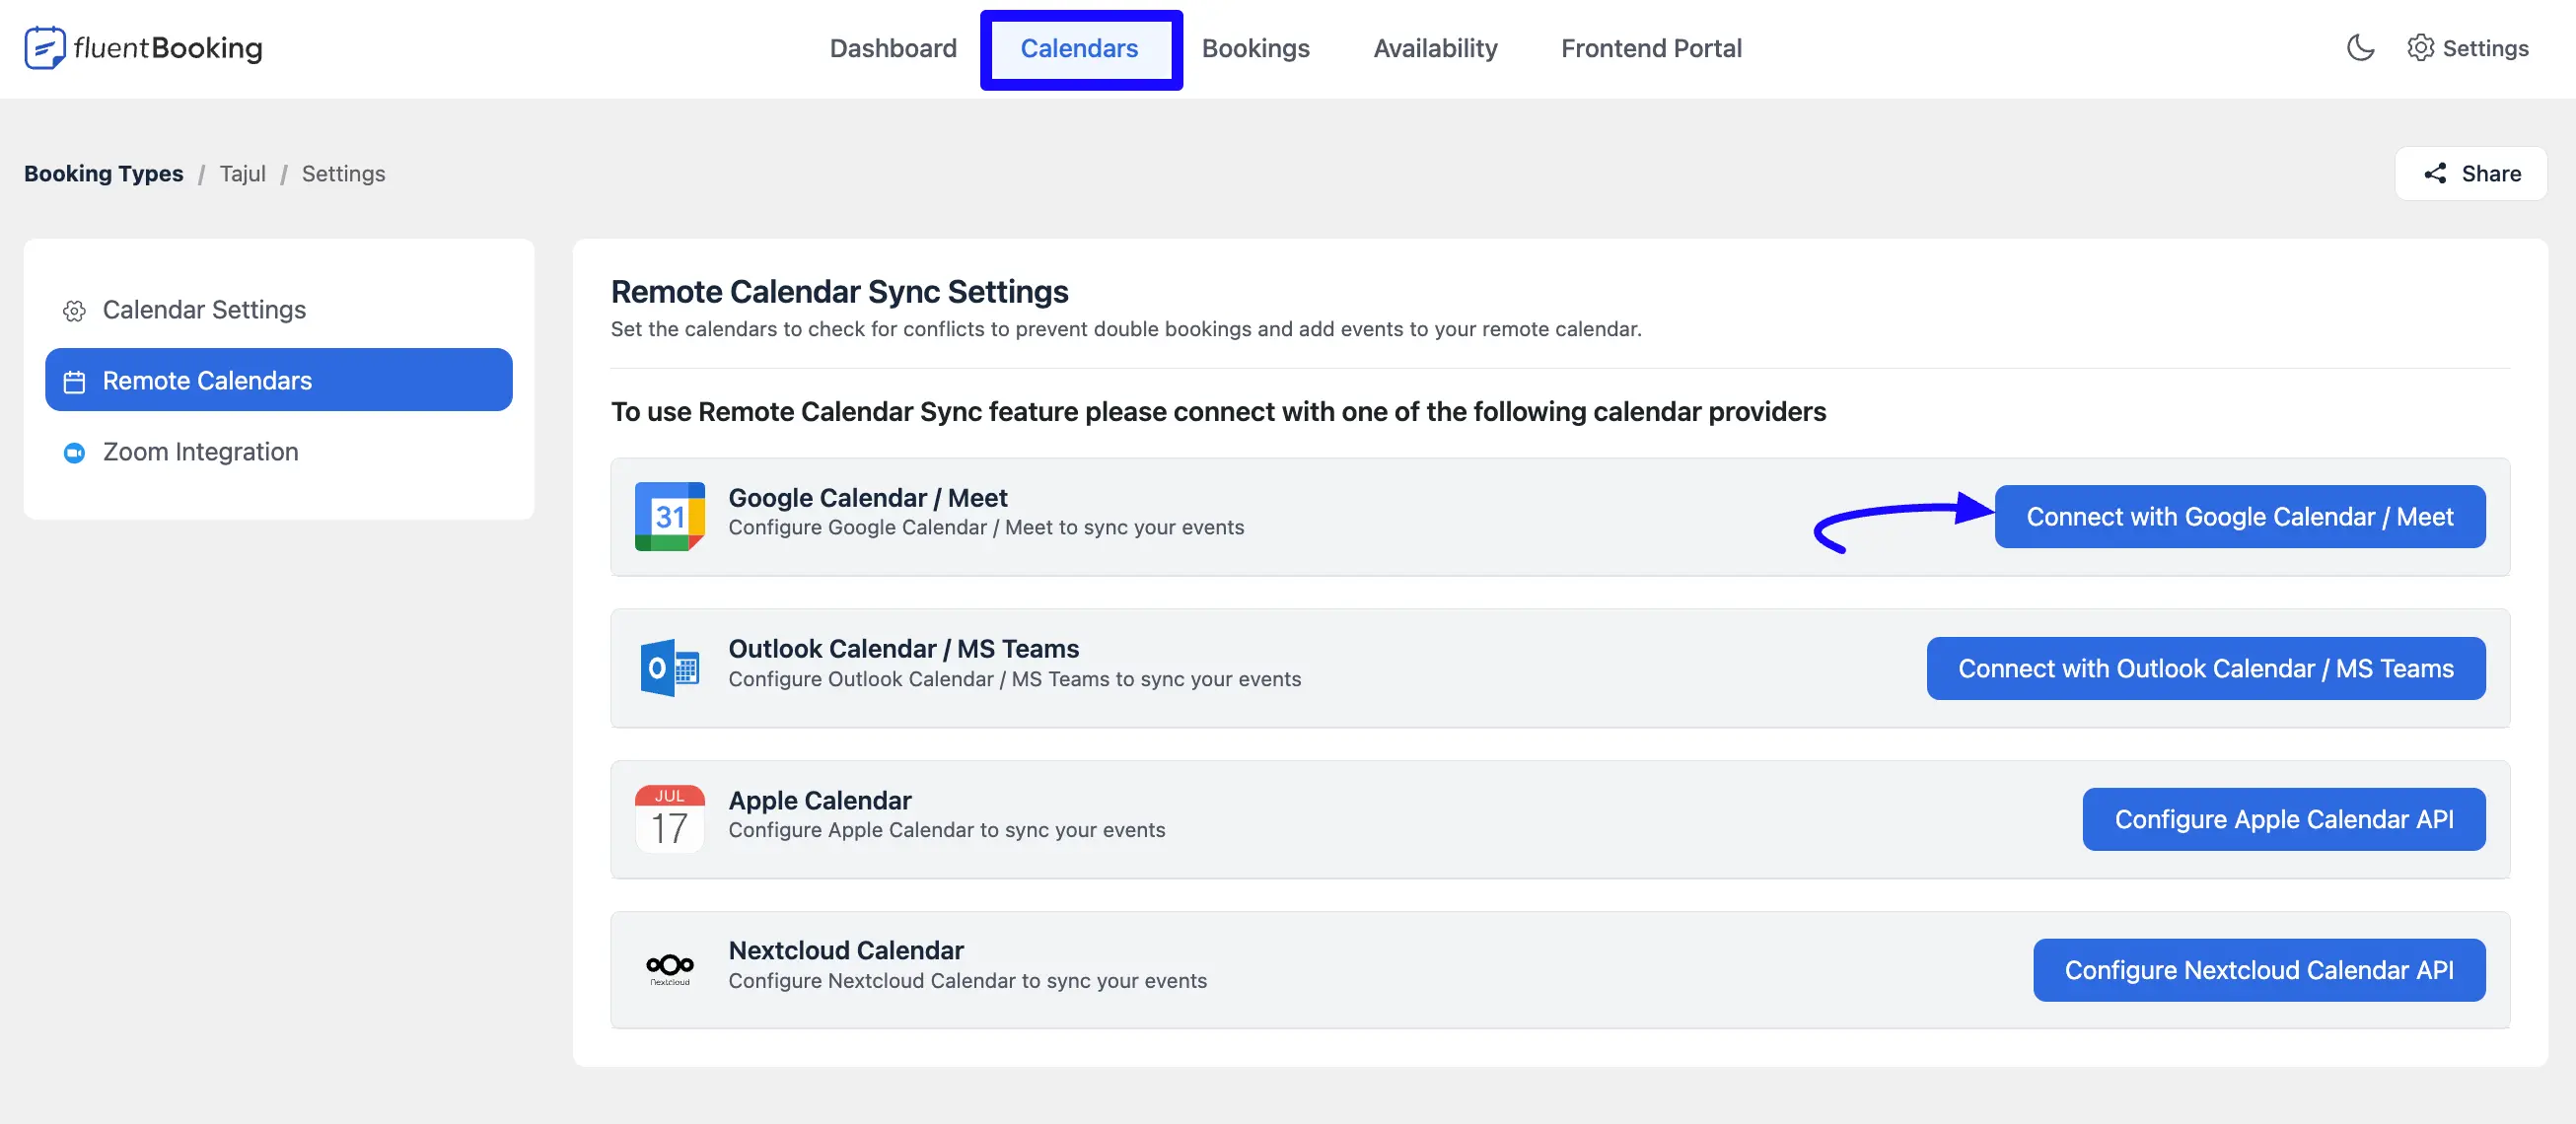
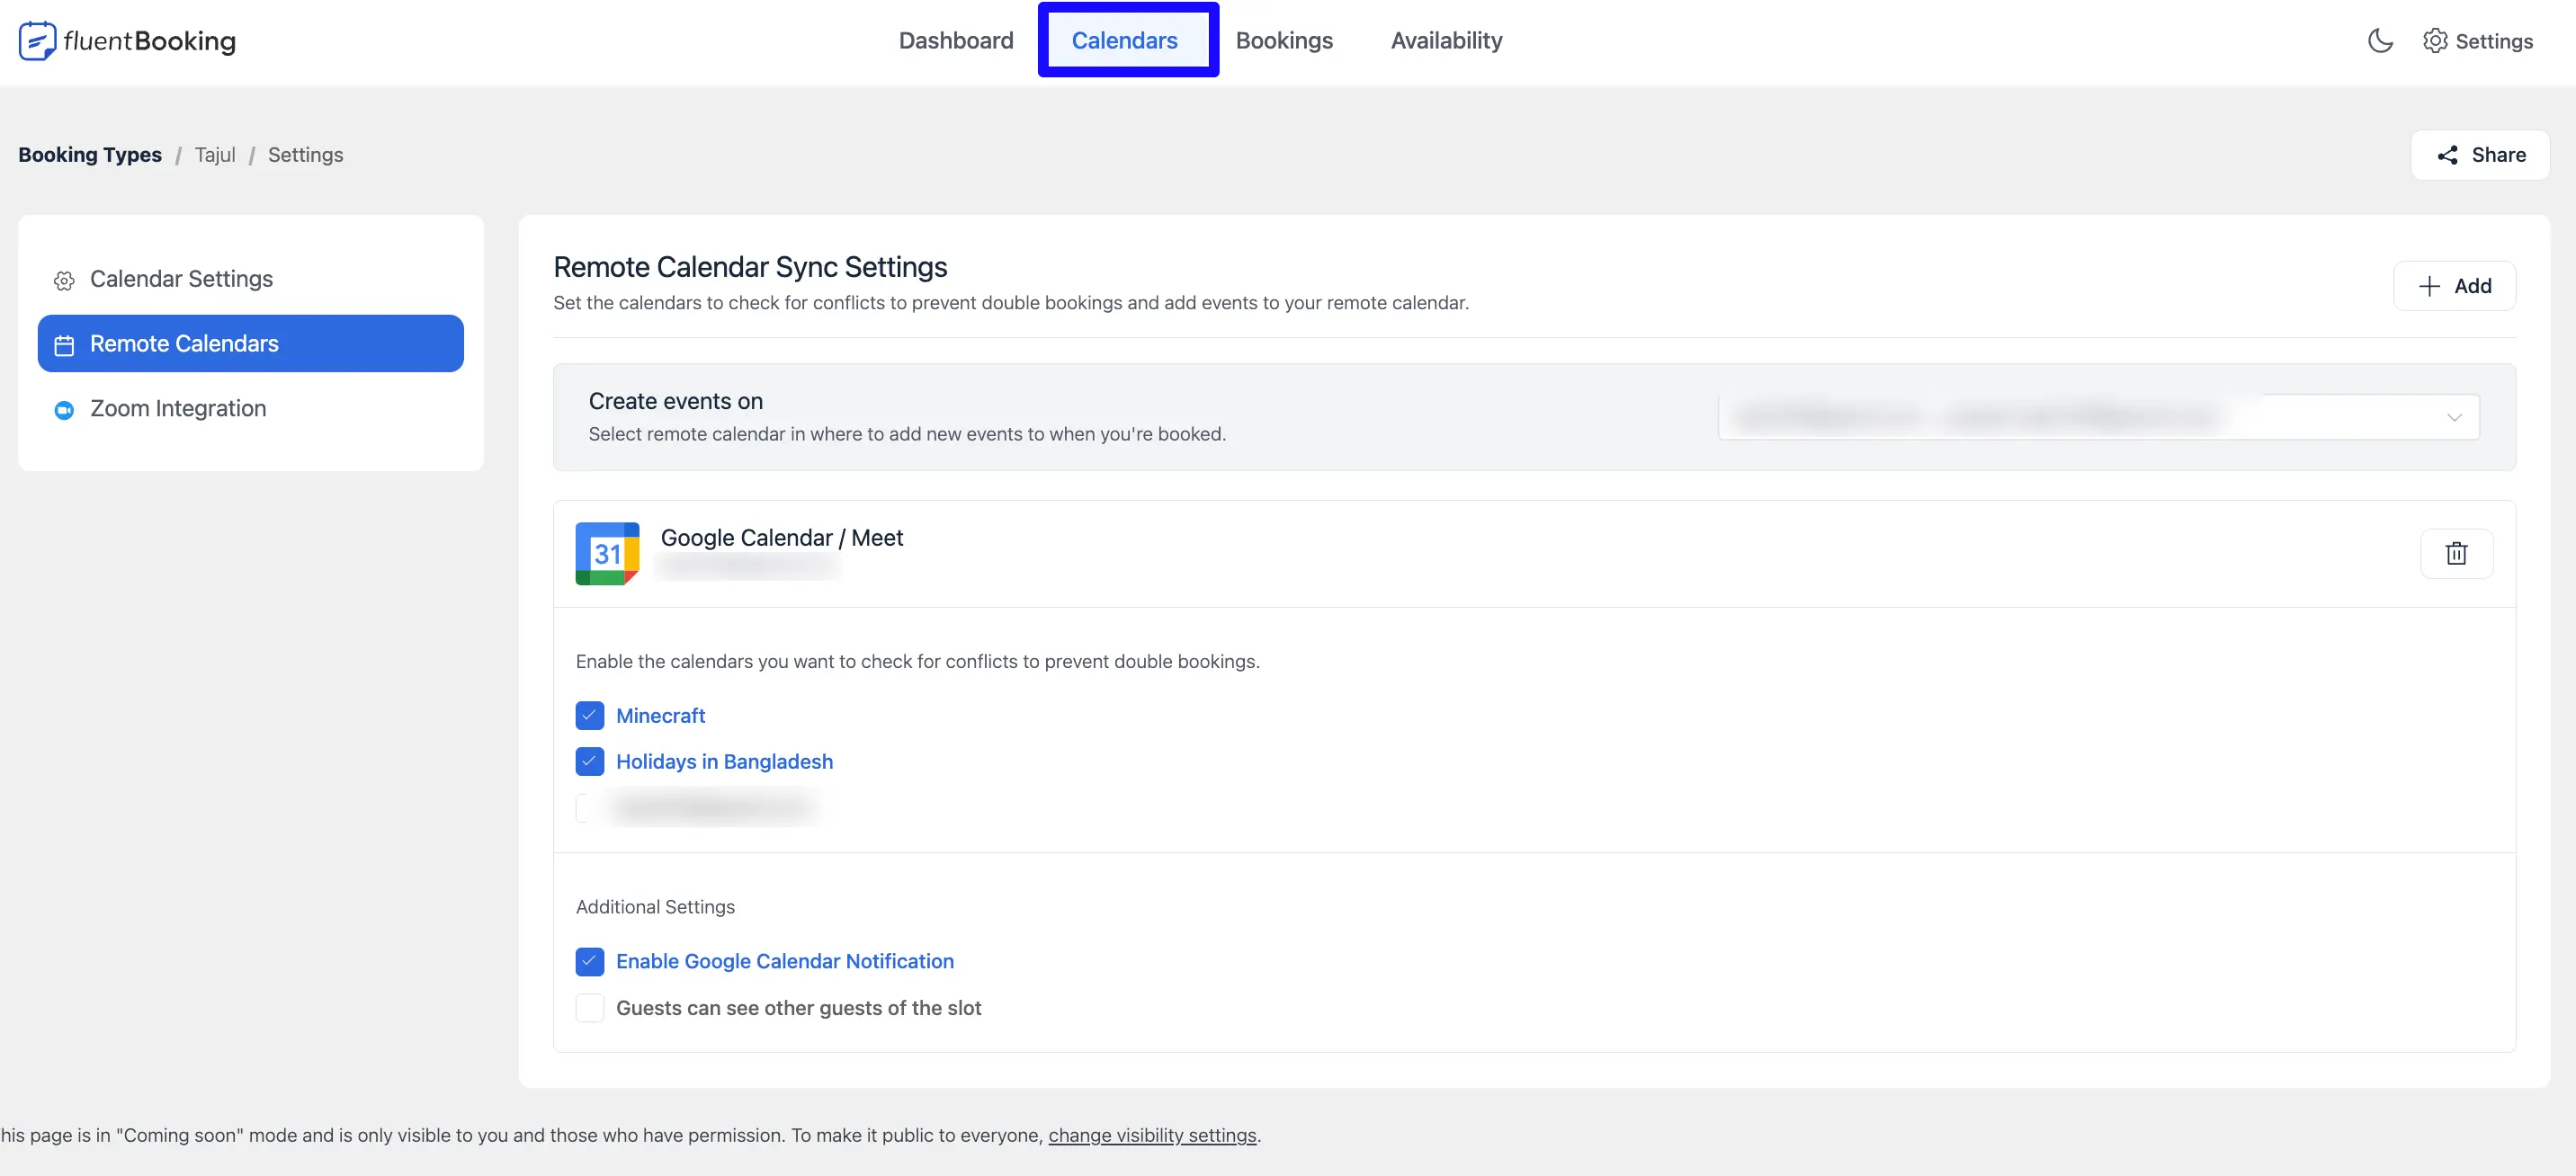
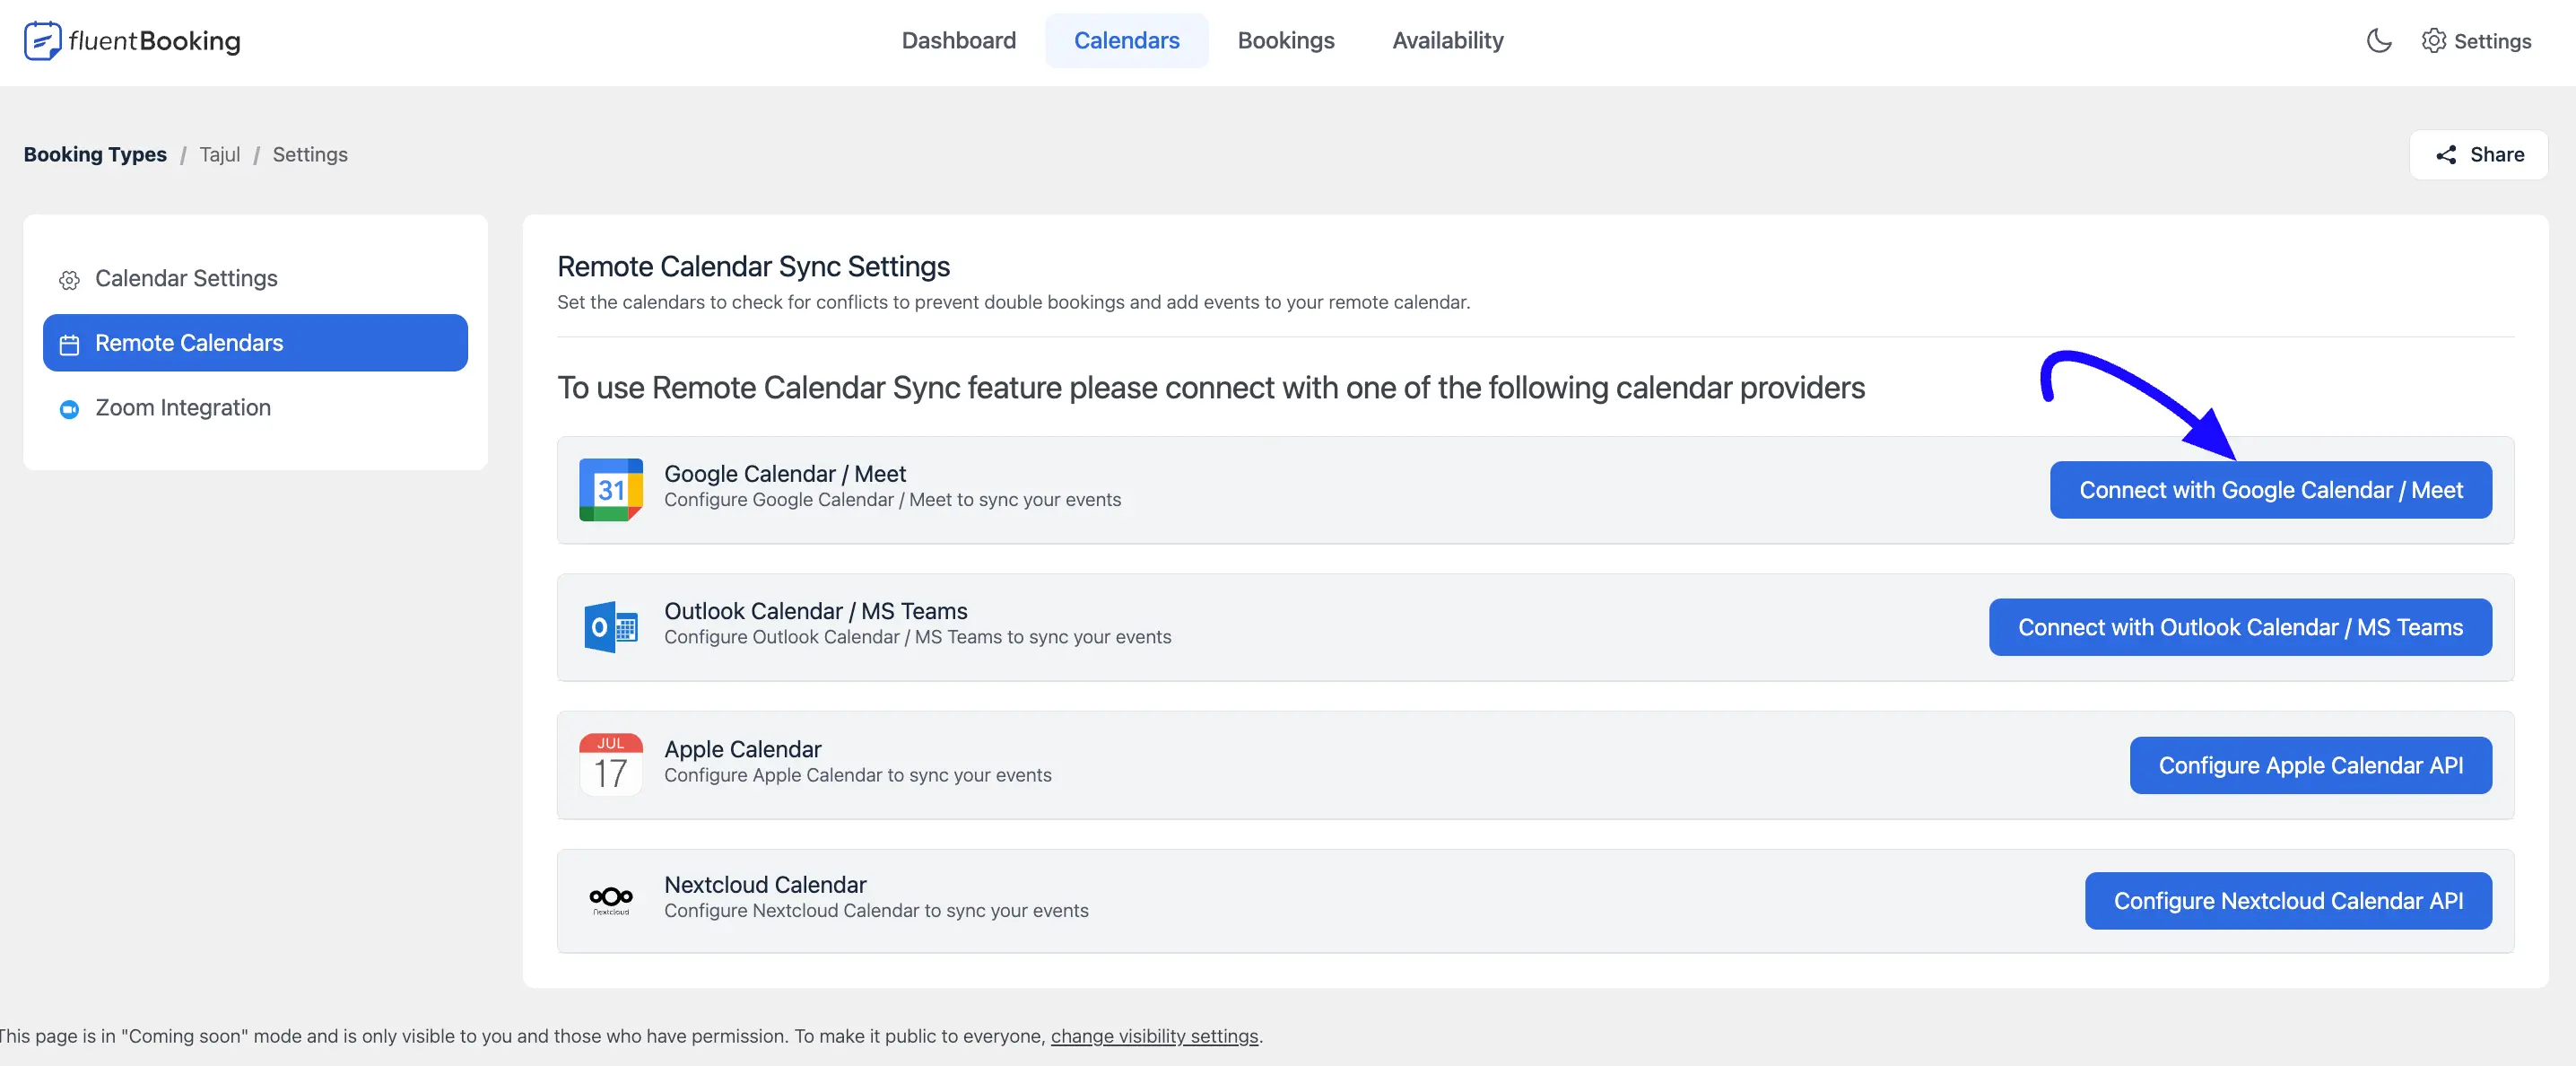
In the Calendars section, select the host you want to sync booking events for on Google Calendar/Meet. If you don't have a host, check out our Documentation for guidance on creating one.
Now, go to the Host Settings > Remote Calendar of that host and click Connect with Google Calendar/Meet.
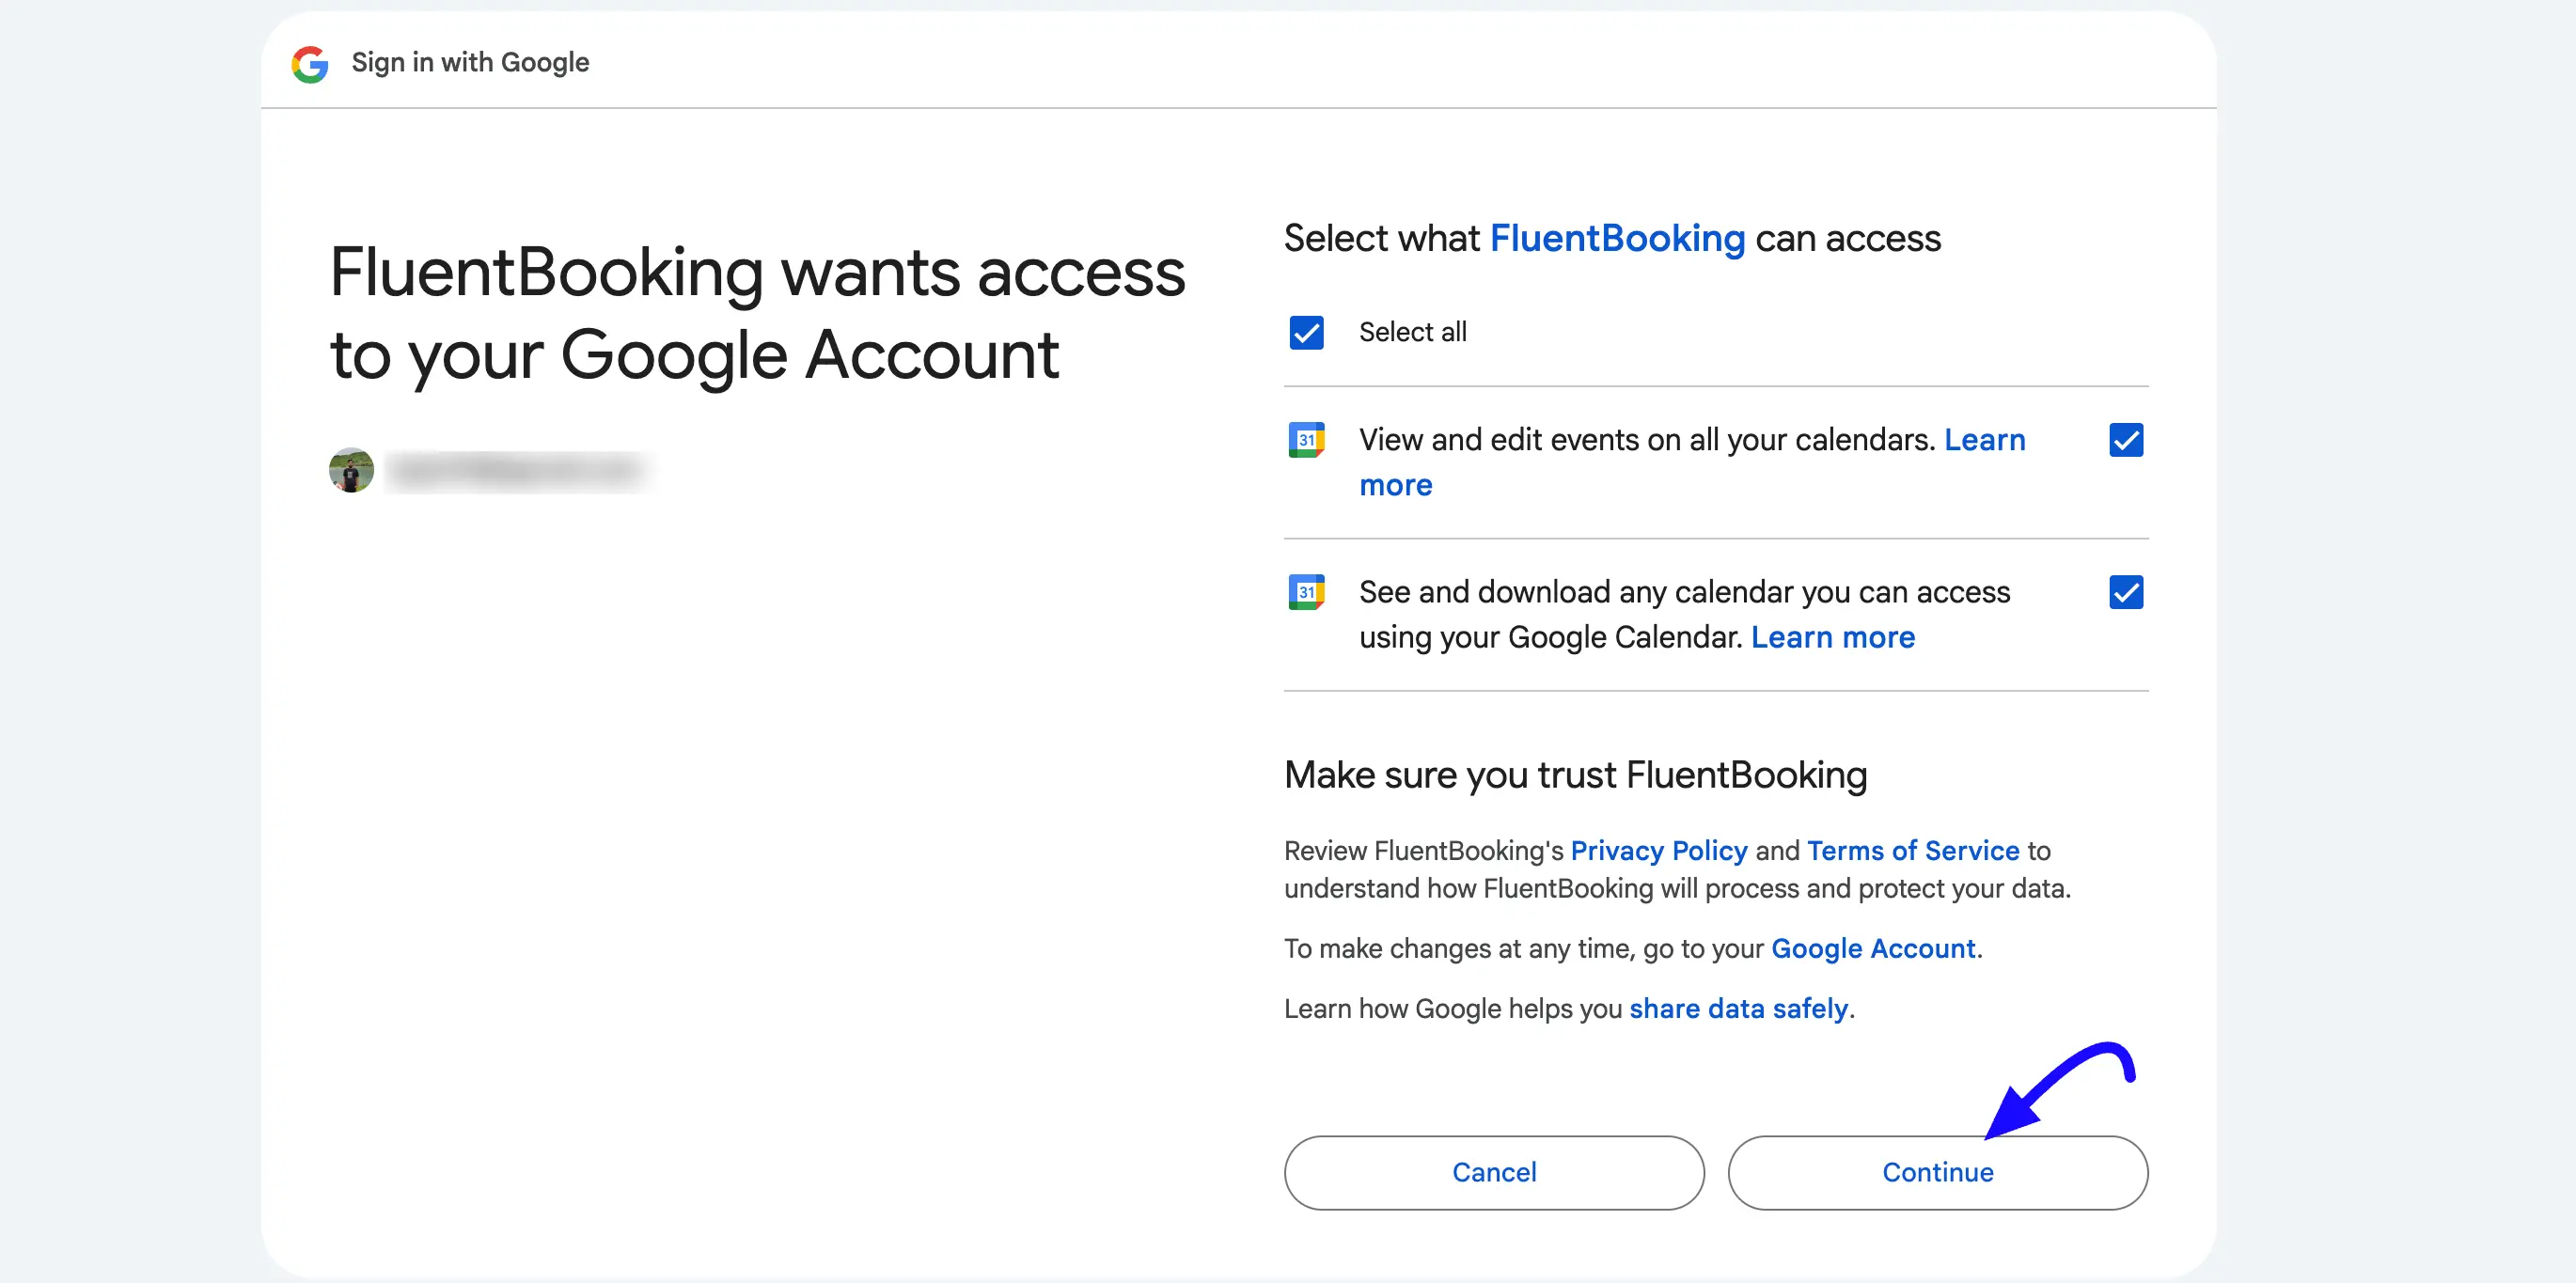
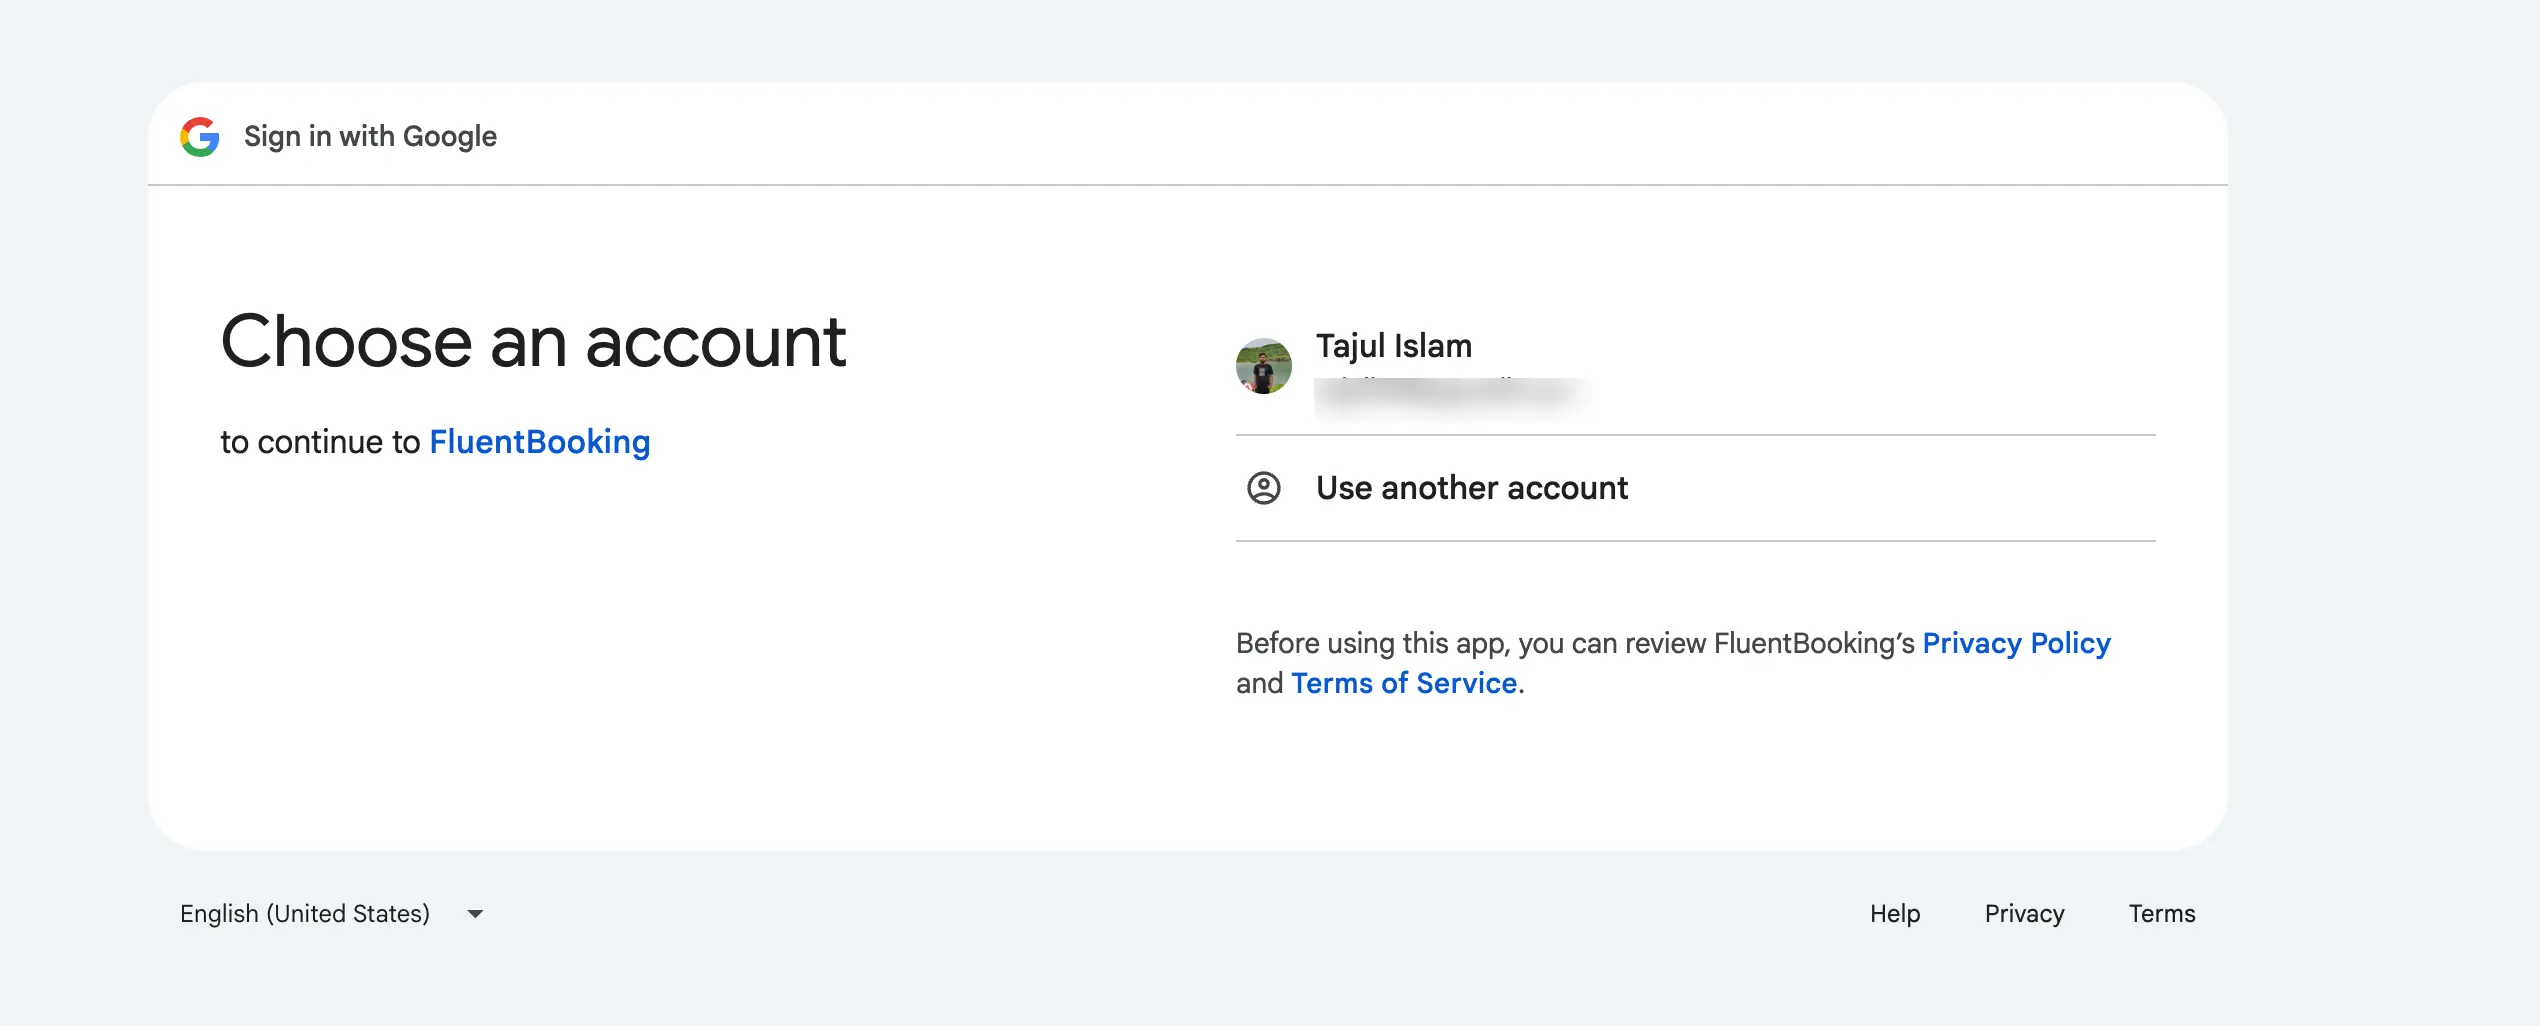
To sync your host's FluentBooking events with their Google Calendar/Meet, add your host's Google Account.
Then, give FluentBooking the necessary permissions and click the Continue button.
That's it, that's all you need to integrate Google Calendar with FluentBooking! Now you can choose your calendar and check conflicts to prevent double bookings.
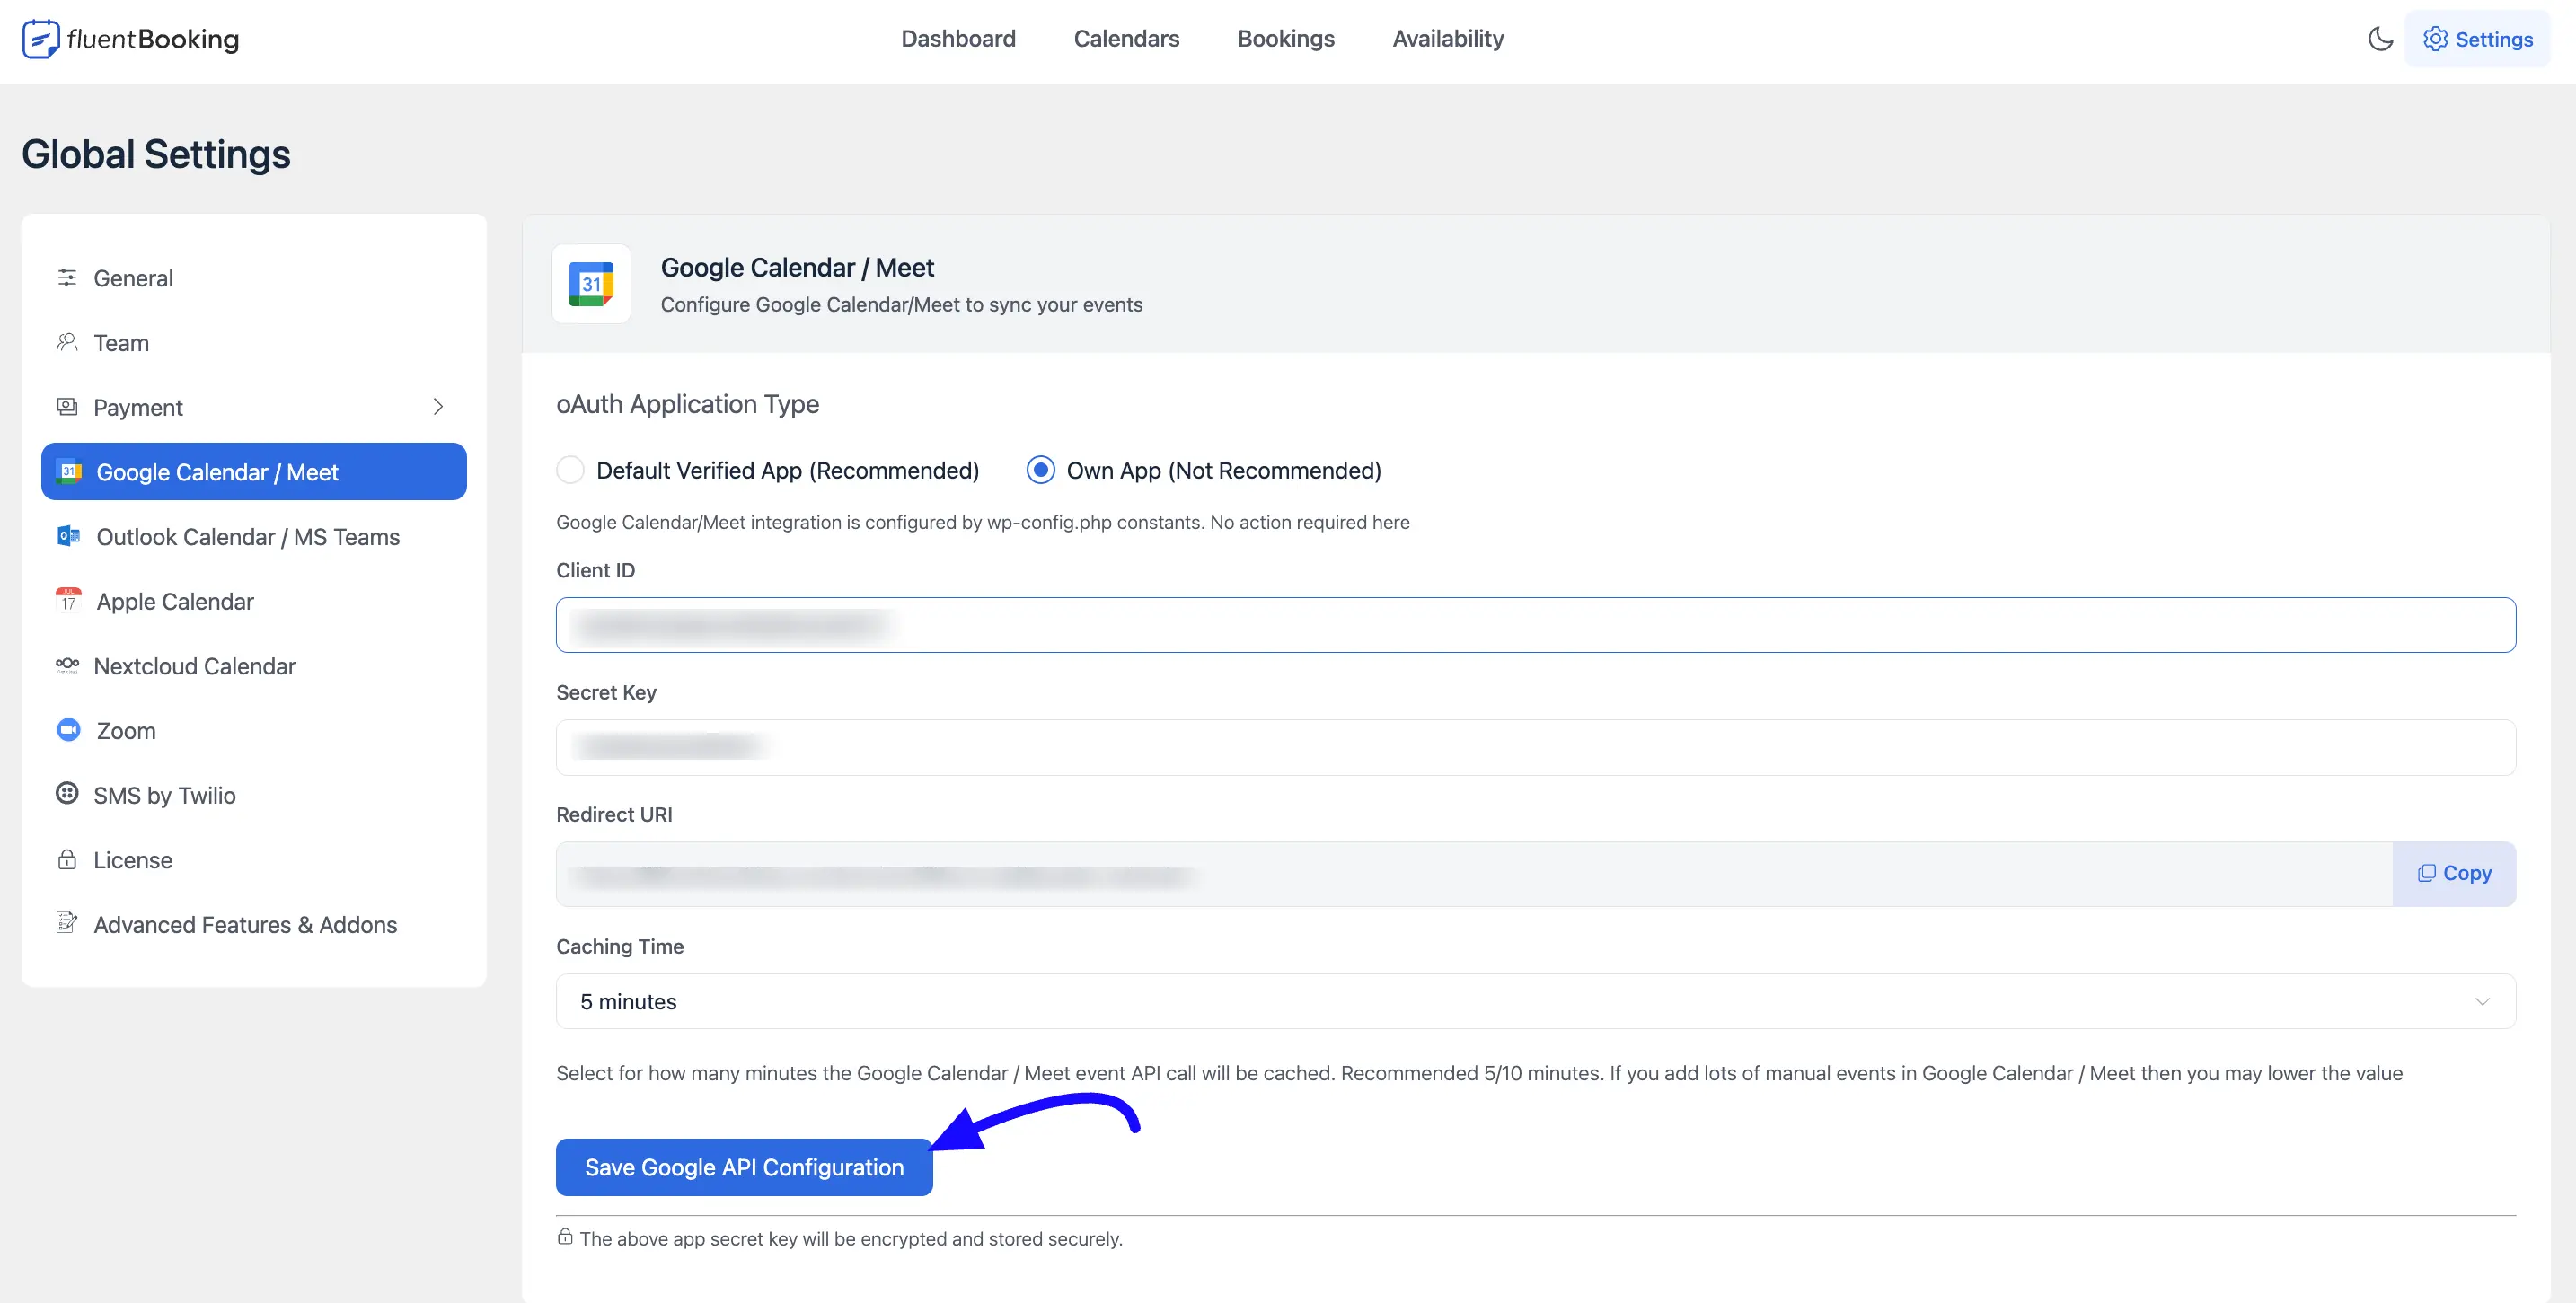
Own App (Not Recommended)
Alternatively, you can use our own app to integrate Google Calendar. Here are the steps below:
Create or Select Project
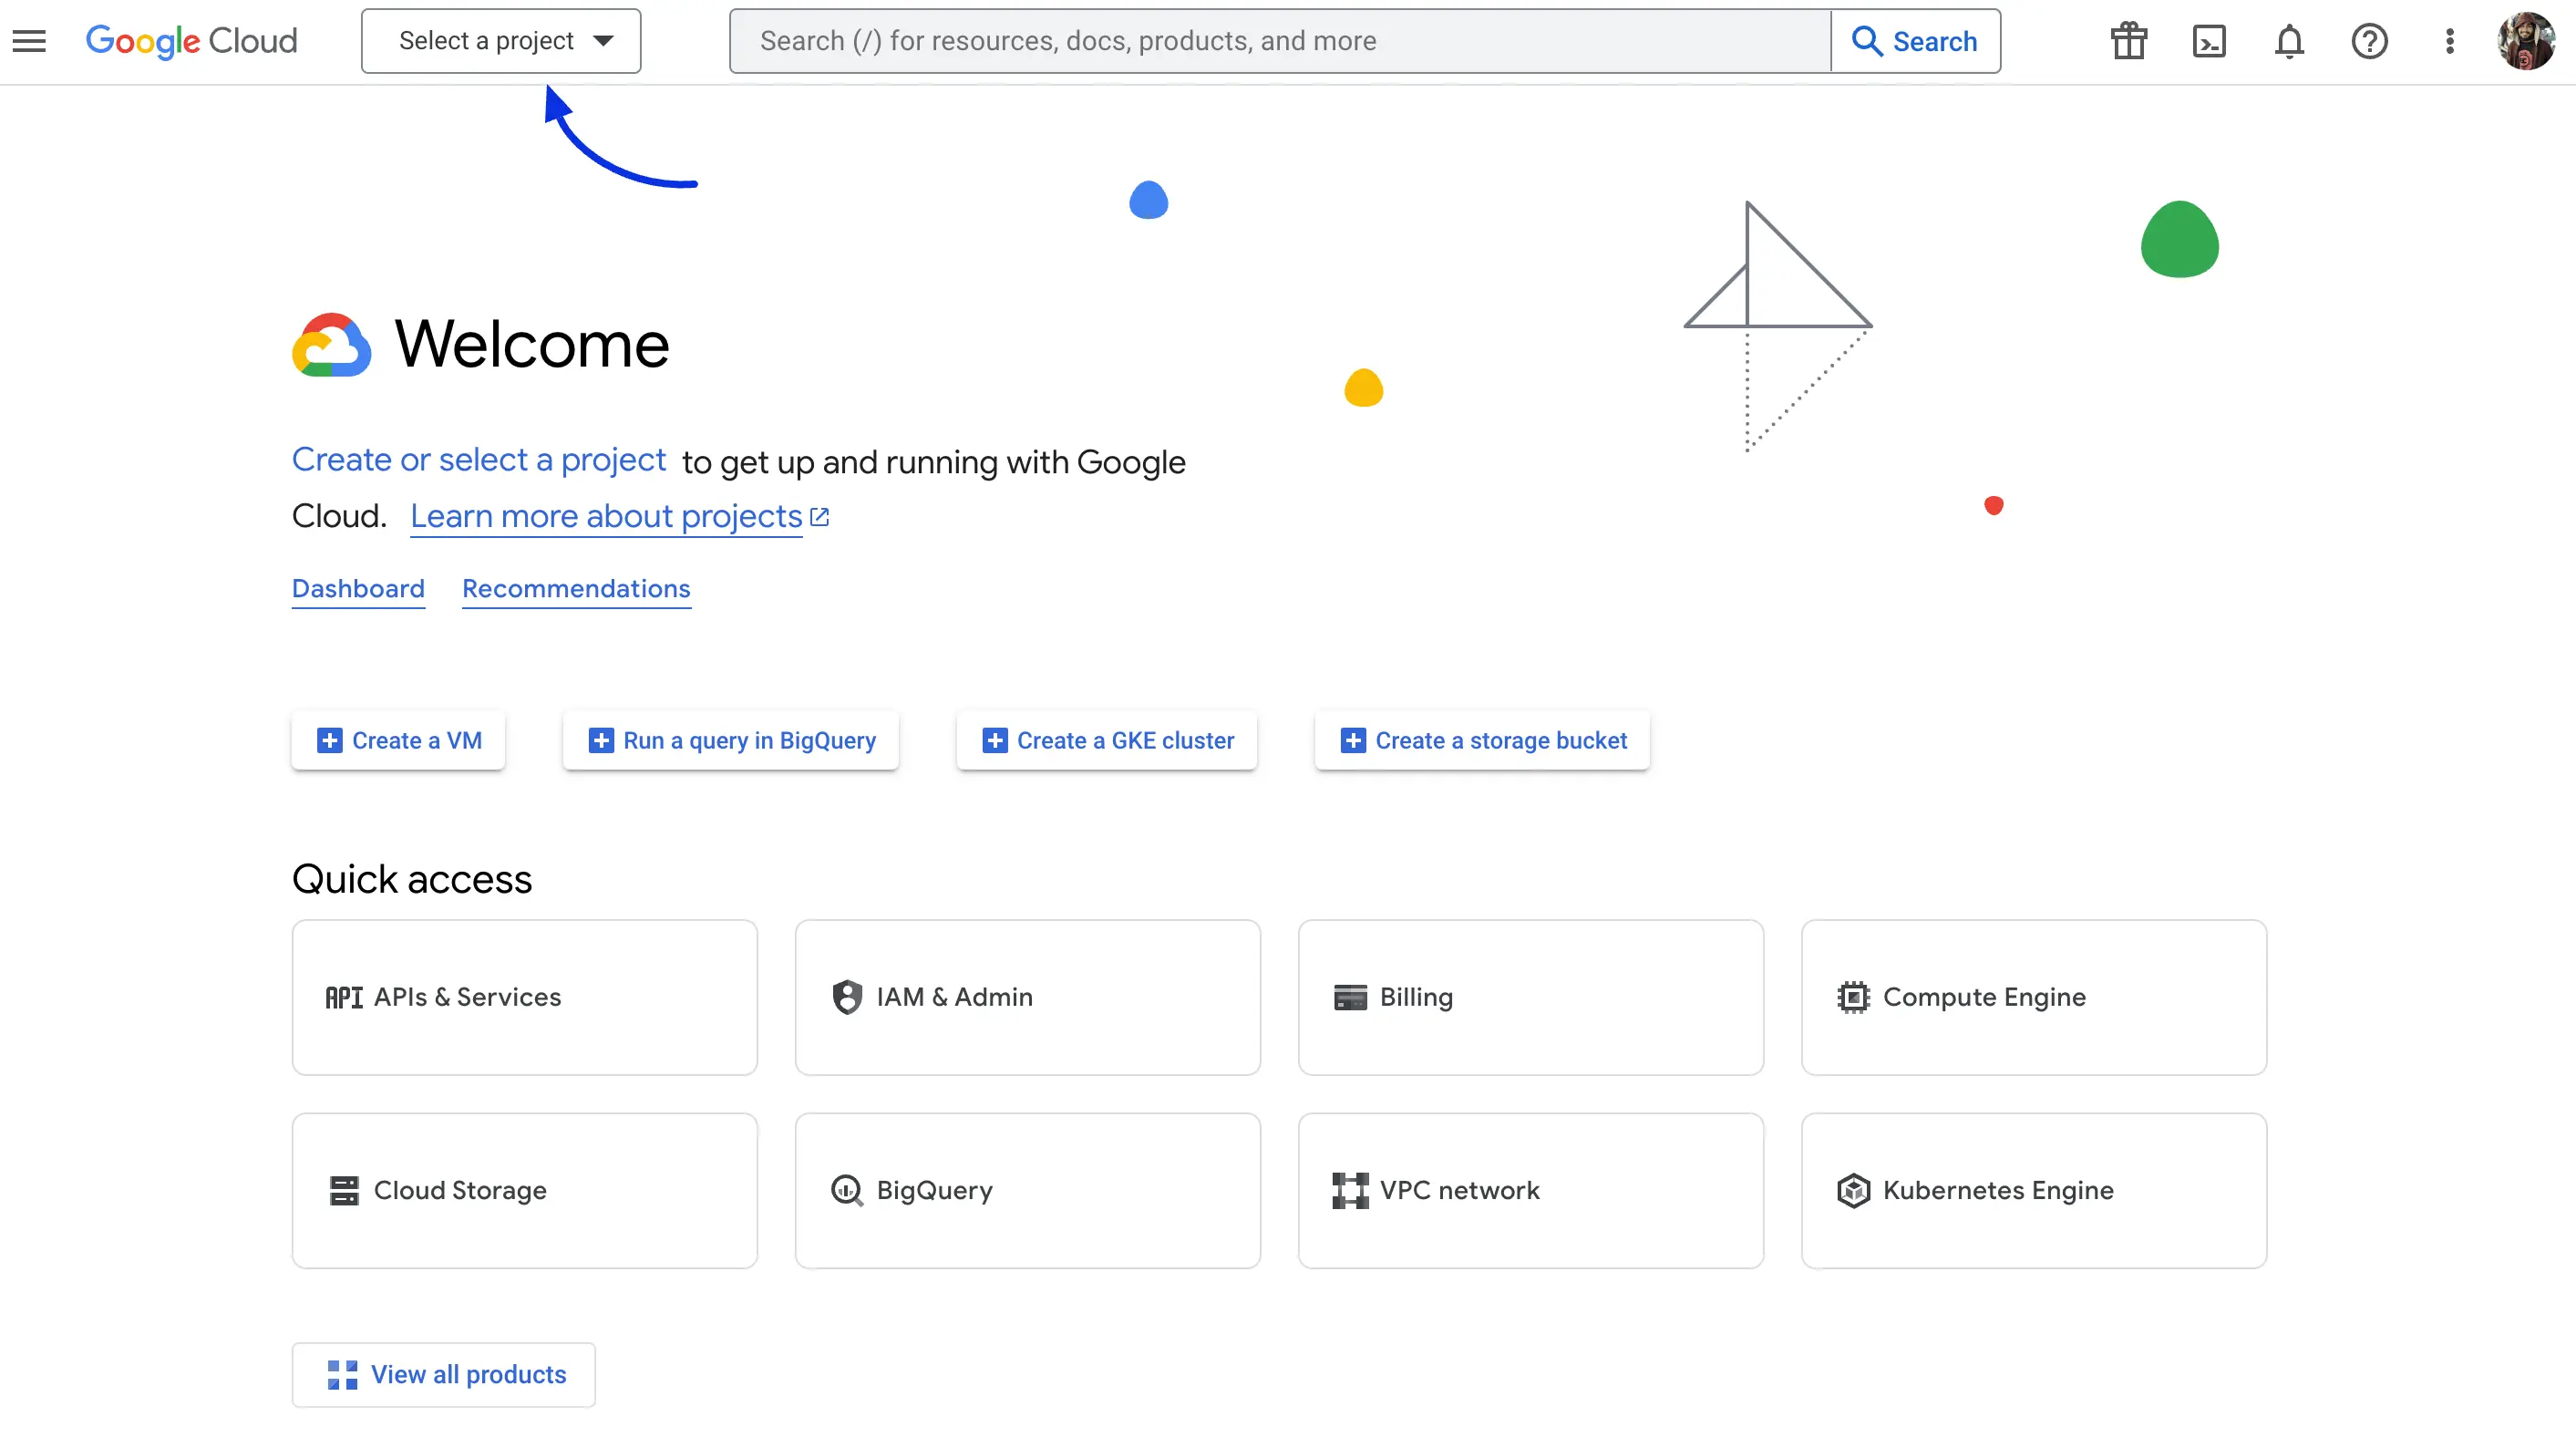
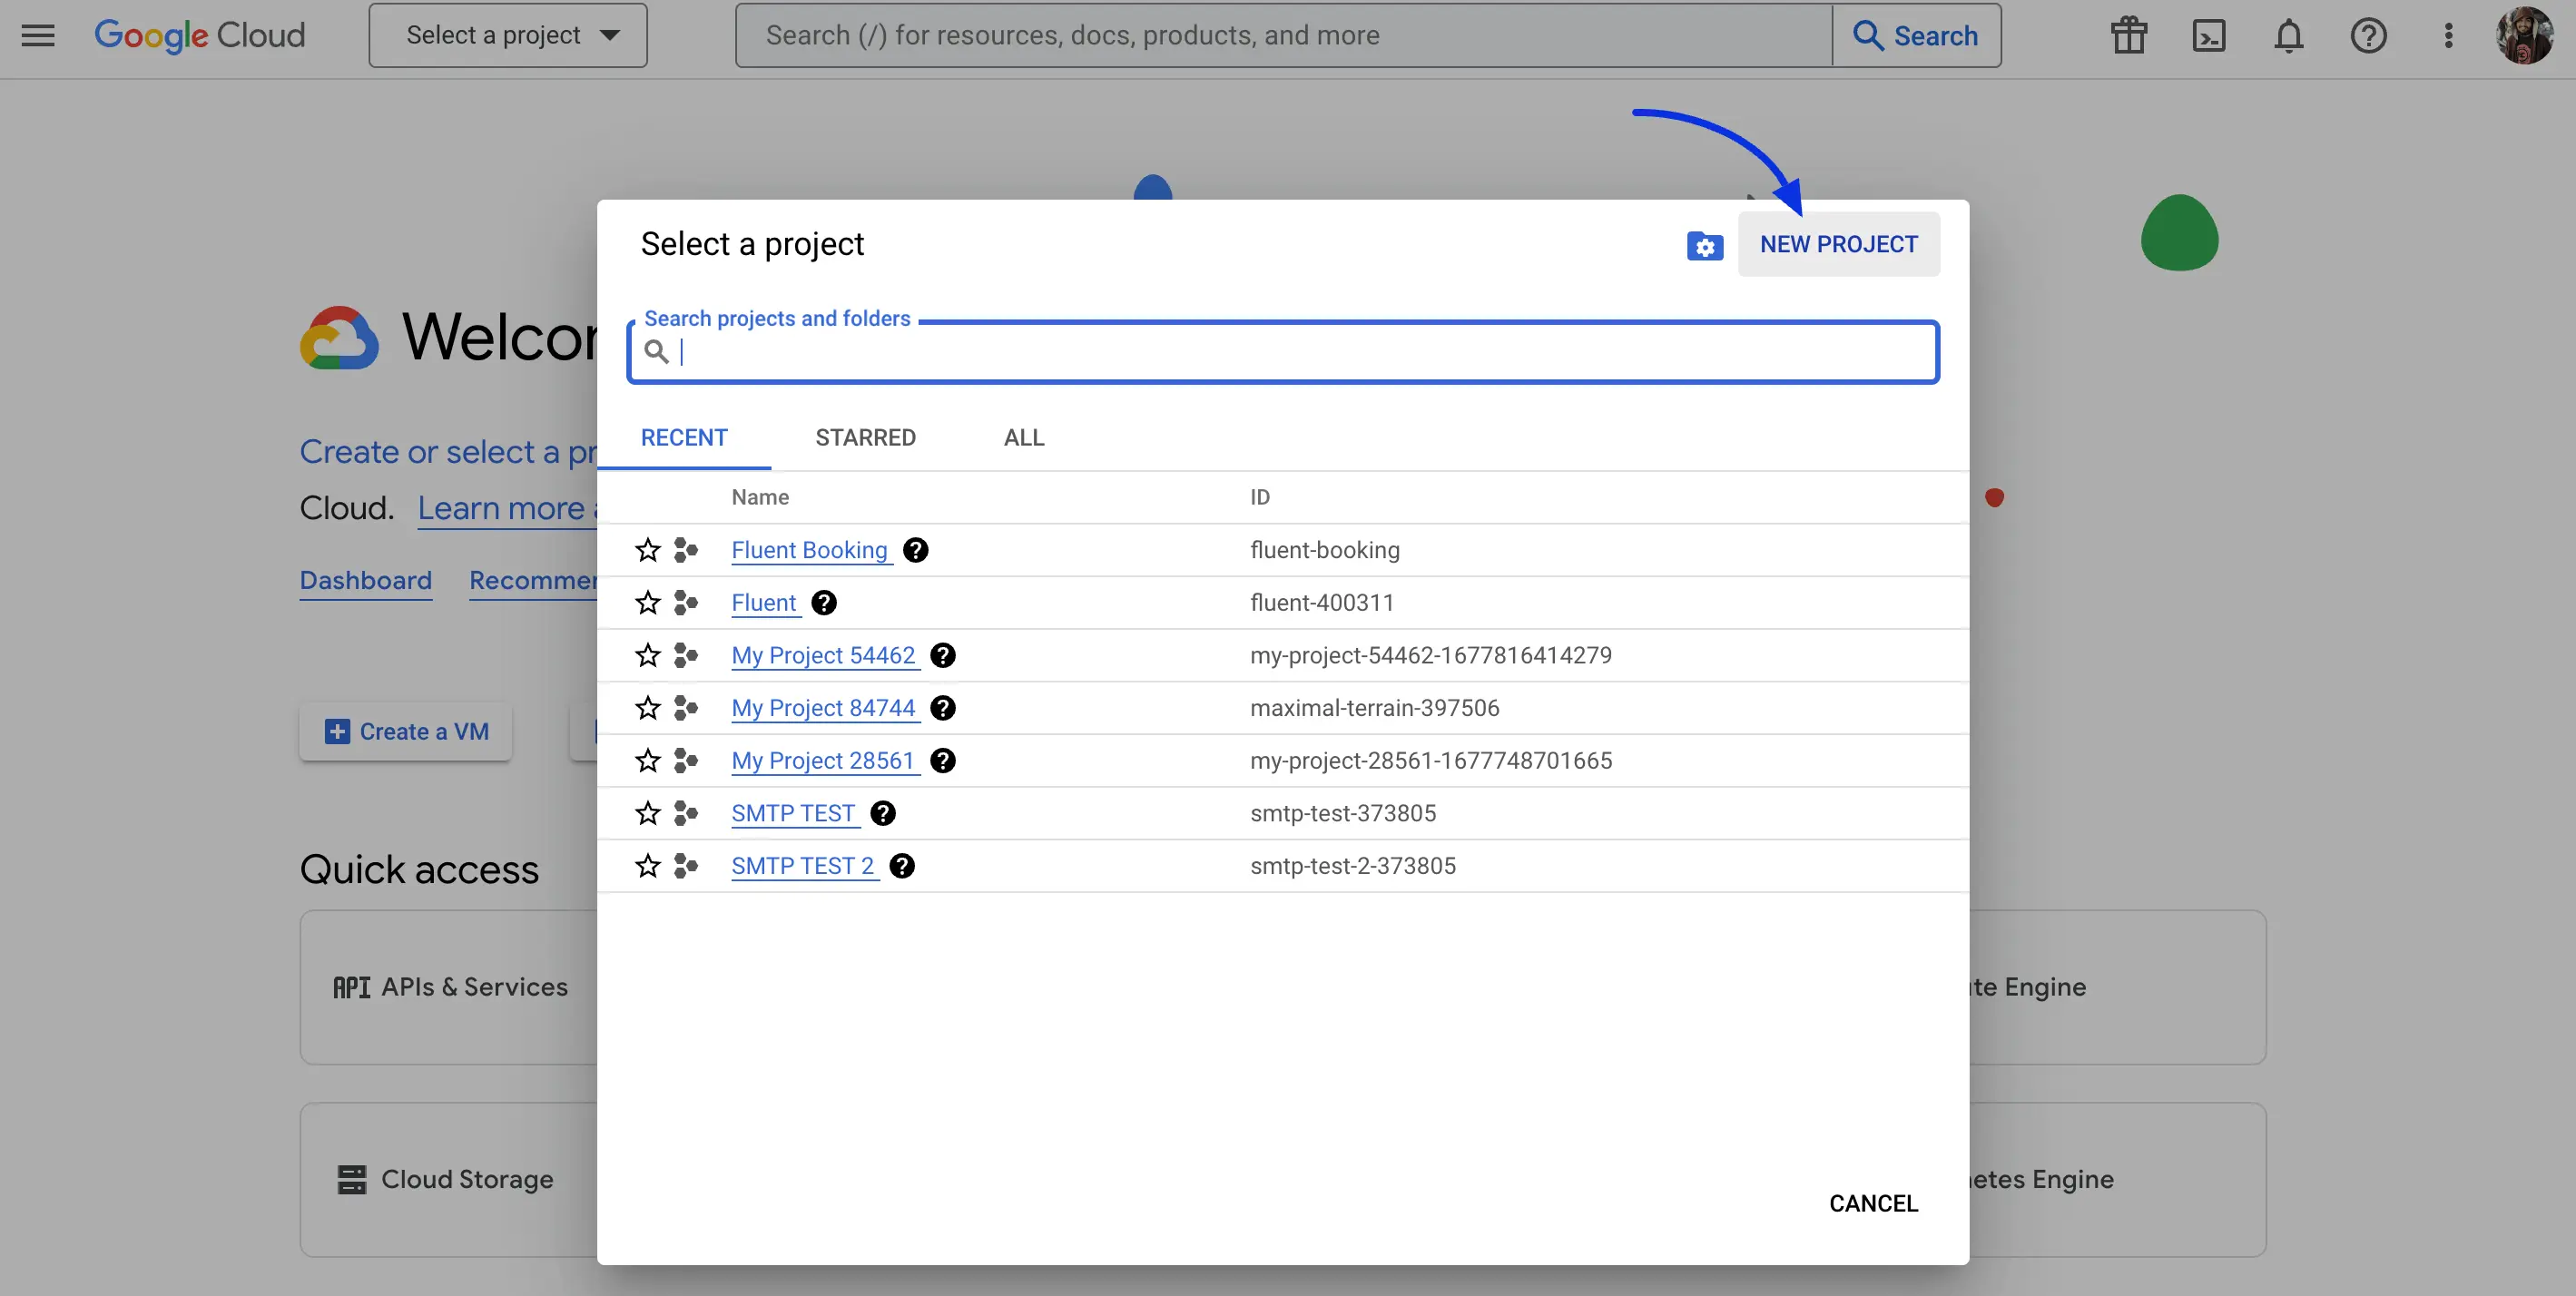
First, go to the Google Cloud Console and here you have to select a project. You can create a new project too.
For creating a new project click on the New Project button here.
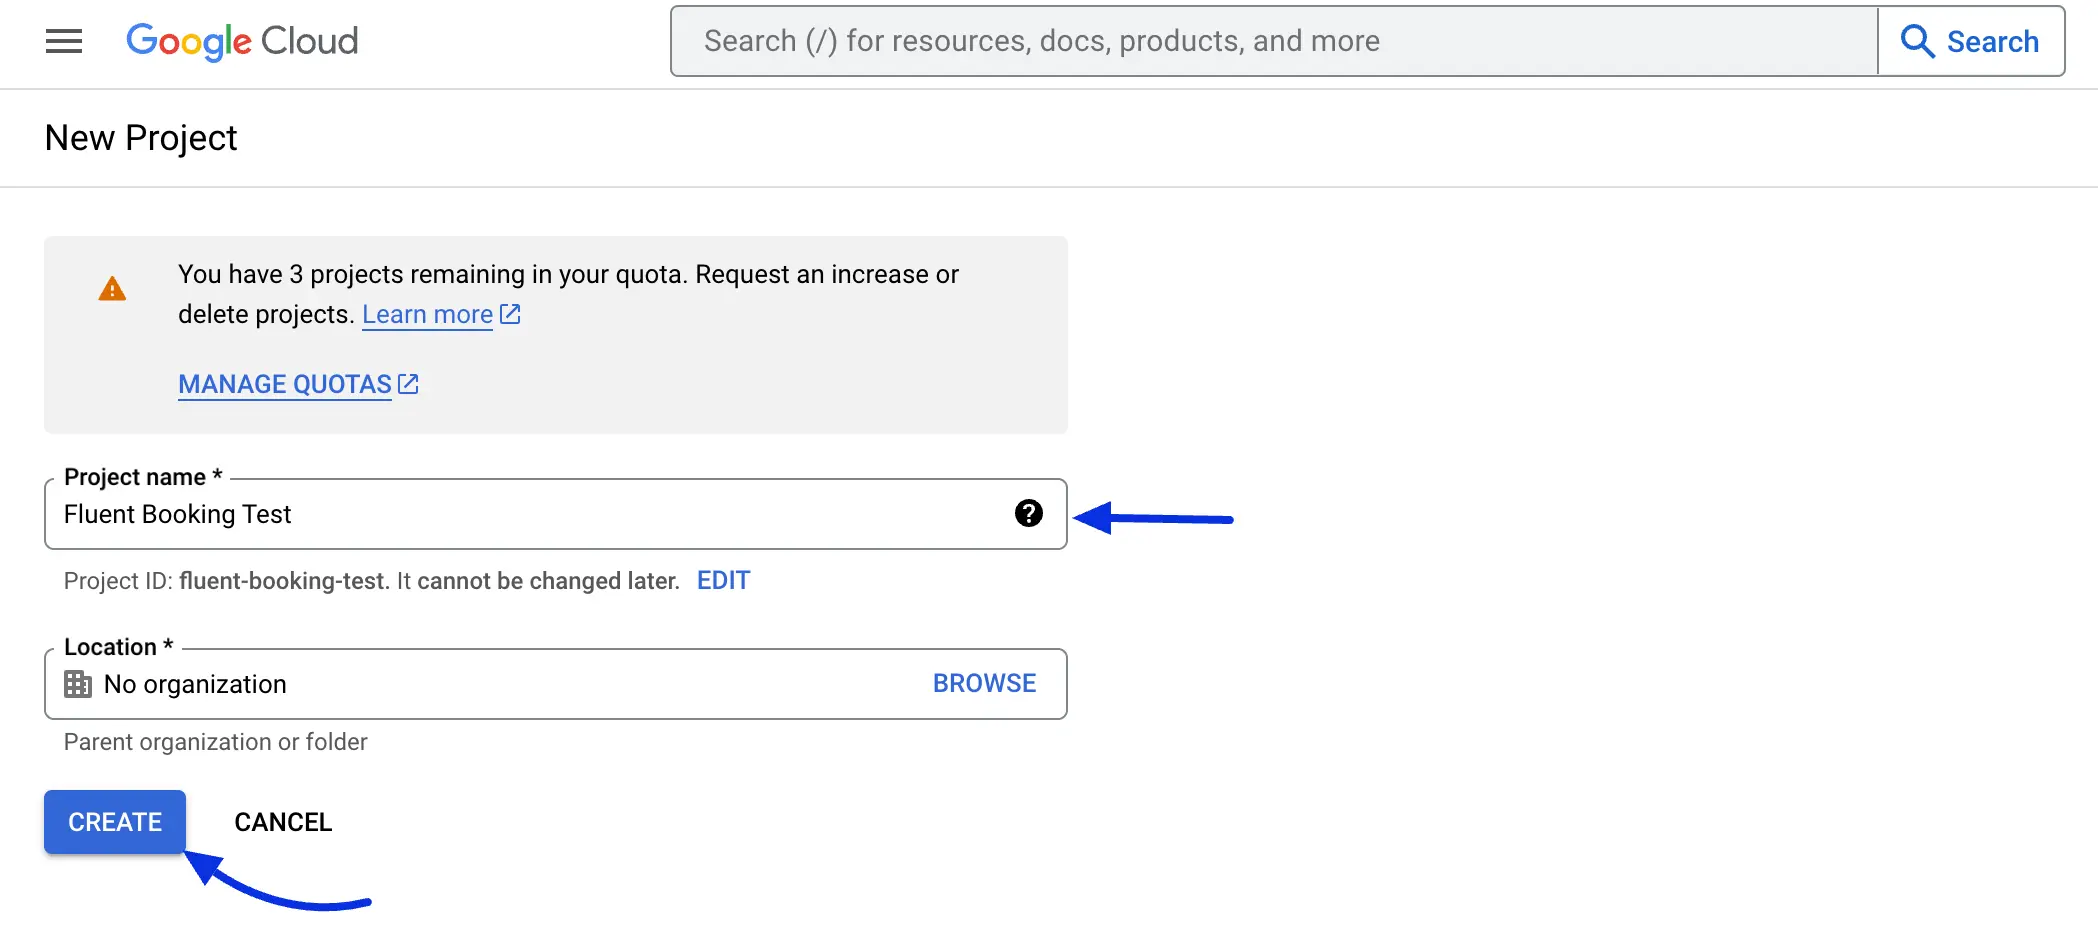
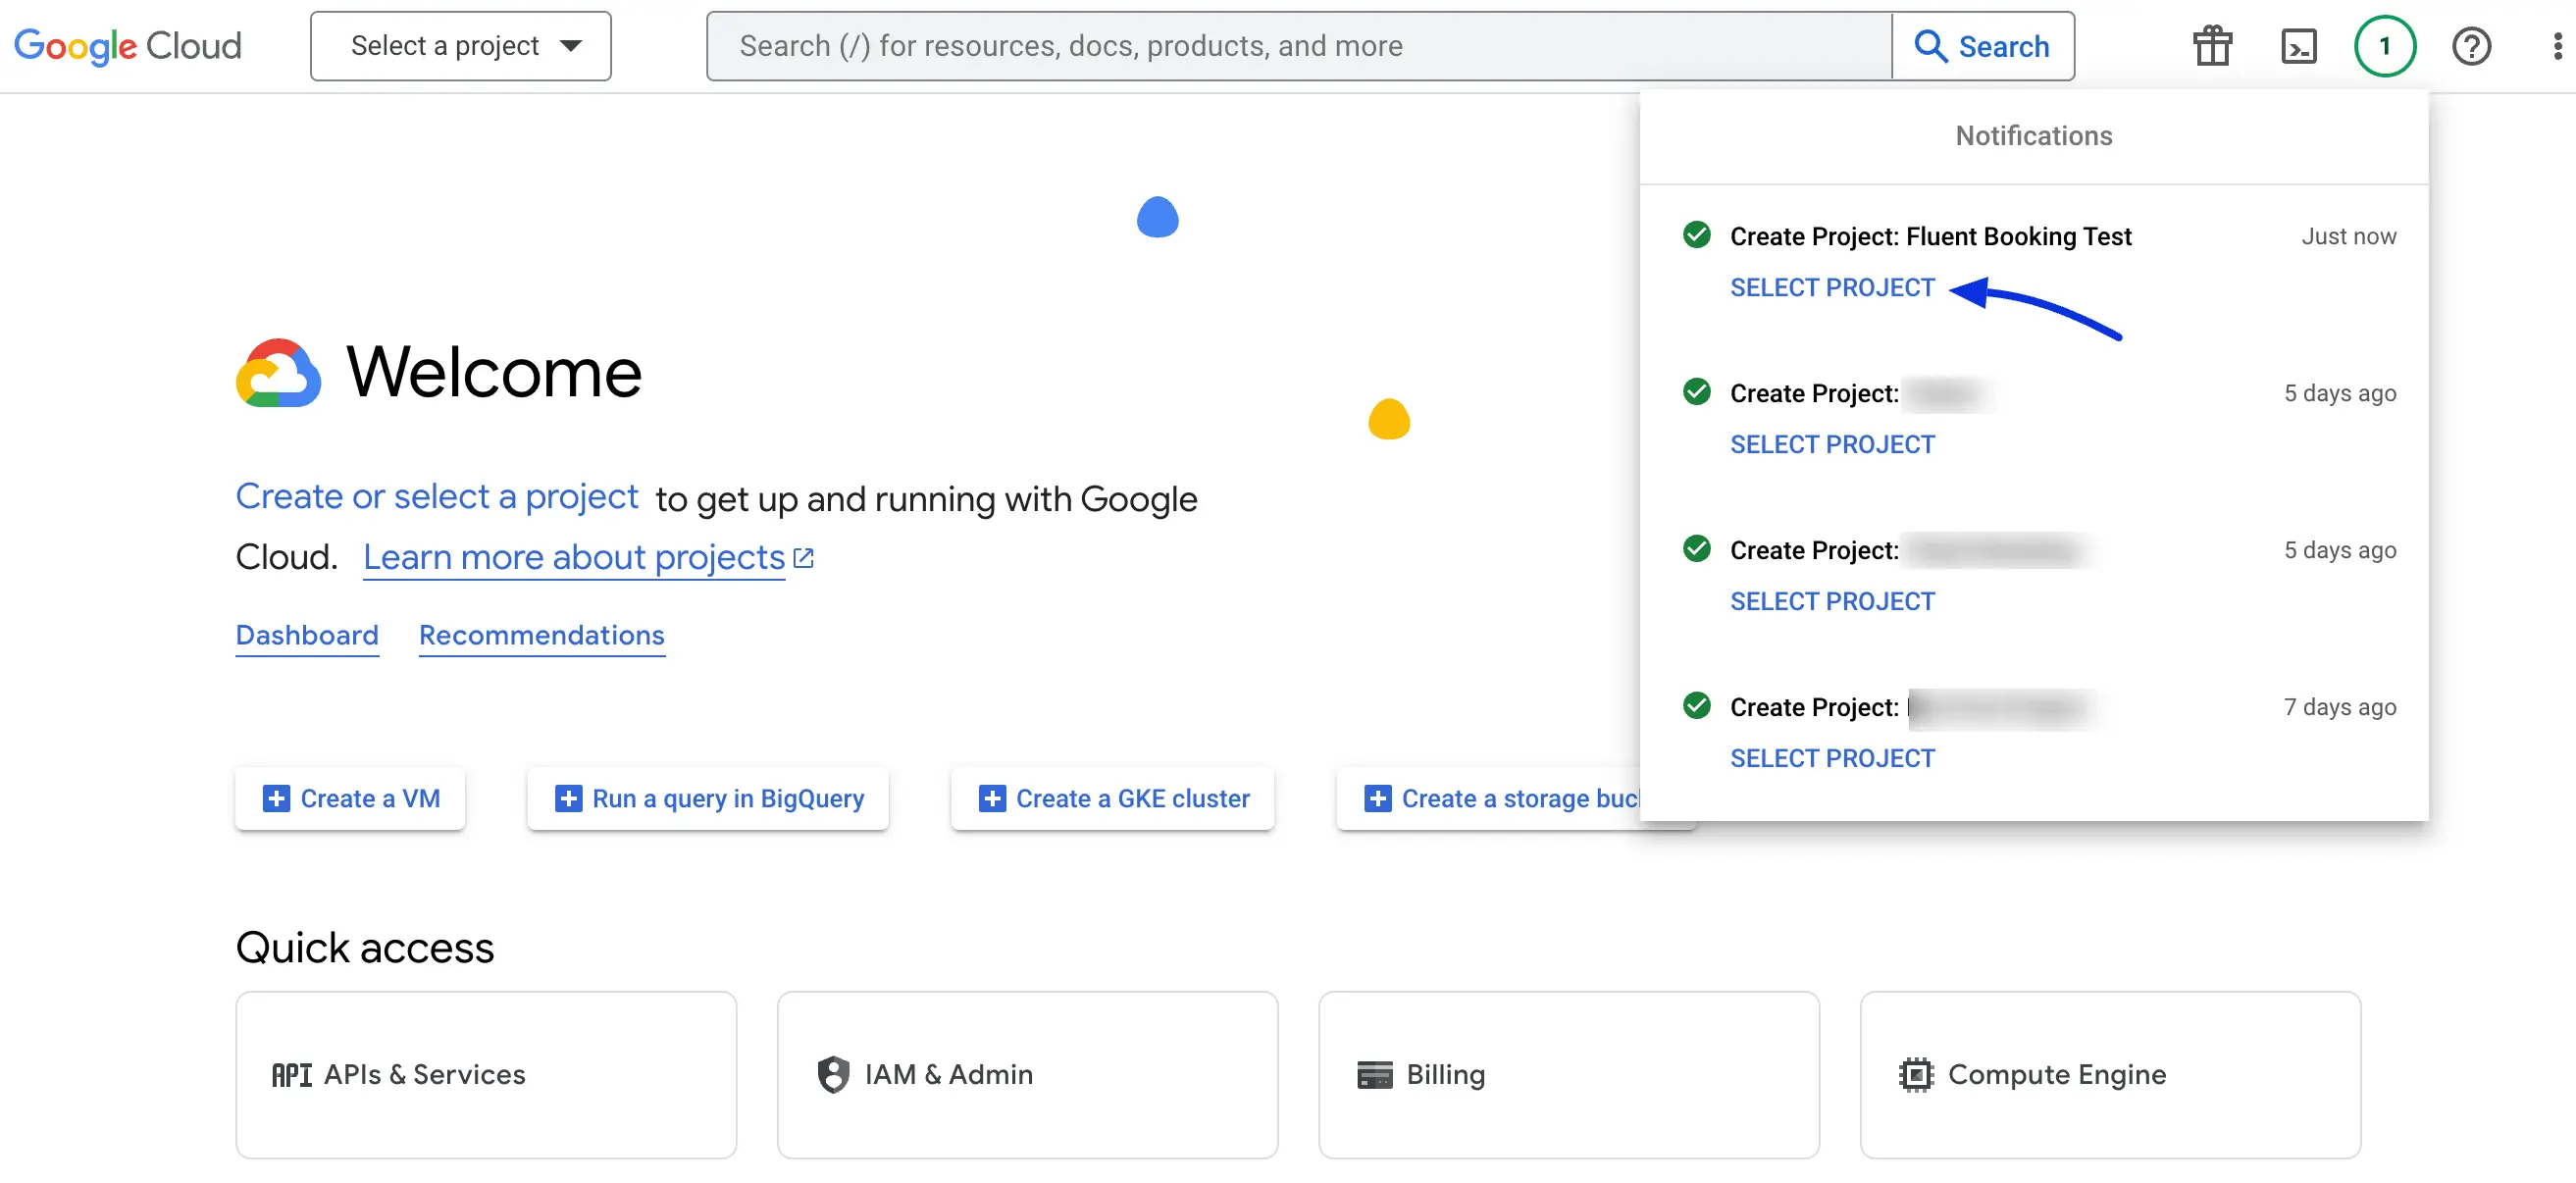
Give a name to your project and press the Create button.
You will see a project create confirmation on your notification panel. Now select your project here.
Configuring 0Auth Consent
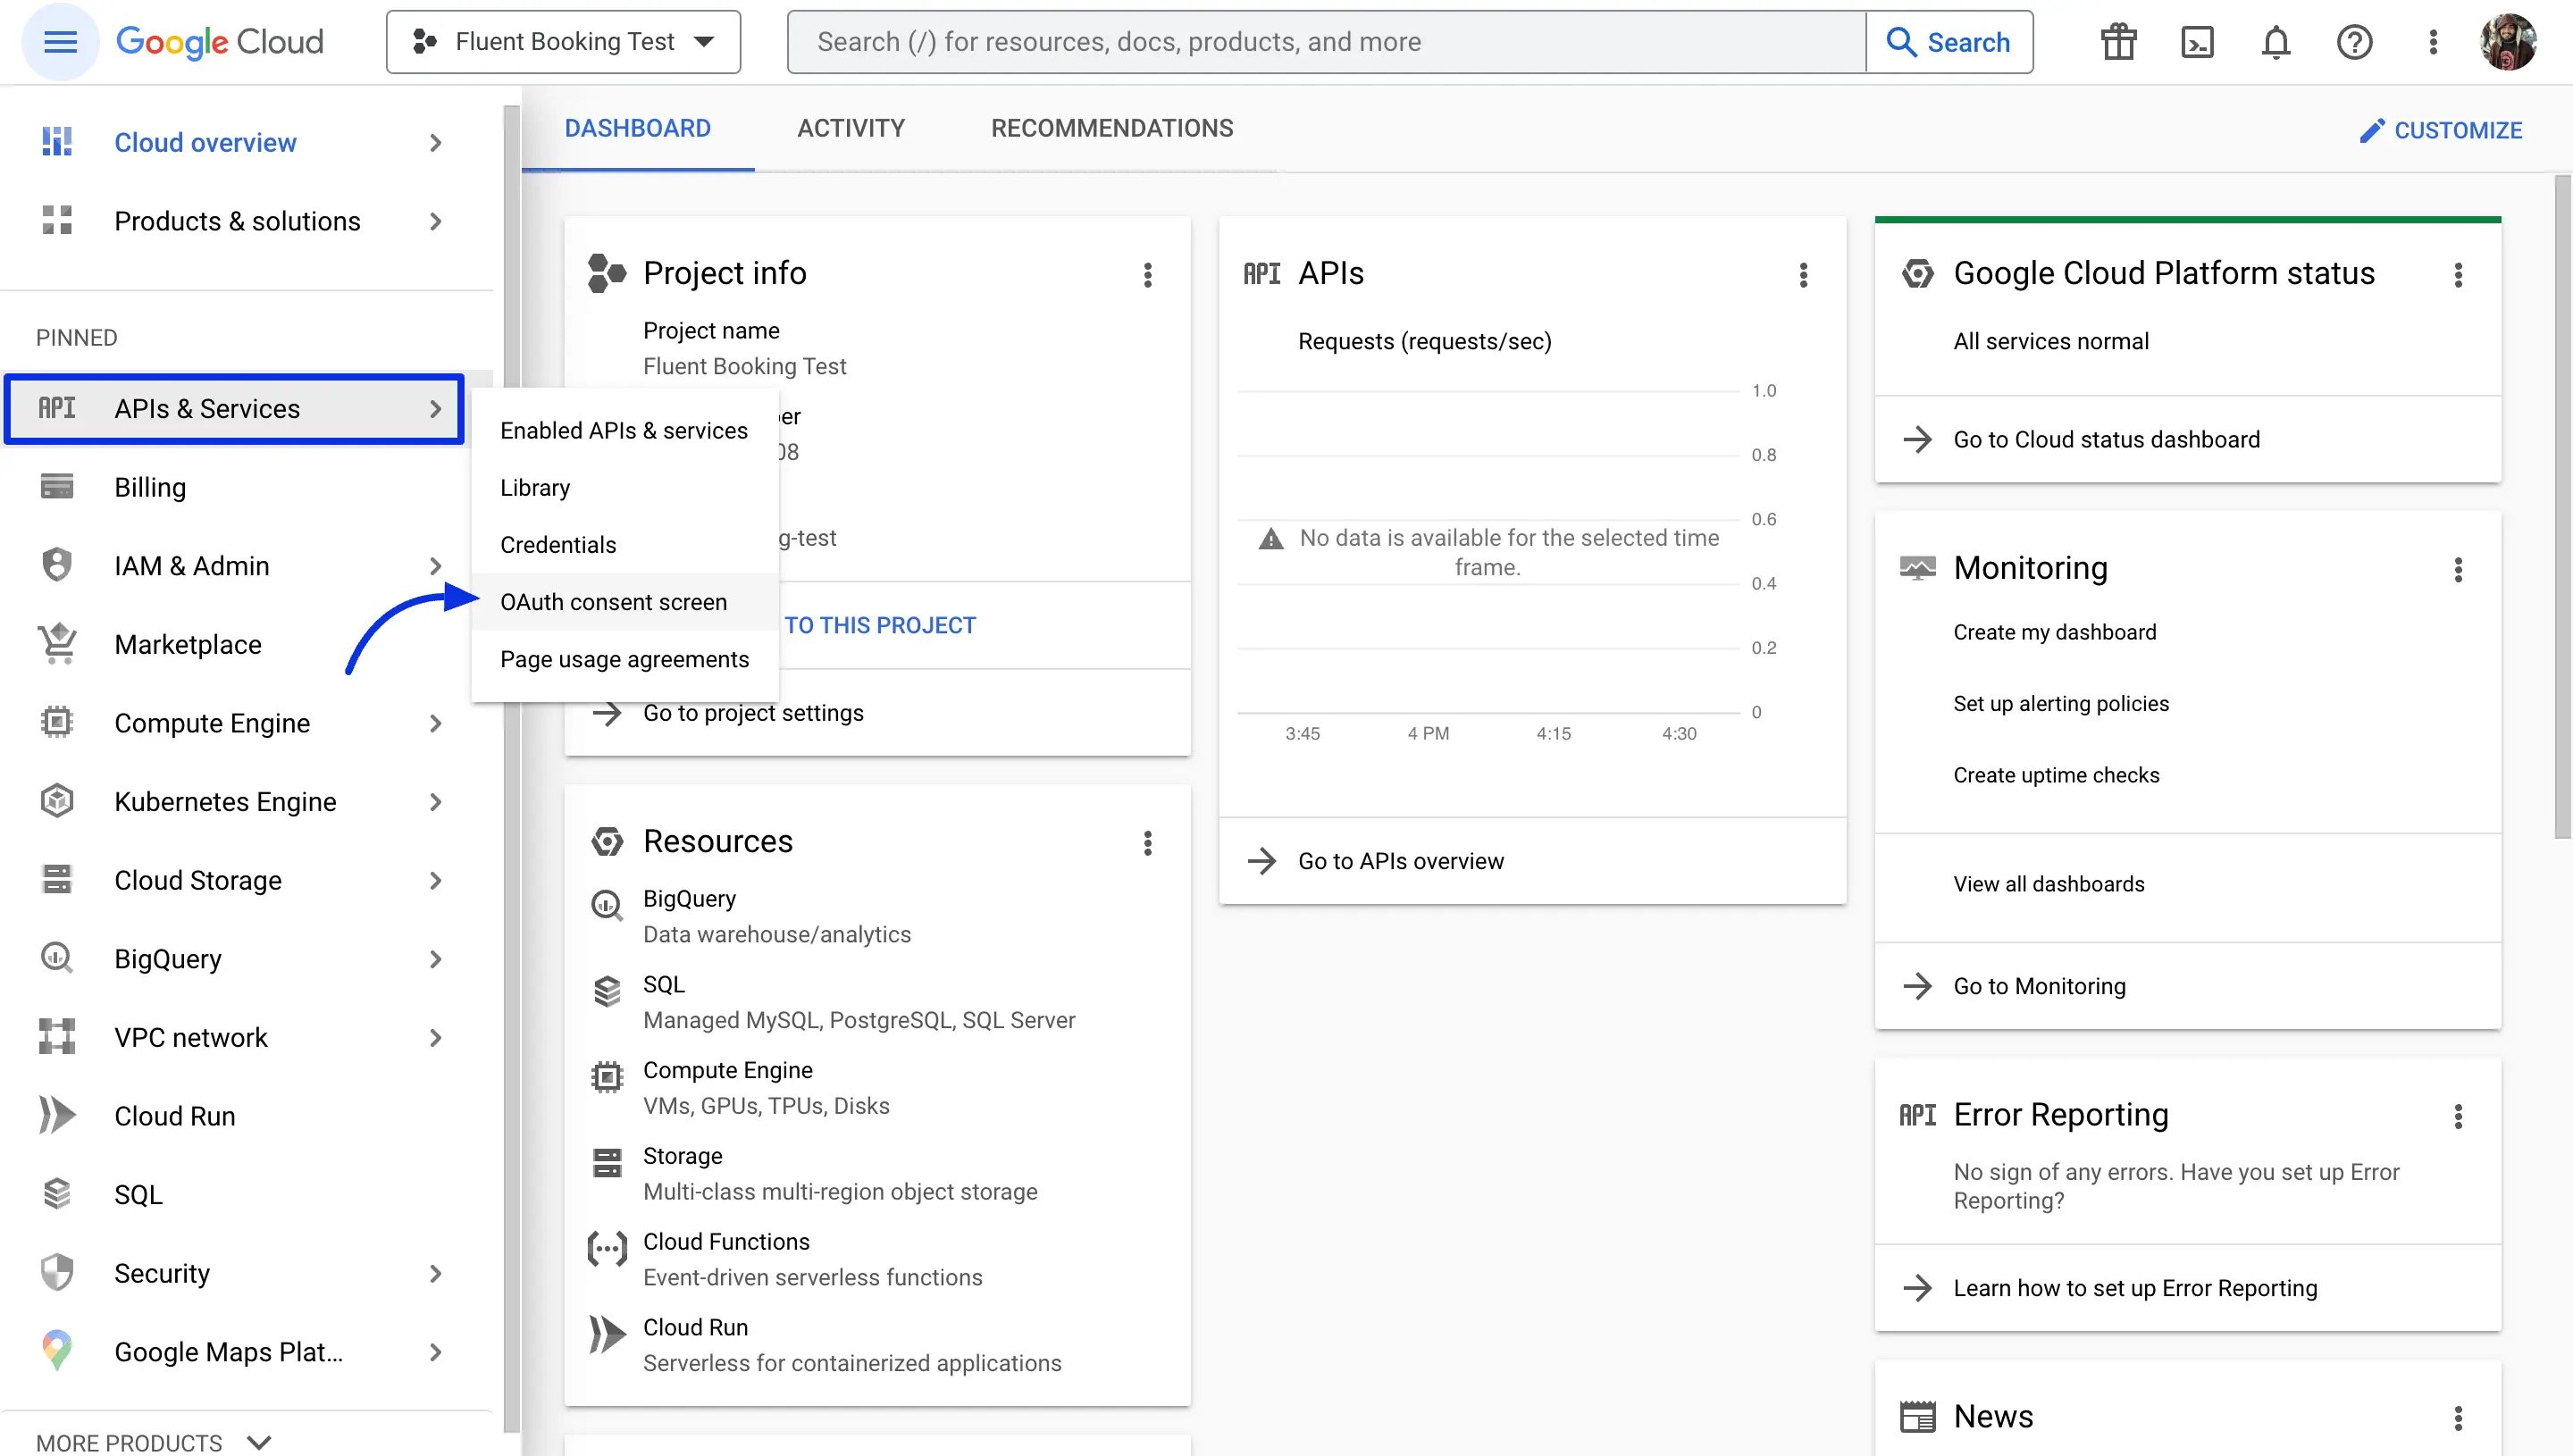
Go to the APIs & Services and select the OAuth consent screen
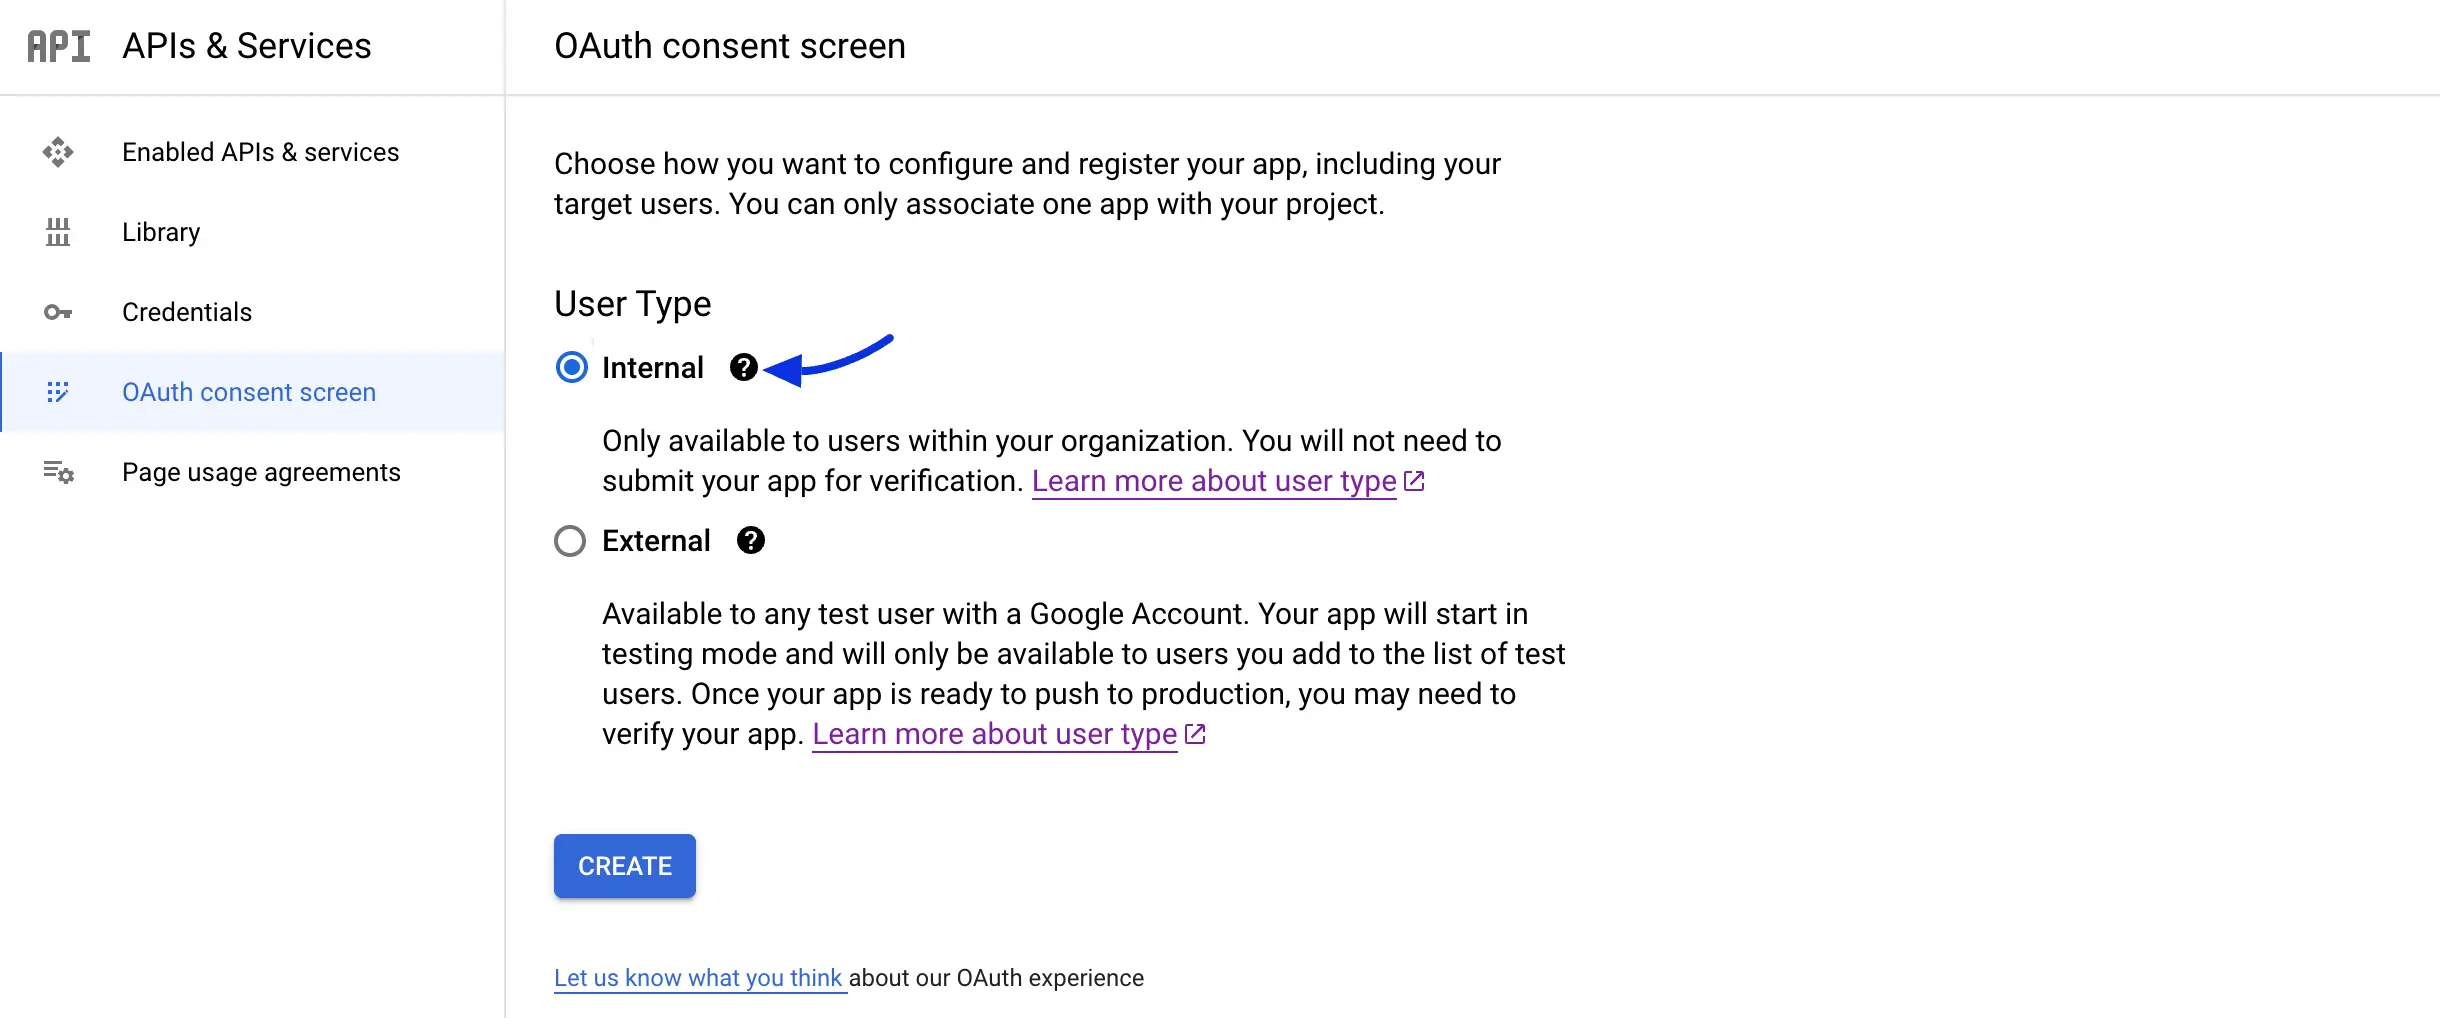
Here you have to select the Internal user type and click on the Create button.
NOTE
If you're not using Google Workspace, select External User. Please be aware that the External user type app may break integration with FluentBooking in one to two weeks.
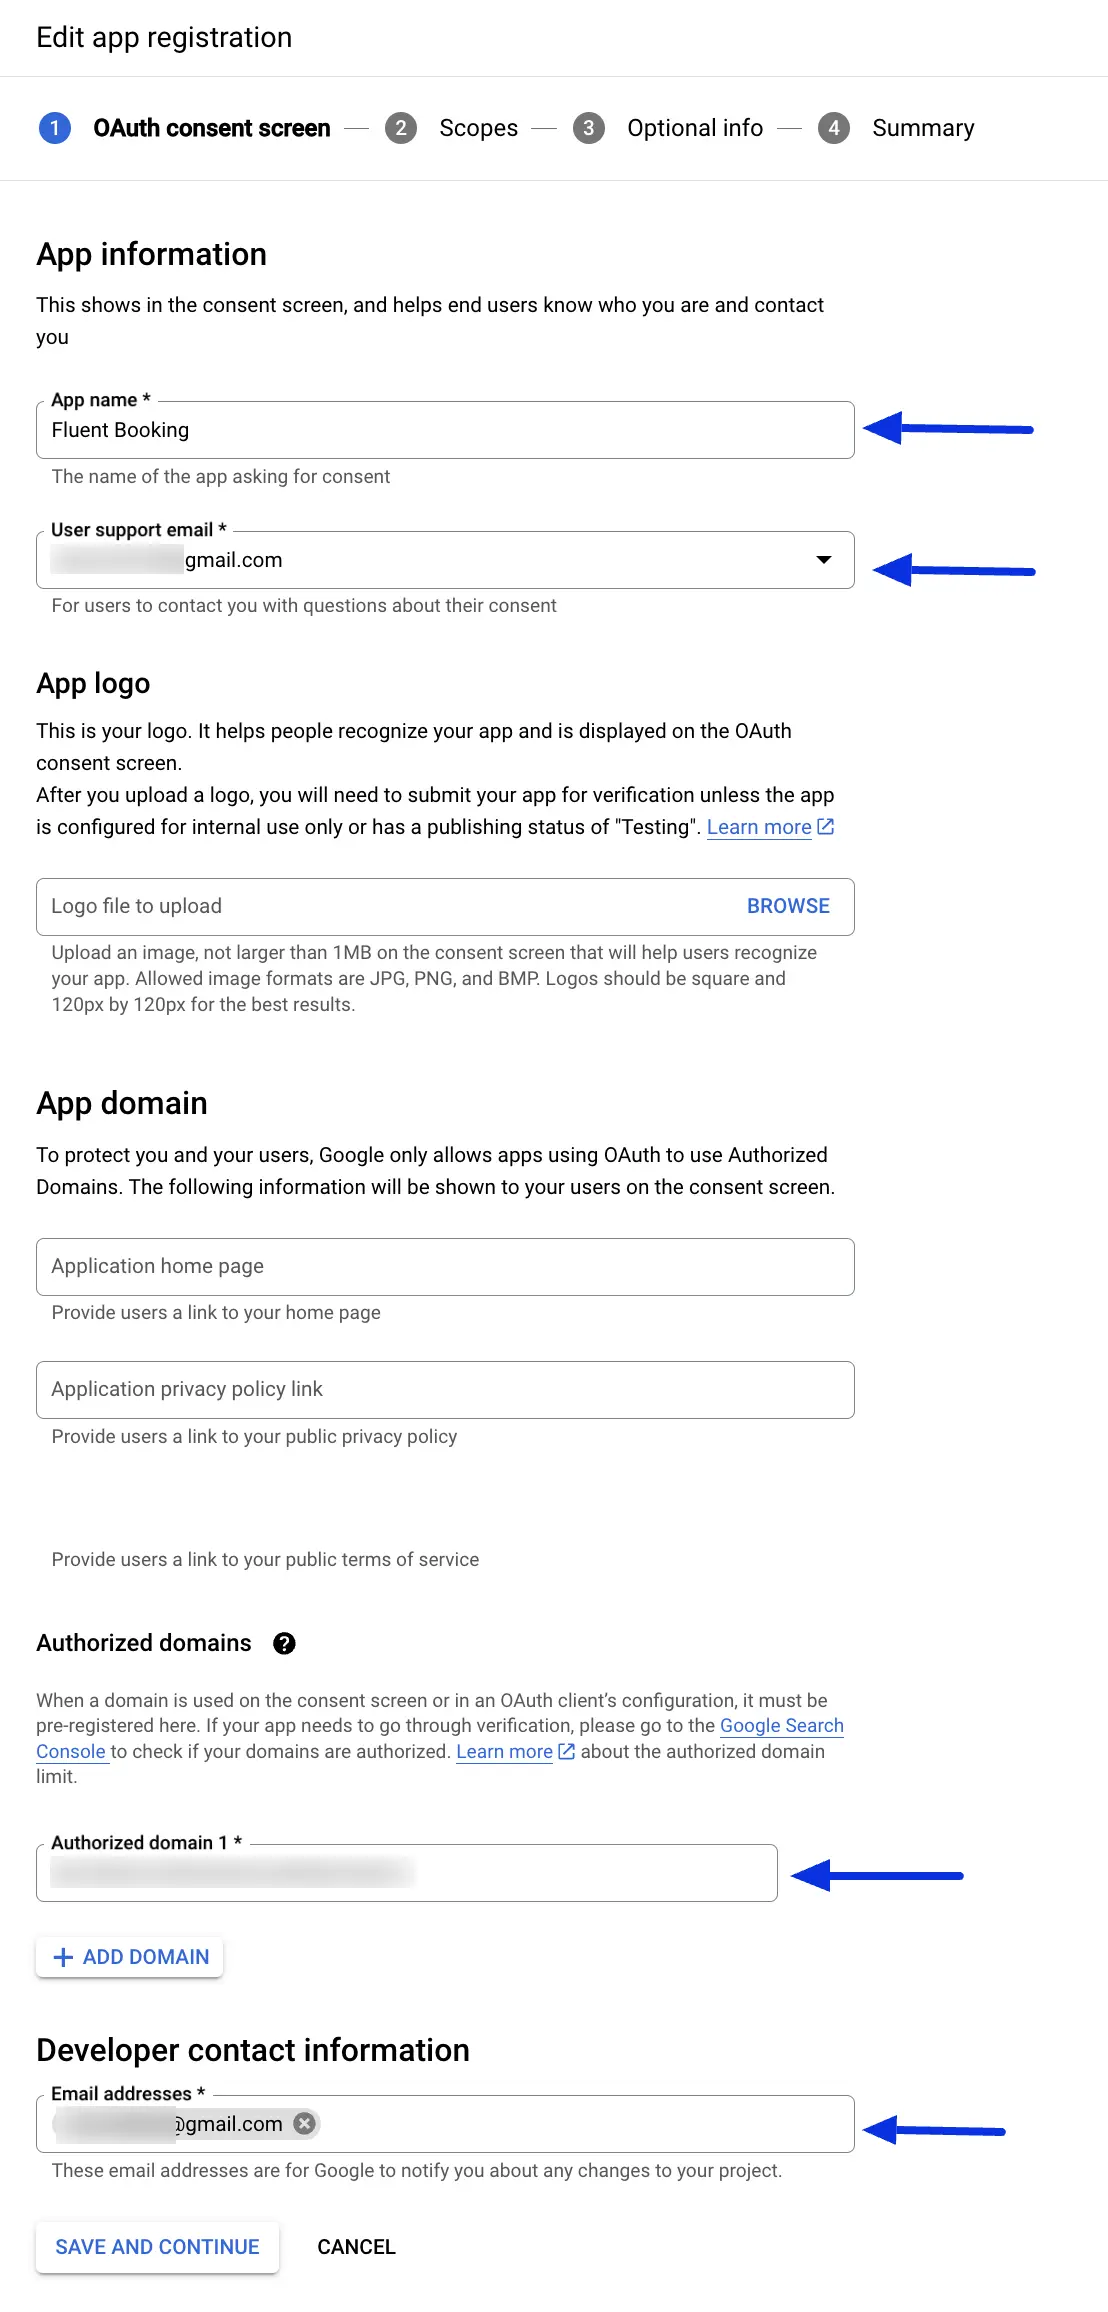
Here you will see four steps to complete the OAuth consent screen. In the first step, you have to give the App name, User Support Email, Authorized domain, and Developer Contact information then click on the Save & Continue button.
You can simply Save and Continue the other three steps.
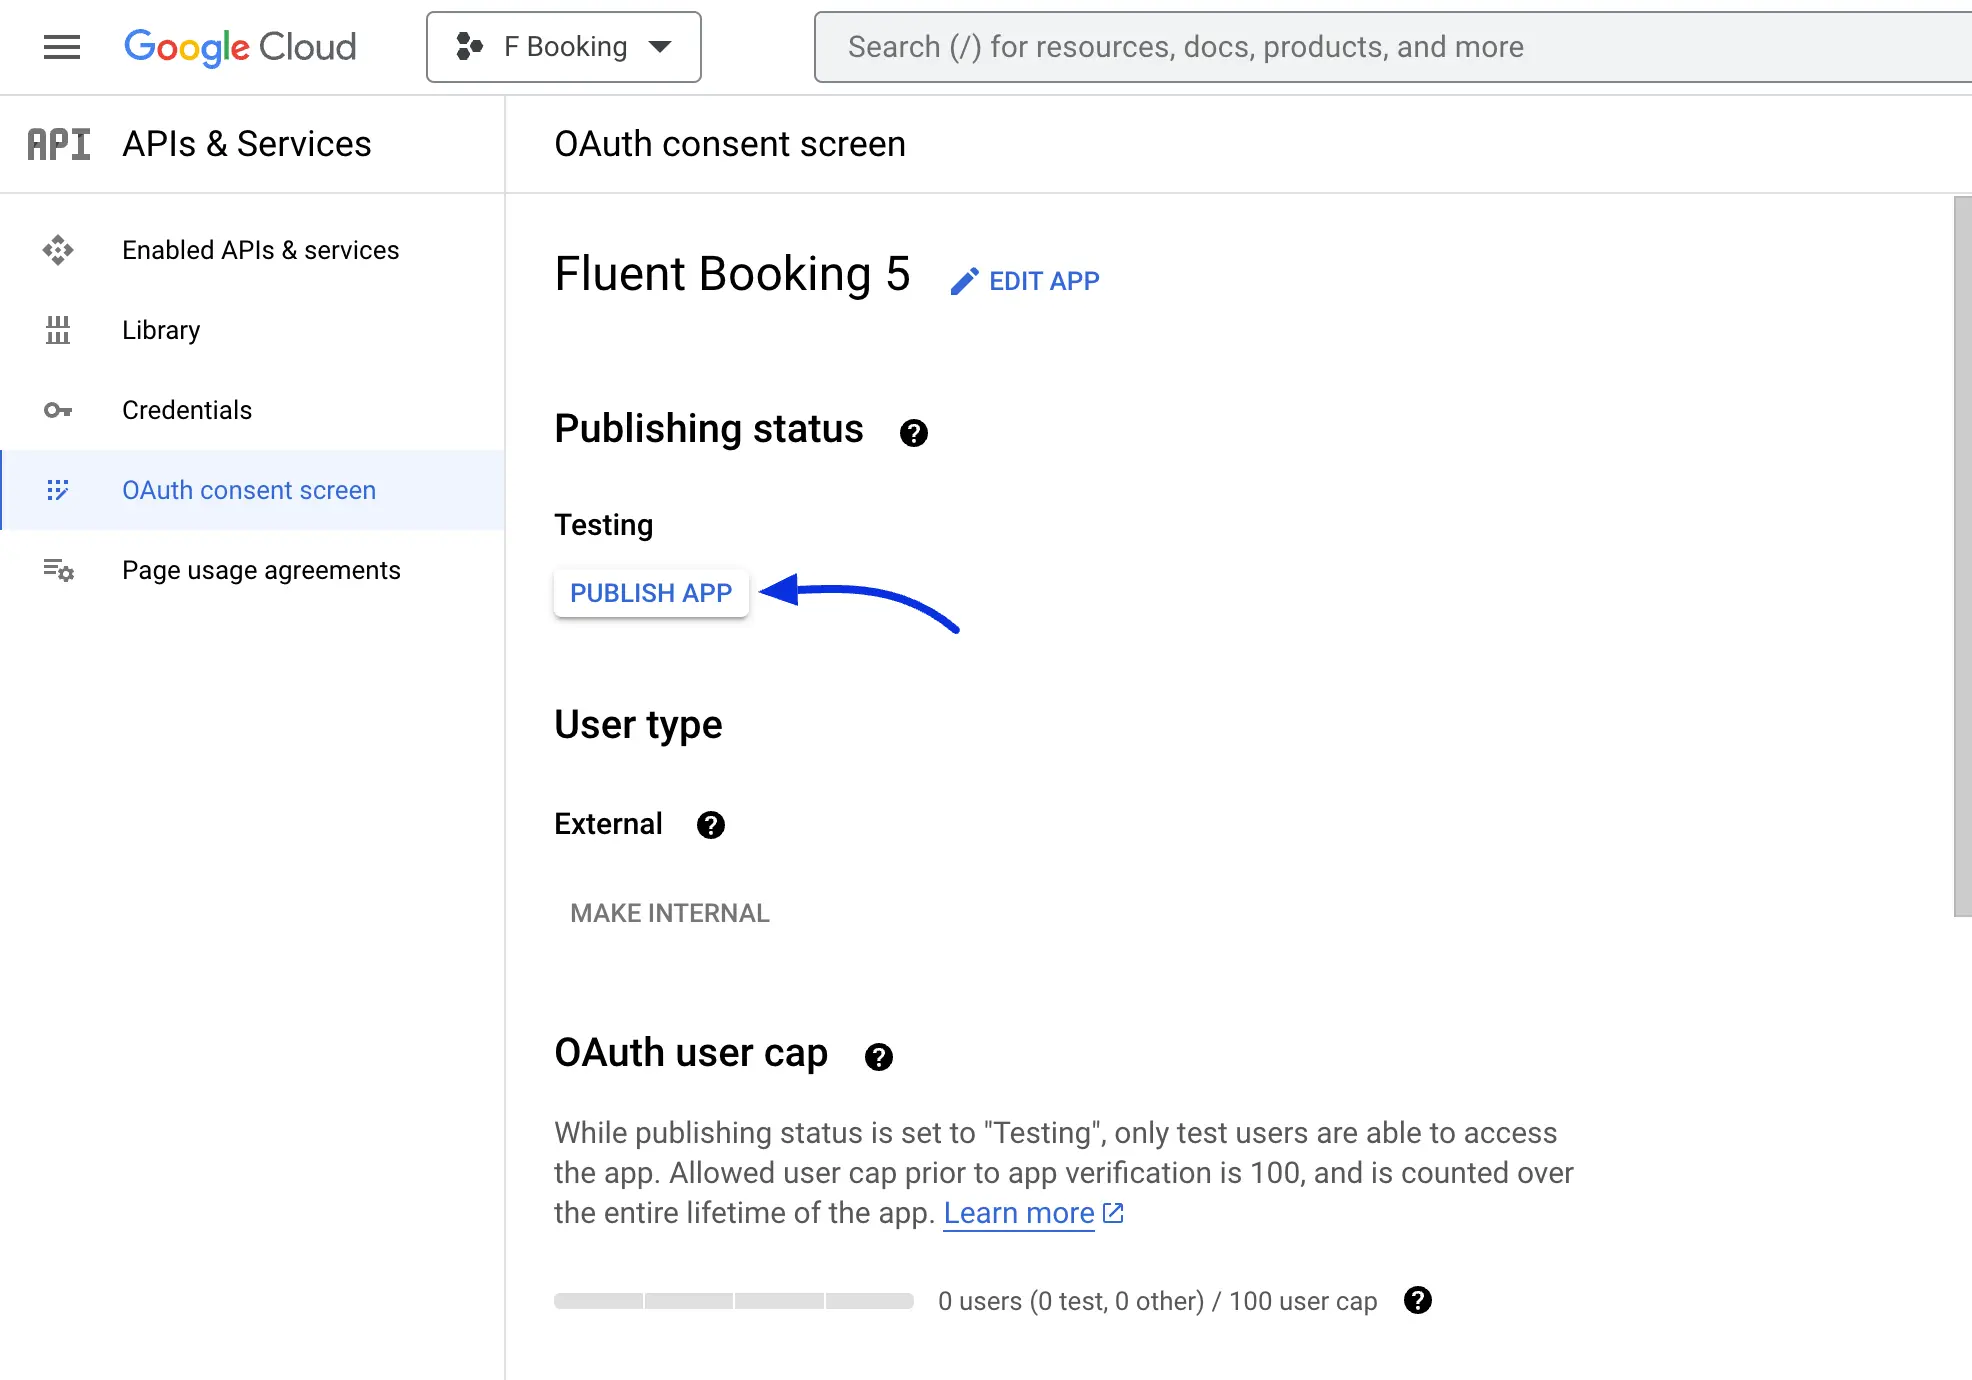
After completing the above steps you have to publish the app. Just click on the Publish App button.
Enabling Google Calendar API
Now go to the Library and enable the Google Calendar API.
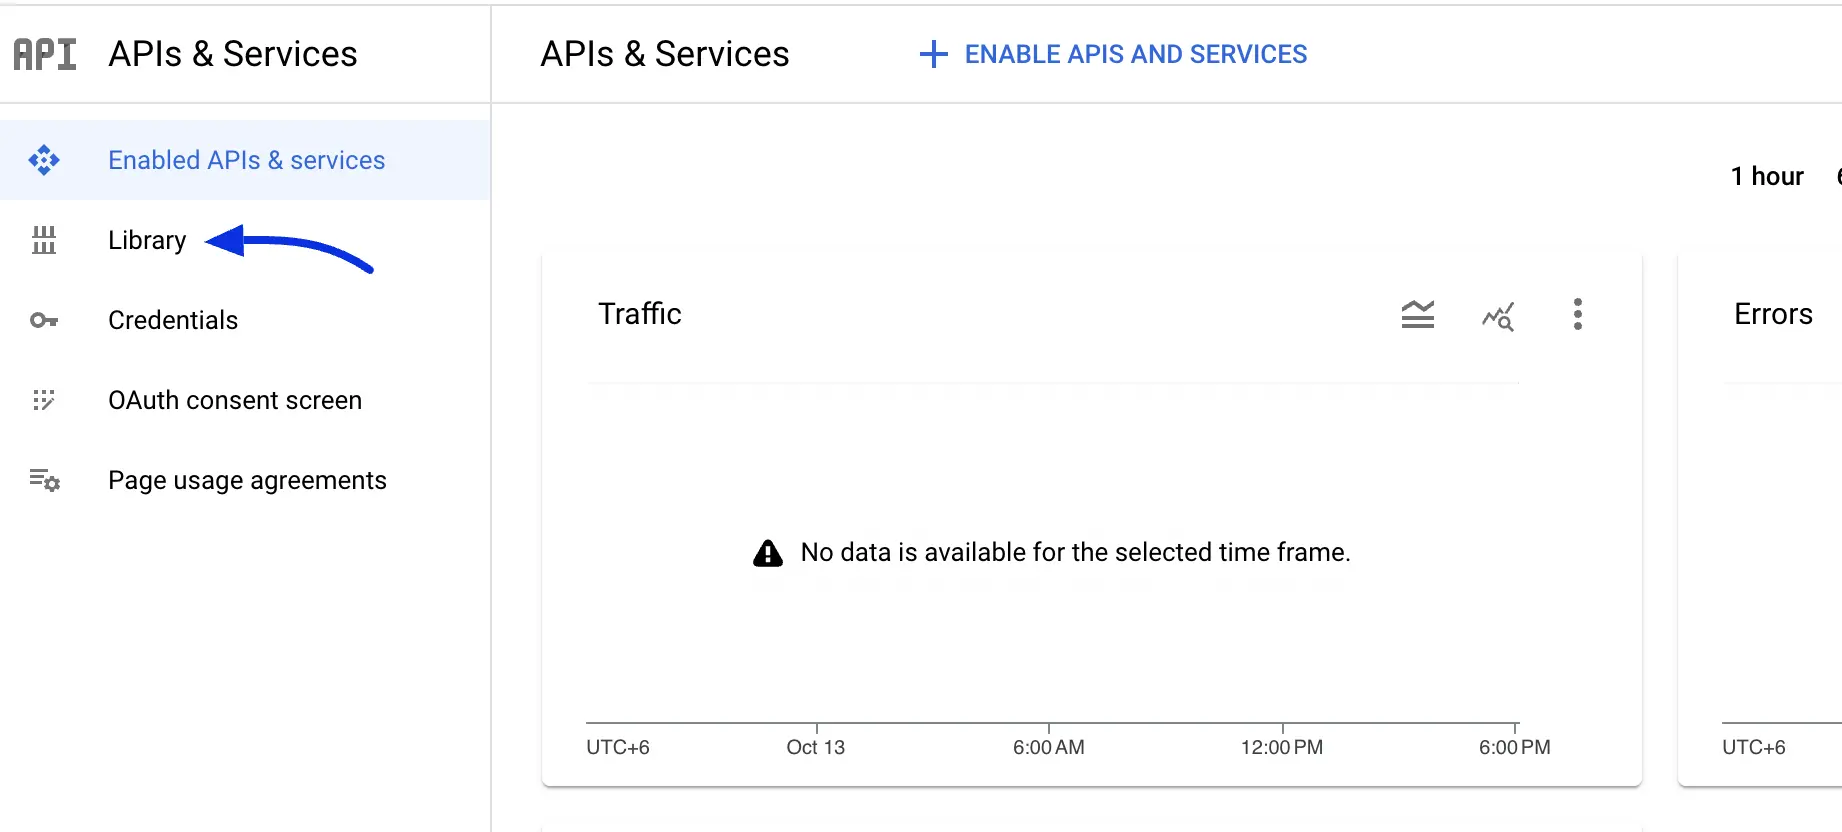
Here search for the Google Calendar API and simply enable it.
Create Credentials
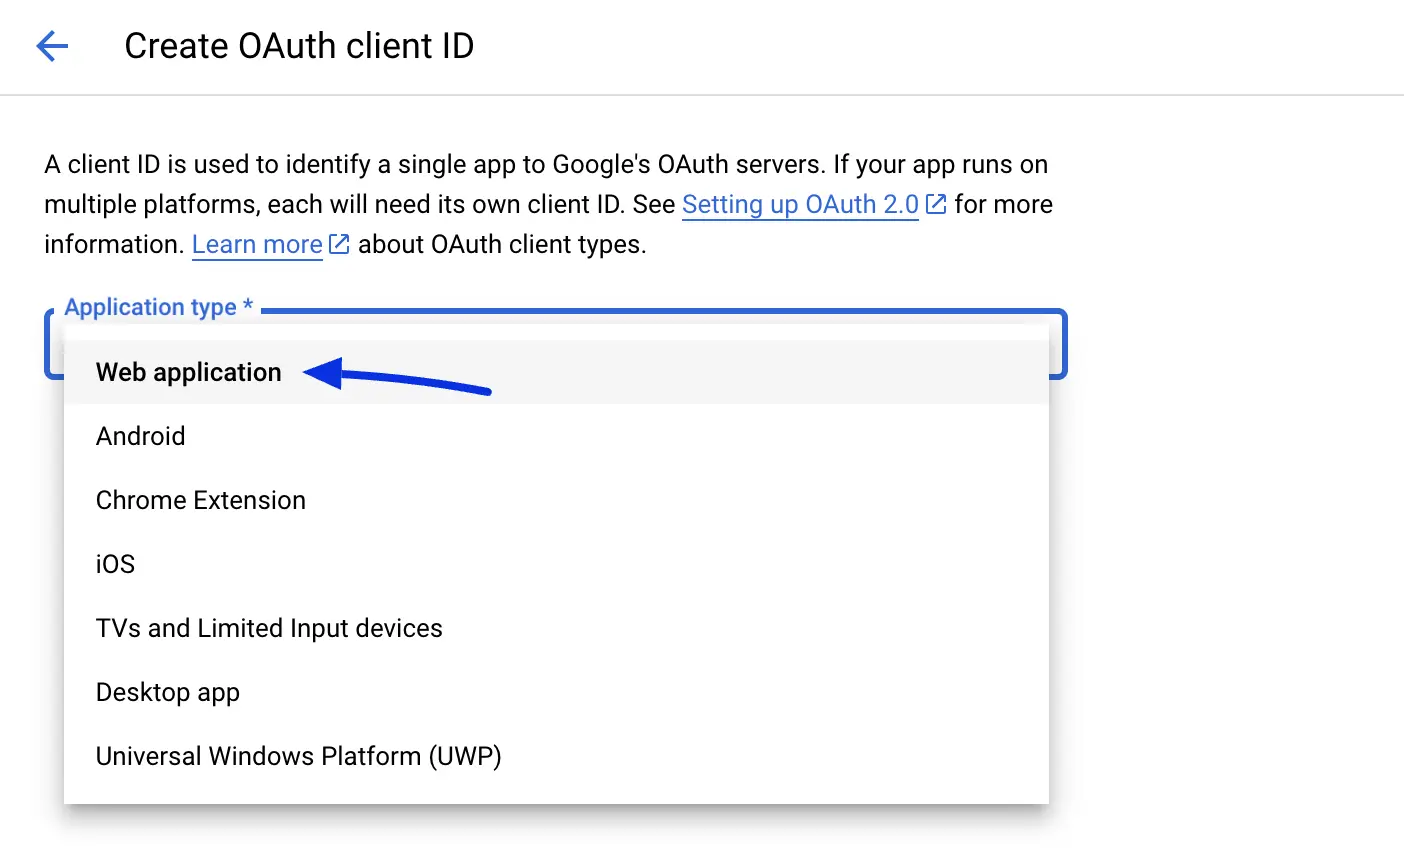
Now go to your project and select Create Credentials > OAuth client ID
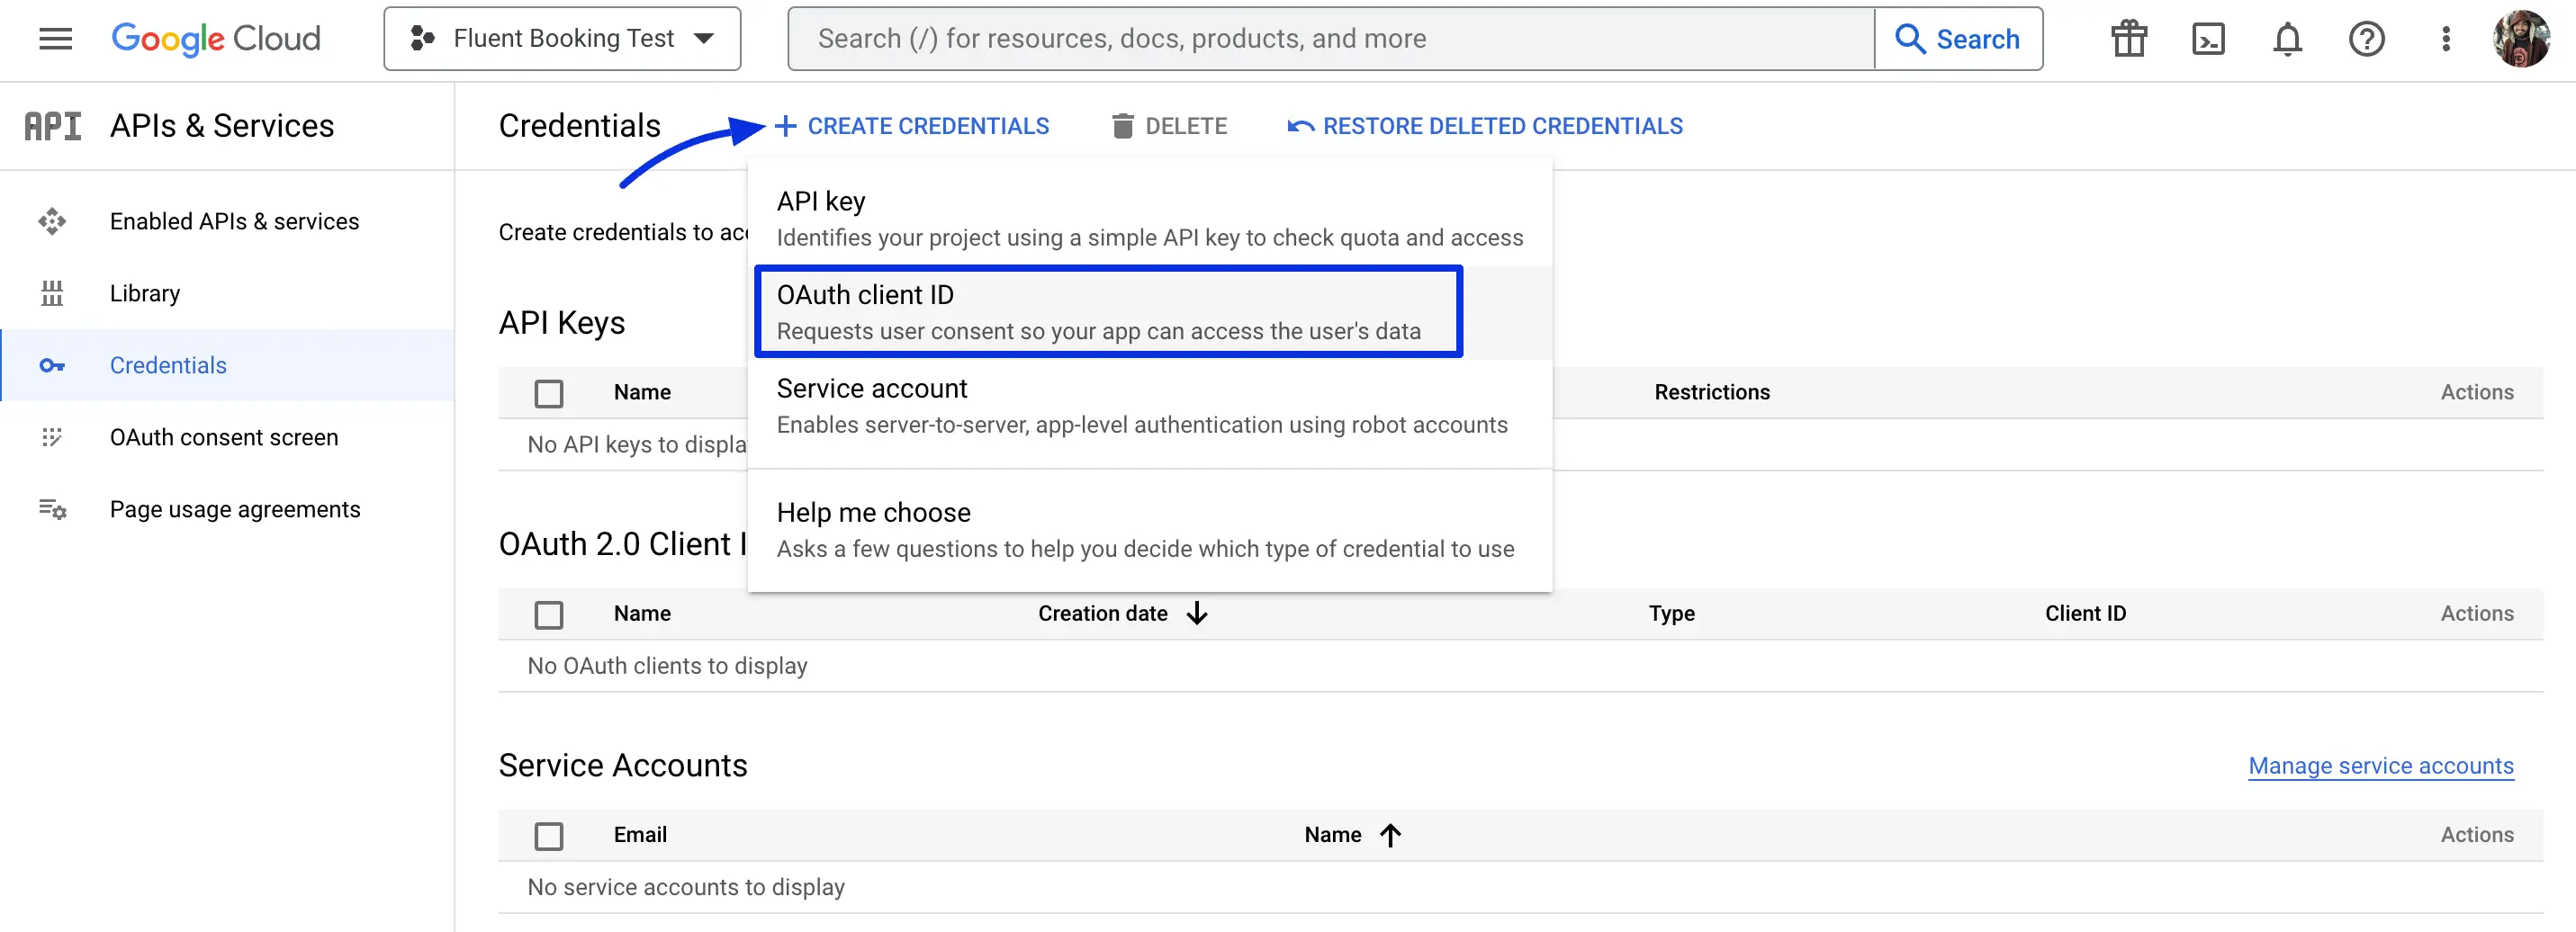
Here you need to create a web application to get your credentials.
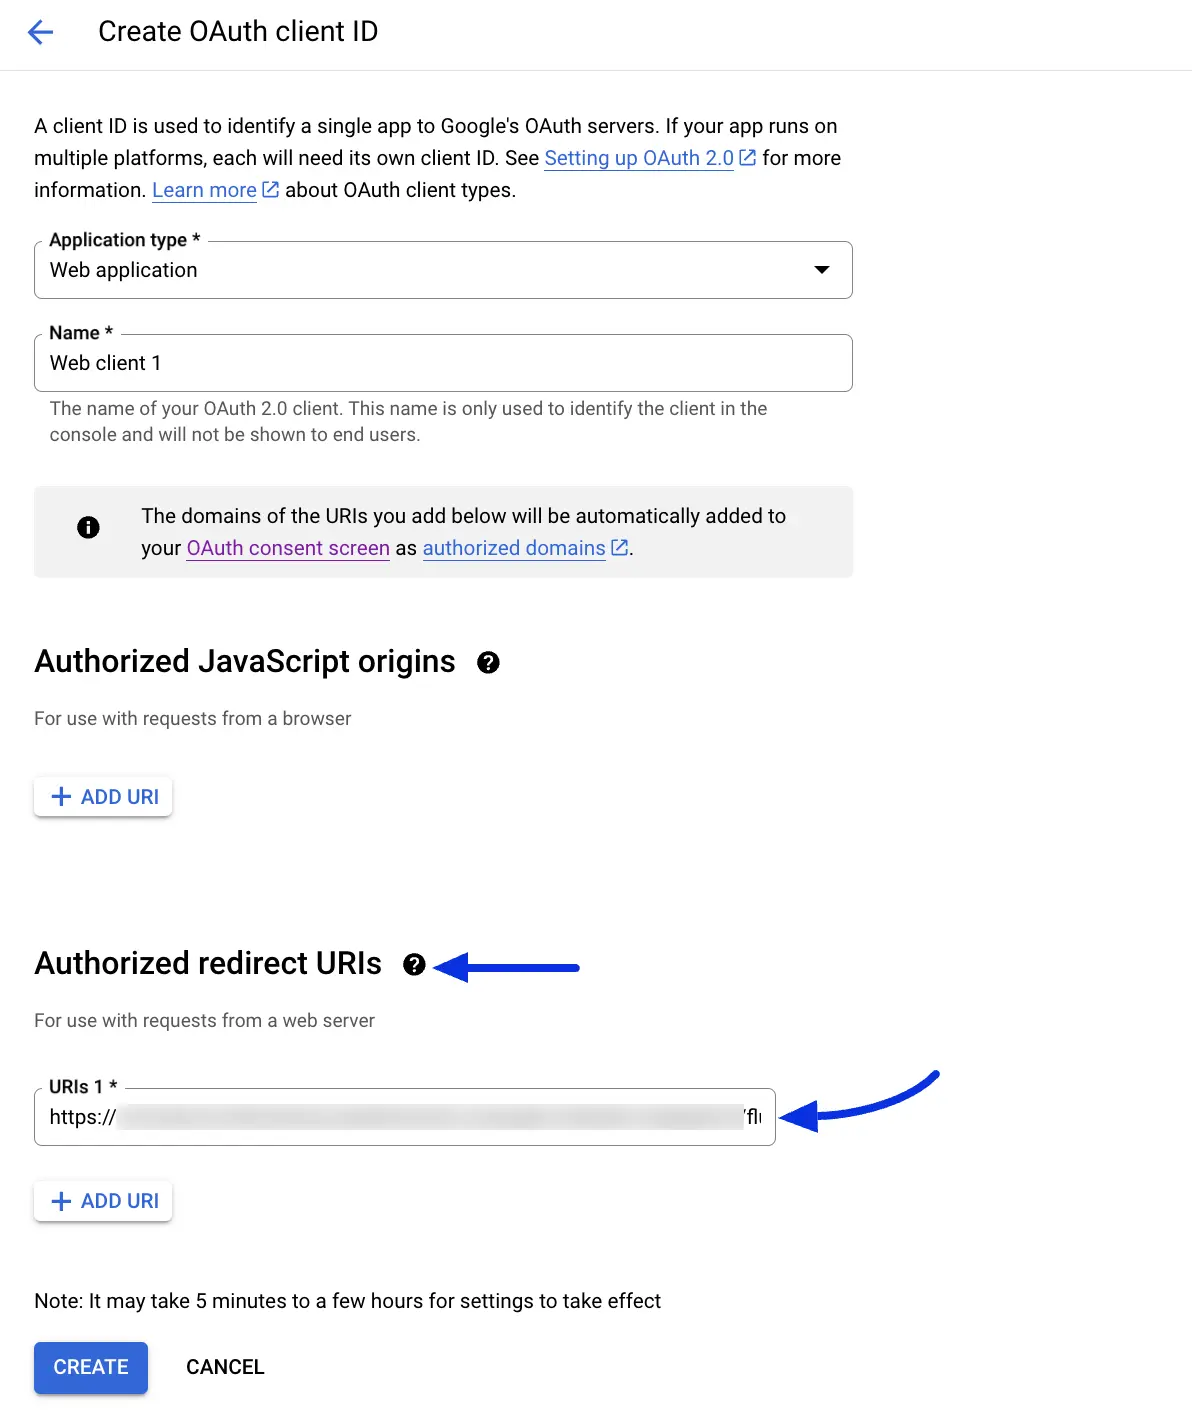
Now you need the Authorized redirect URL of FluentBooking. Go to Settings > Google Calendar of your FluentBooking plugin and you will get the redirect URL.
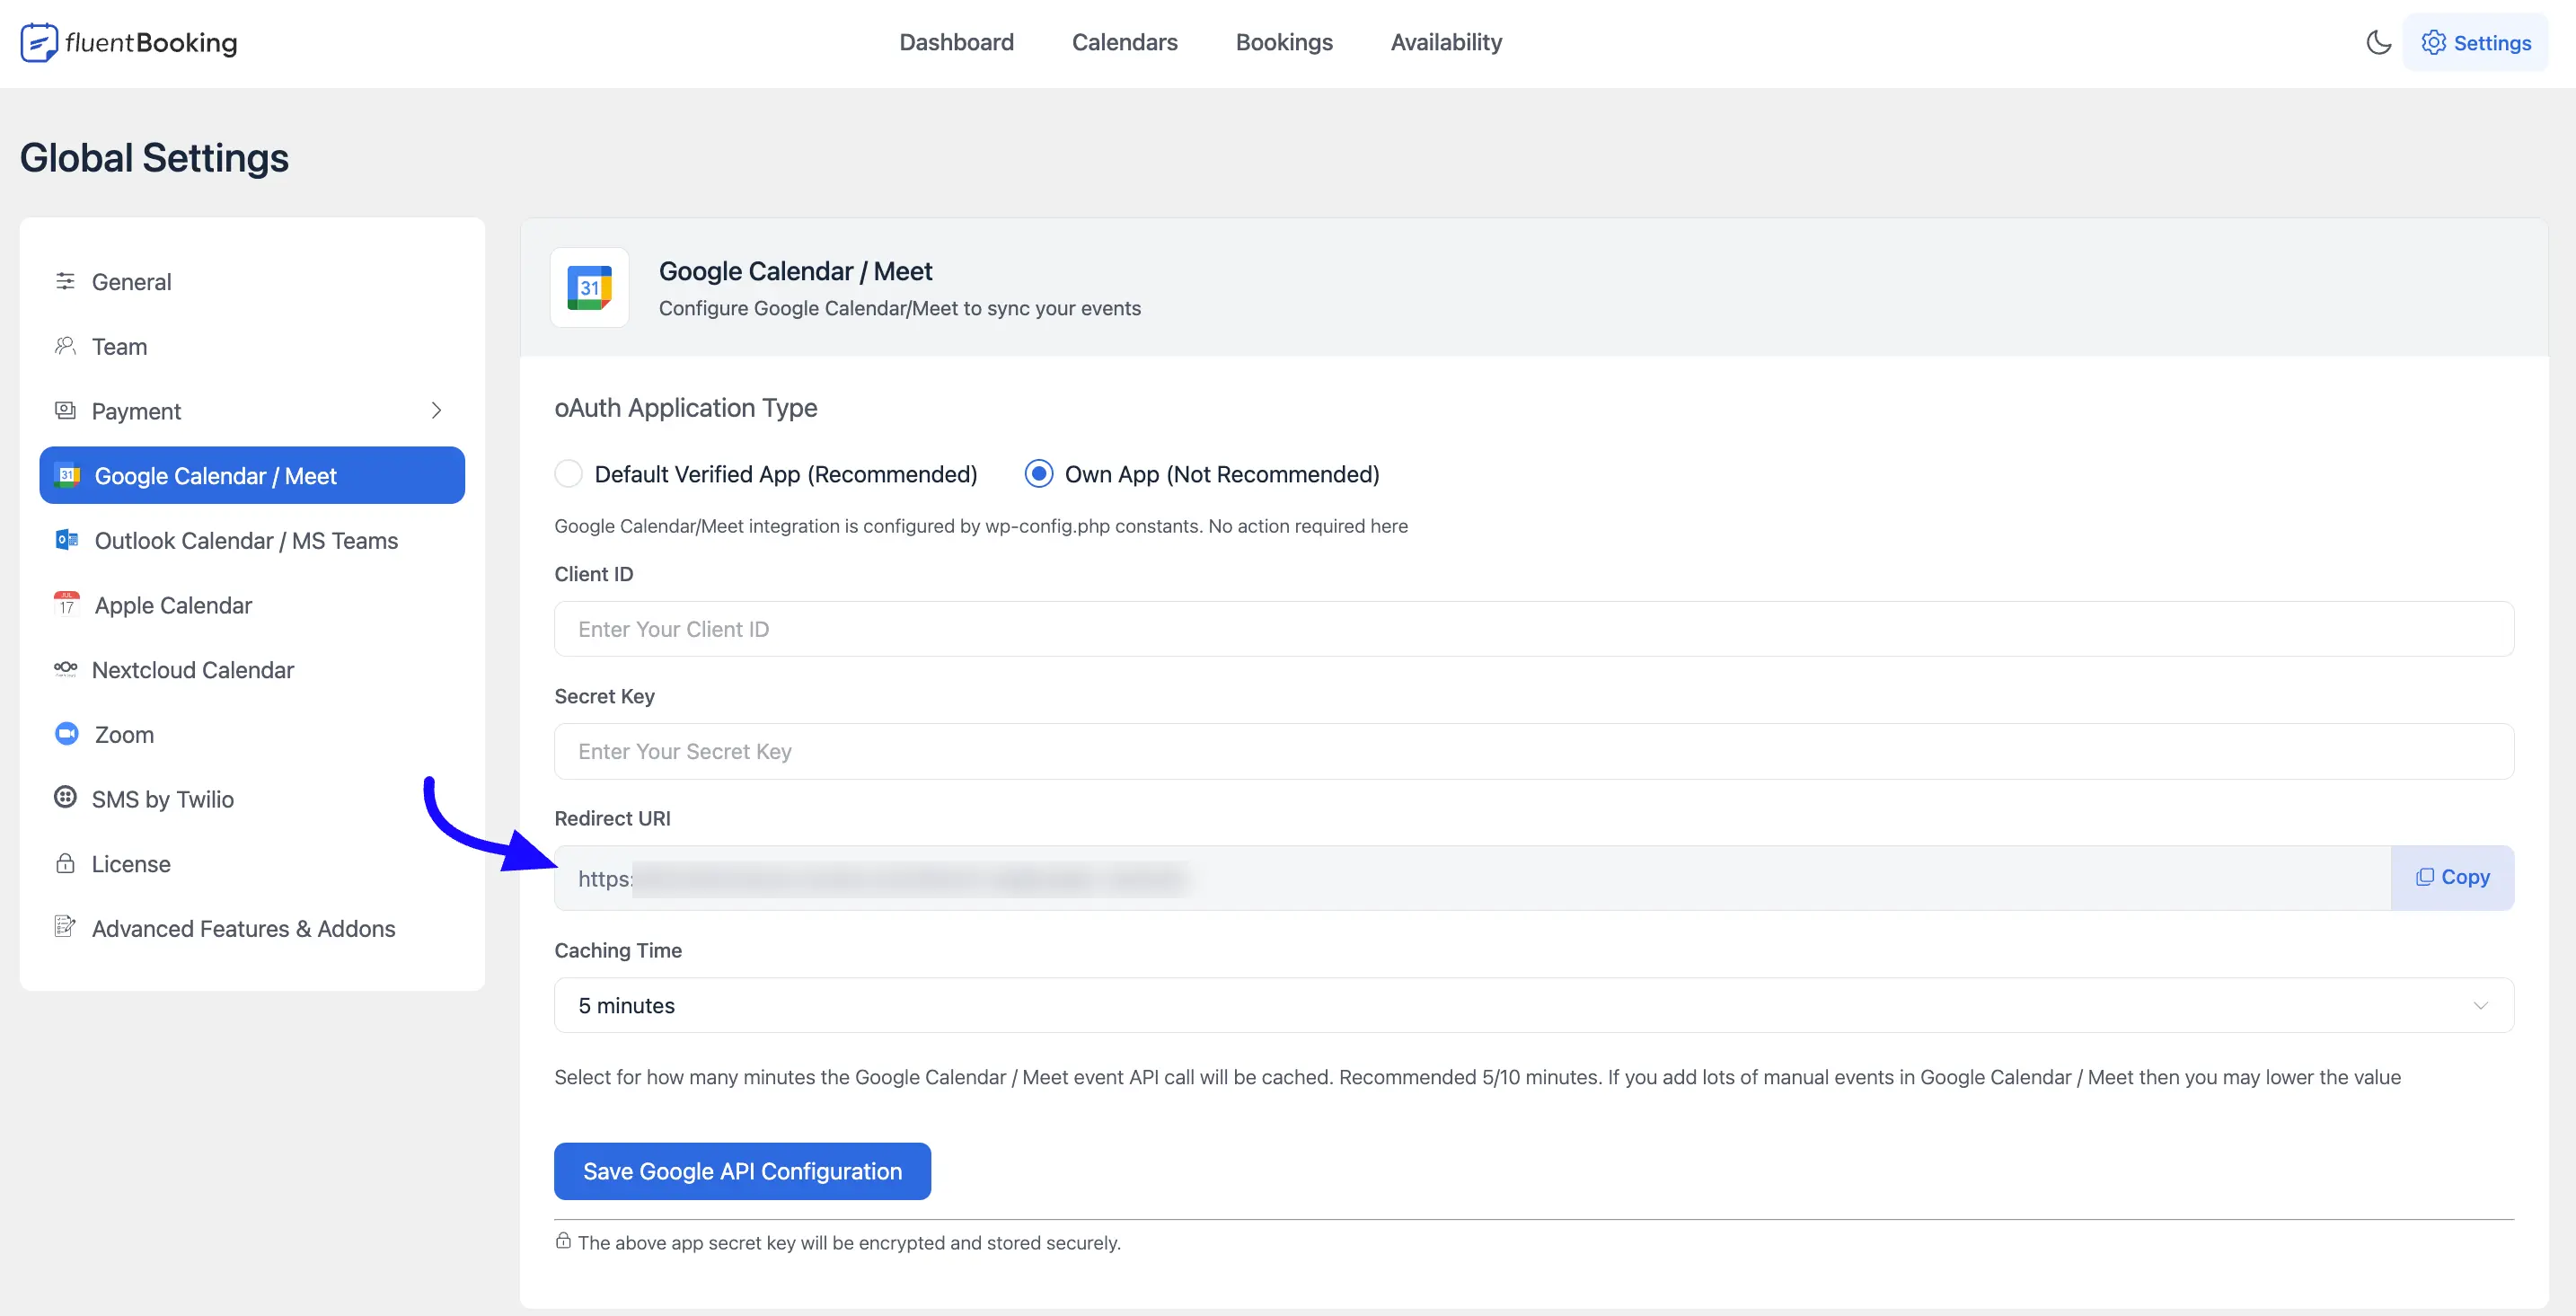
Copy the URL and paste it into the Authorized redirect URL field.
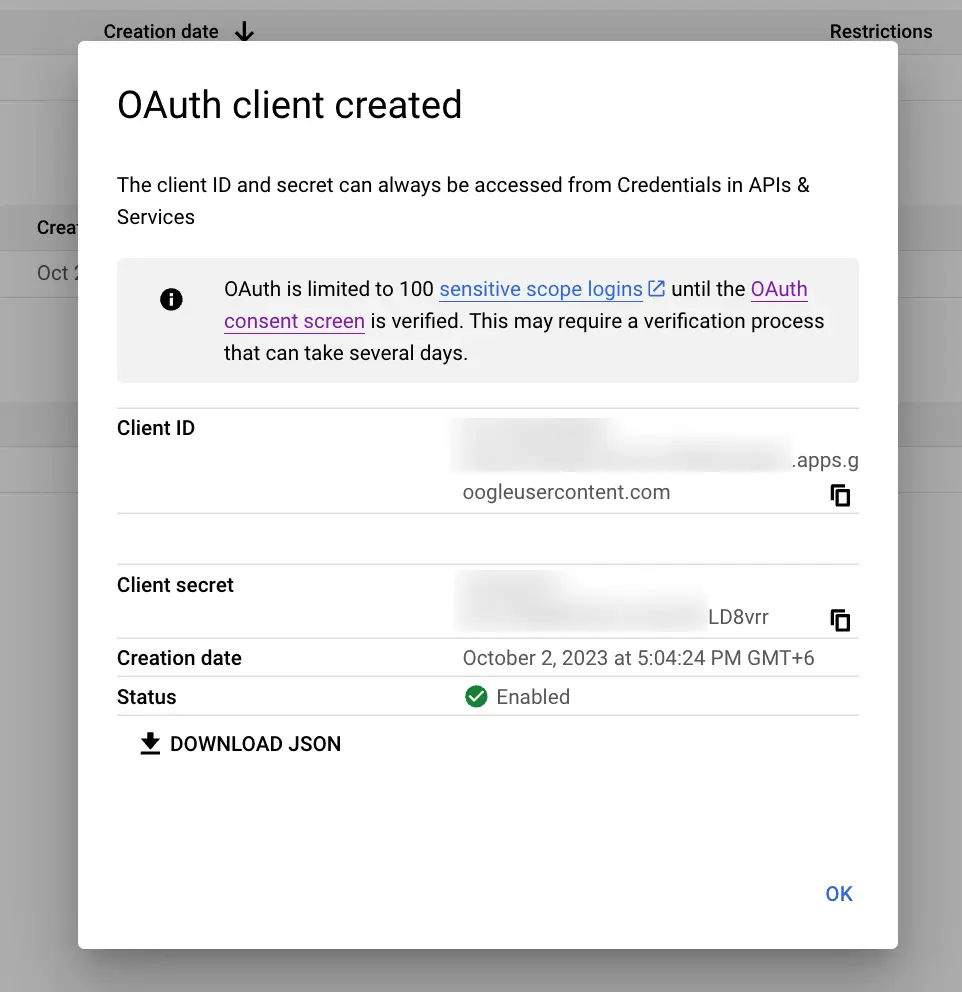
After that click on the Create button and a pop-up will show up with the necessary credentials.
Copy the Client ID and Client Secret from here.
Configuring Admin Google Calendar
You must have to add an Admin Google Calender/Meet account in FluentBooking in order to use Google Calender/Meet integration.
To add an Admin Google Calender Account go to your FluentBooking plugin Settings > Google Calendar and paste the Credentials (Client ID, Client Secret) to integrate FluentBooking with Google Calendar/Meet. Click on the Save Google API Configuration button and you will see a Success notification.
NOTE
To synchronize your booking events with Google Calendar/Meet you have to connect your Google account to host profiles.
Configuring Host Google Calendar
After setting up an Admin Google Calendar account you will be able to add a Google Calendar/Meet account for every individual host also the hosts can add their own Google Account to synchronize their booking events with their Google Calendar/Meet.You don't need to re-configure Google OAuth Credentials to add a Google account for each host, as you have already connected the authenticator app. Hosts can add multiple Google accounts to manage their booking events.
To synchronize your booking events with Google Calendar/Meet you need to connect a Google account of yours. Go to Calenders > Host Settings > Remote Calendars now select the Connect with Google Calendar/Meet button.
You have to log in or select the account you want to synchronize your FluentBooking events.
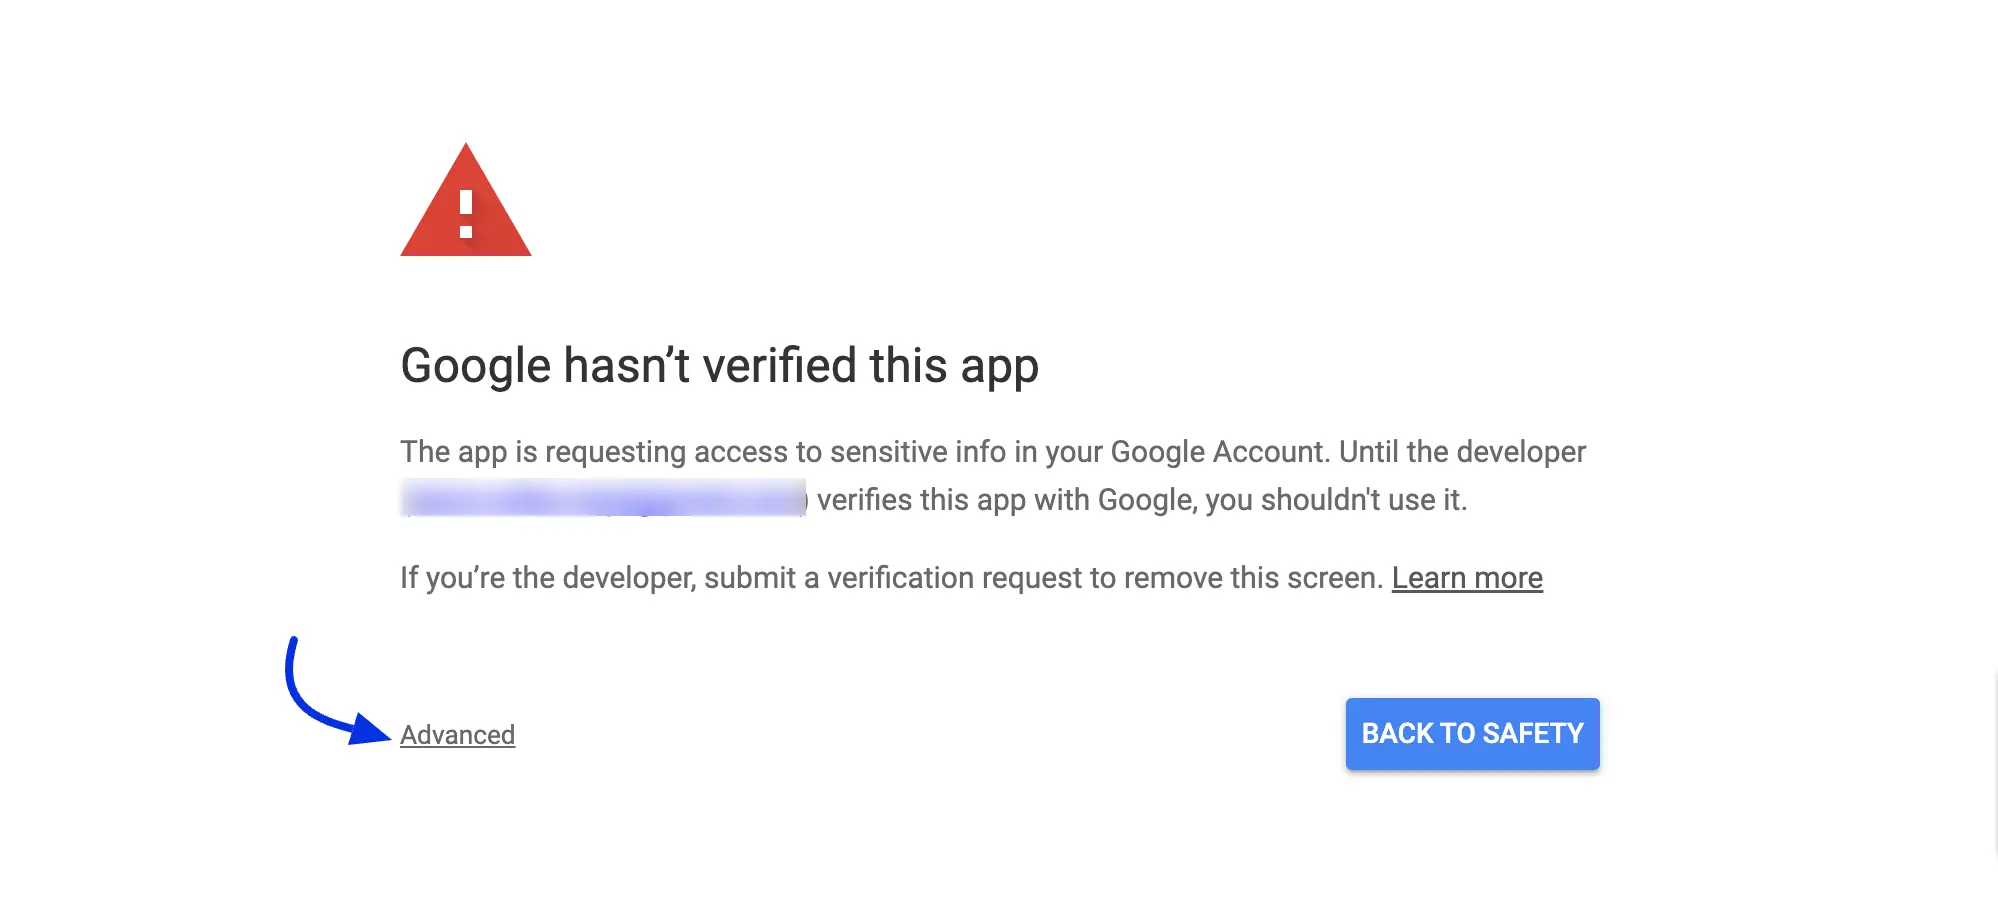
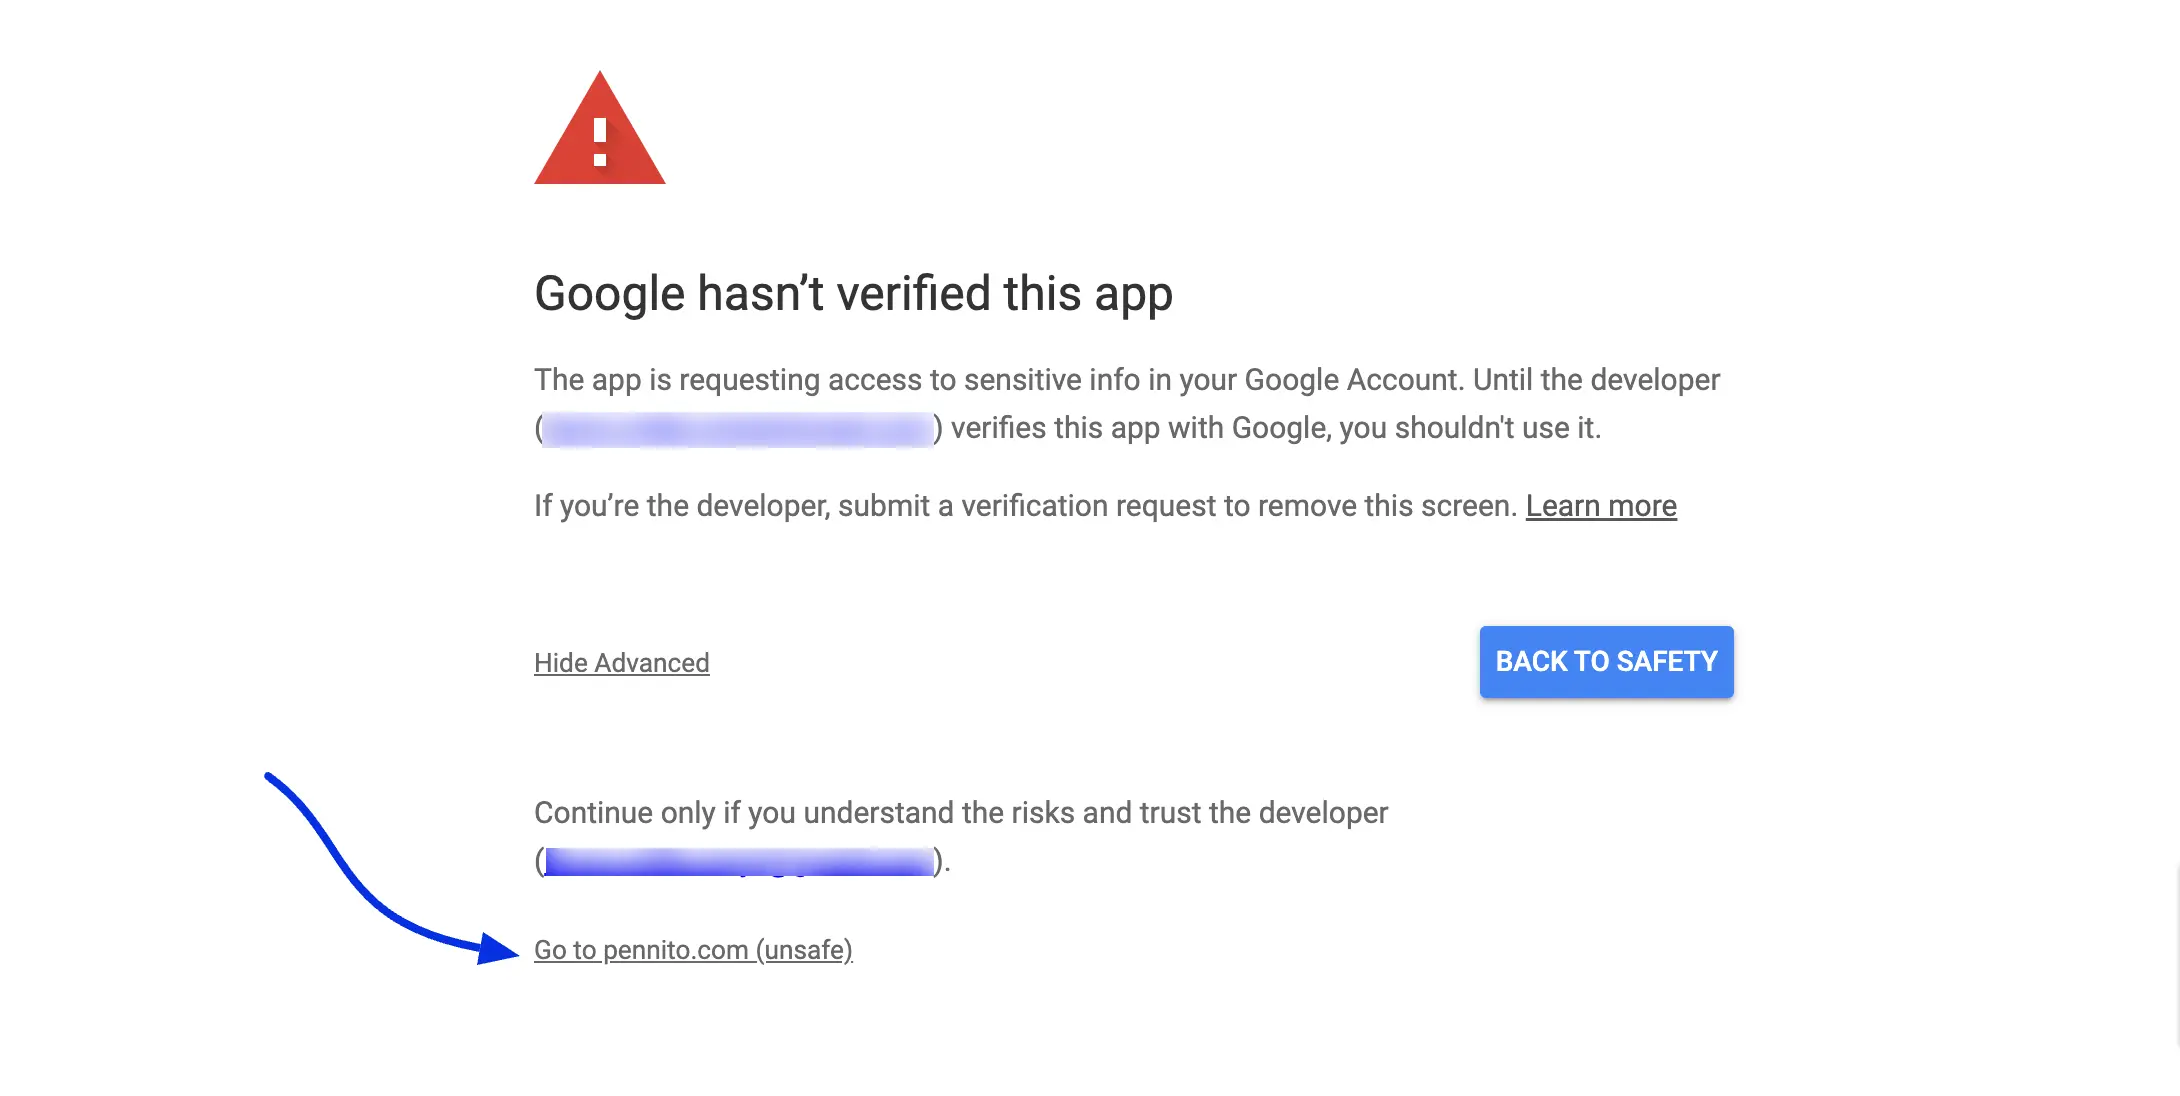
You will see a warning saying, "Google hasn't verified this app". Just click on "Advanced" just like in the screenshot below:
Now click on "Go to {yourWebsite.com}" and it will take you to the next step.
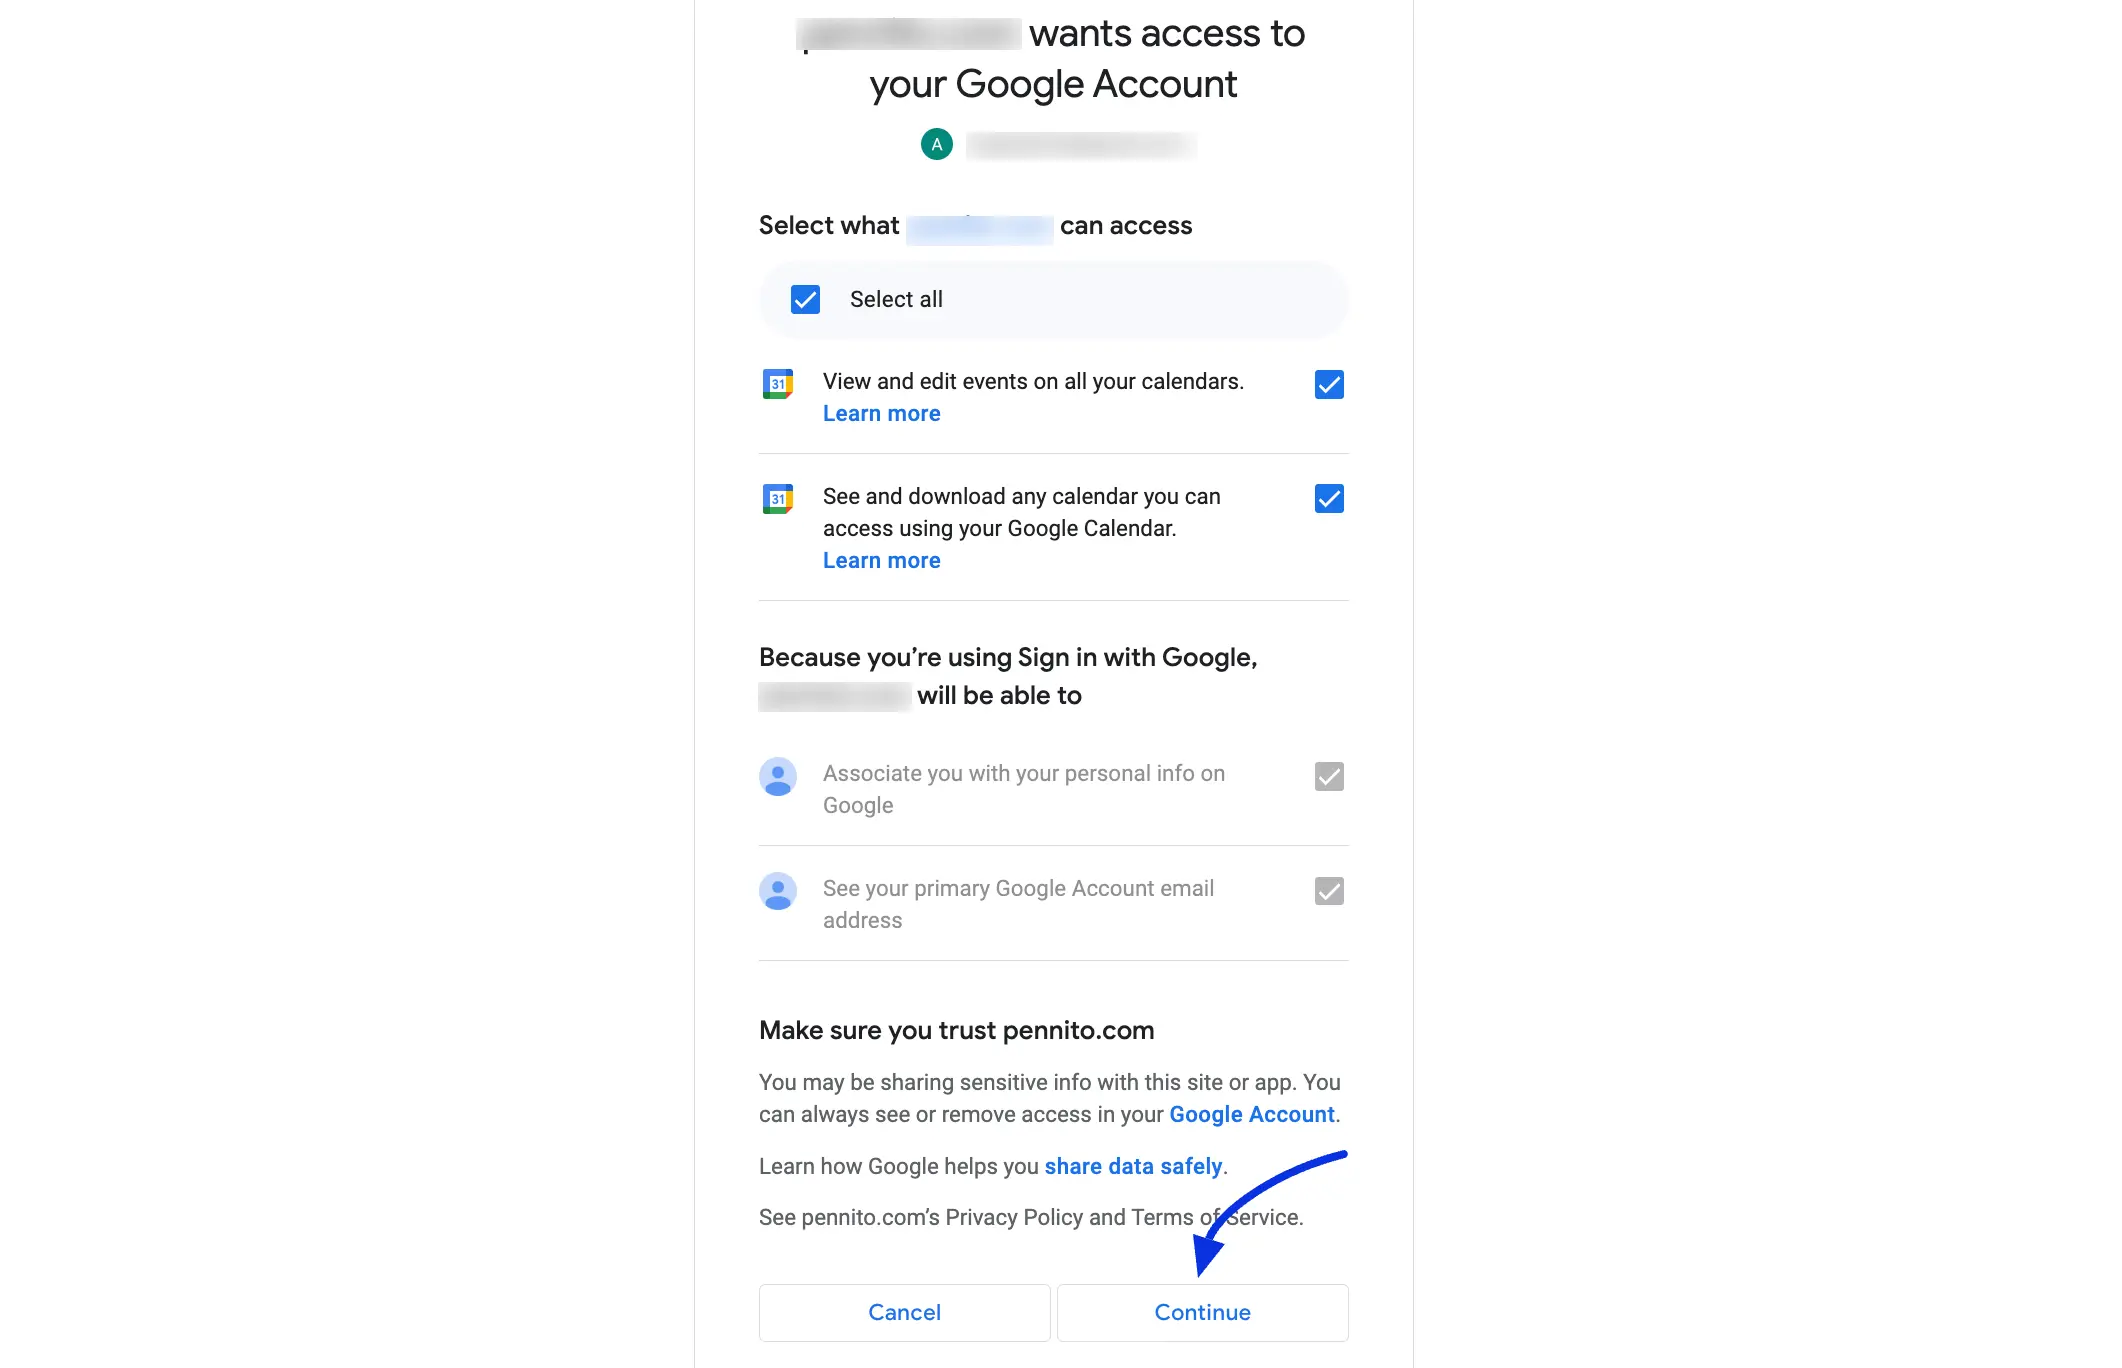
Lastly, select all checkboxes then click on Continue and your integration will be completely done.
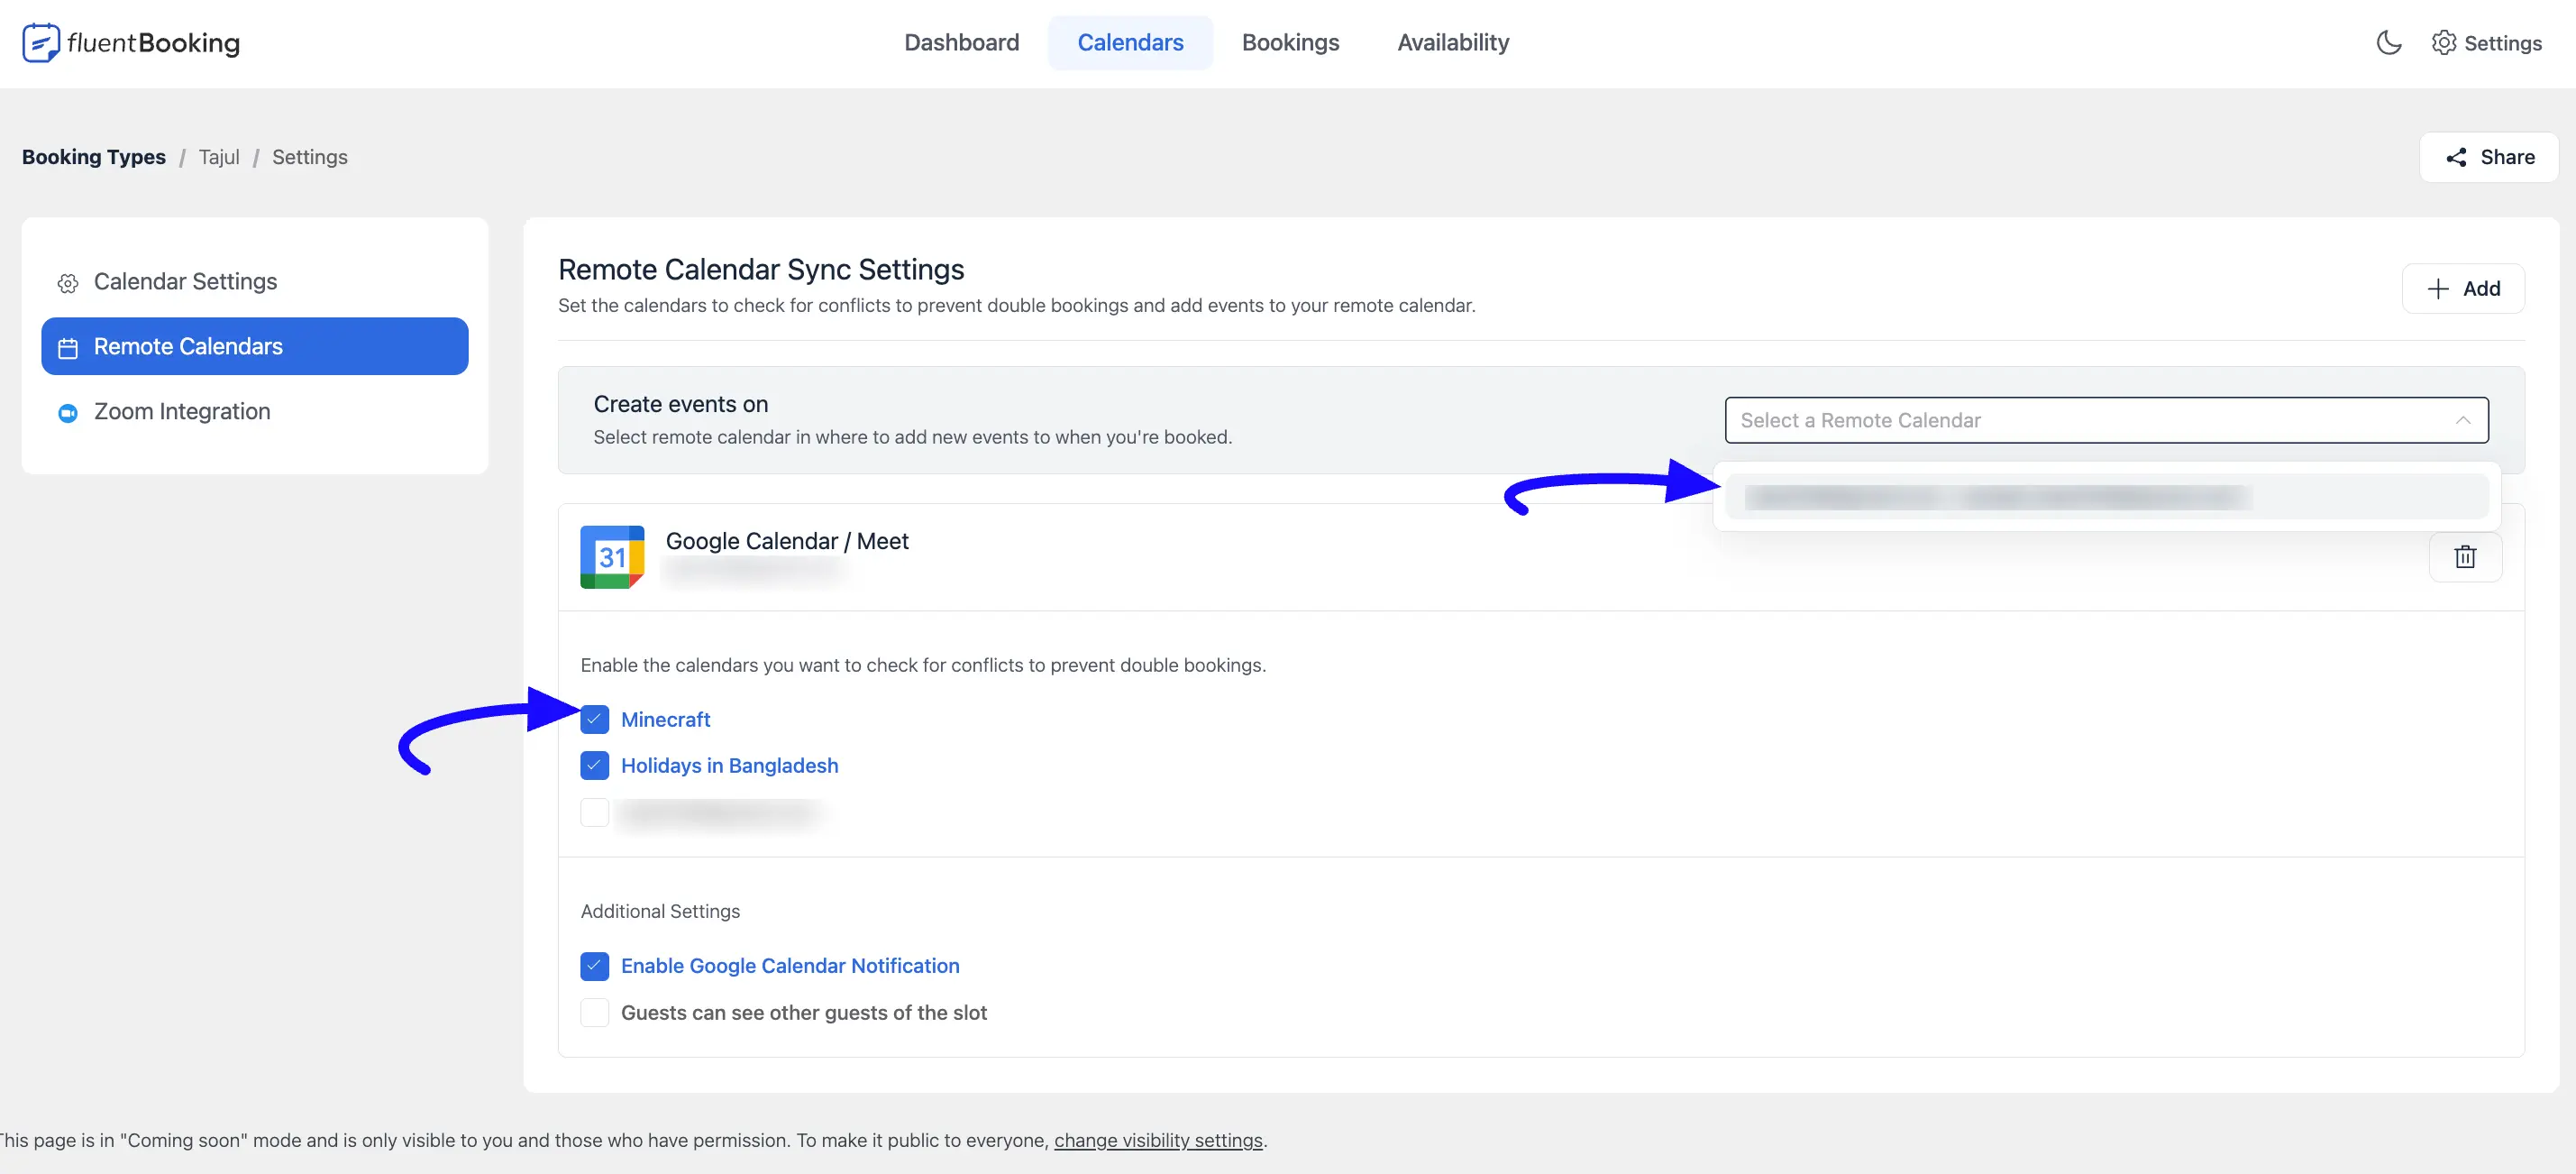
Congrats! You have successfully completed your integration with Google Calendar/Meet. Now Select the Remote Calendar and Enable it just like the below:
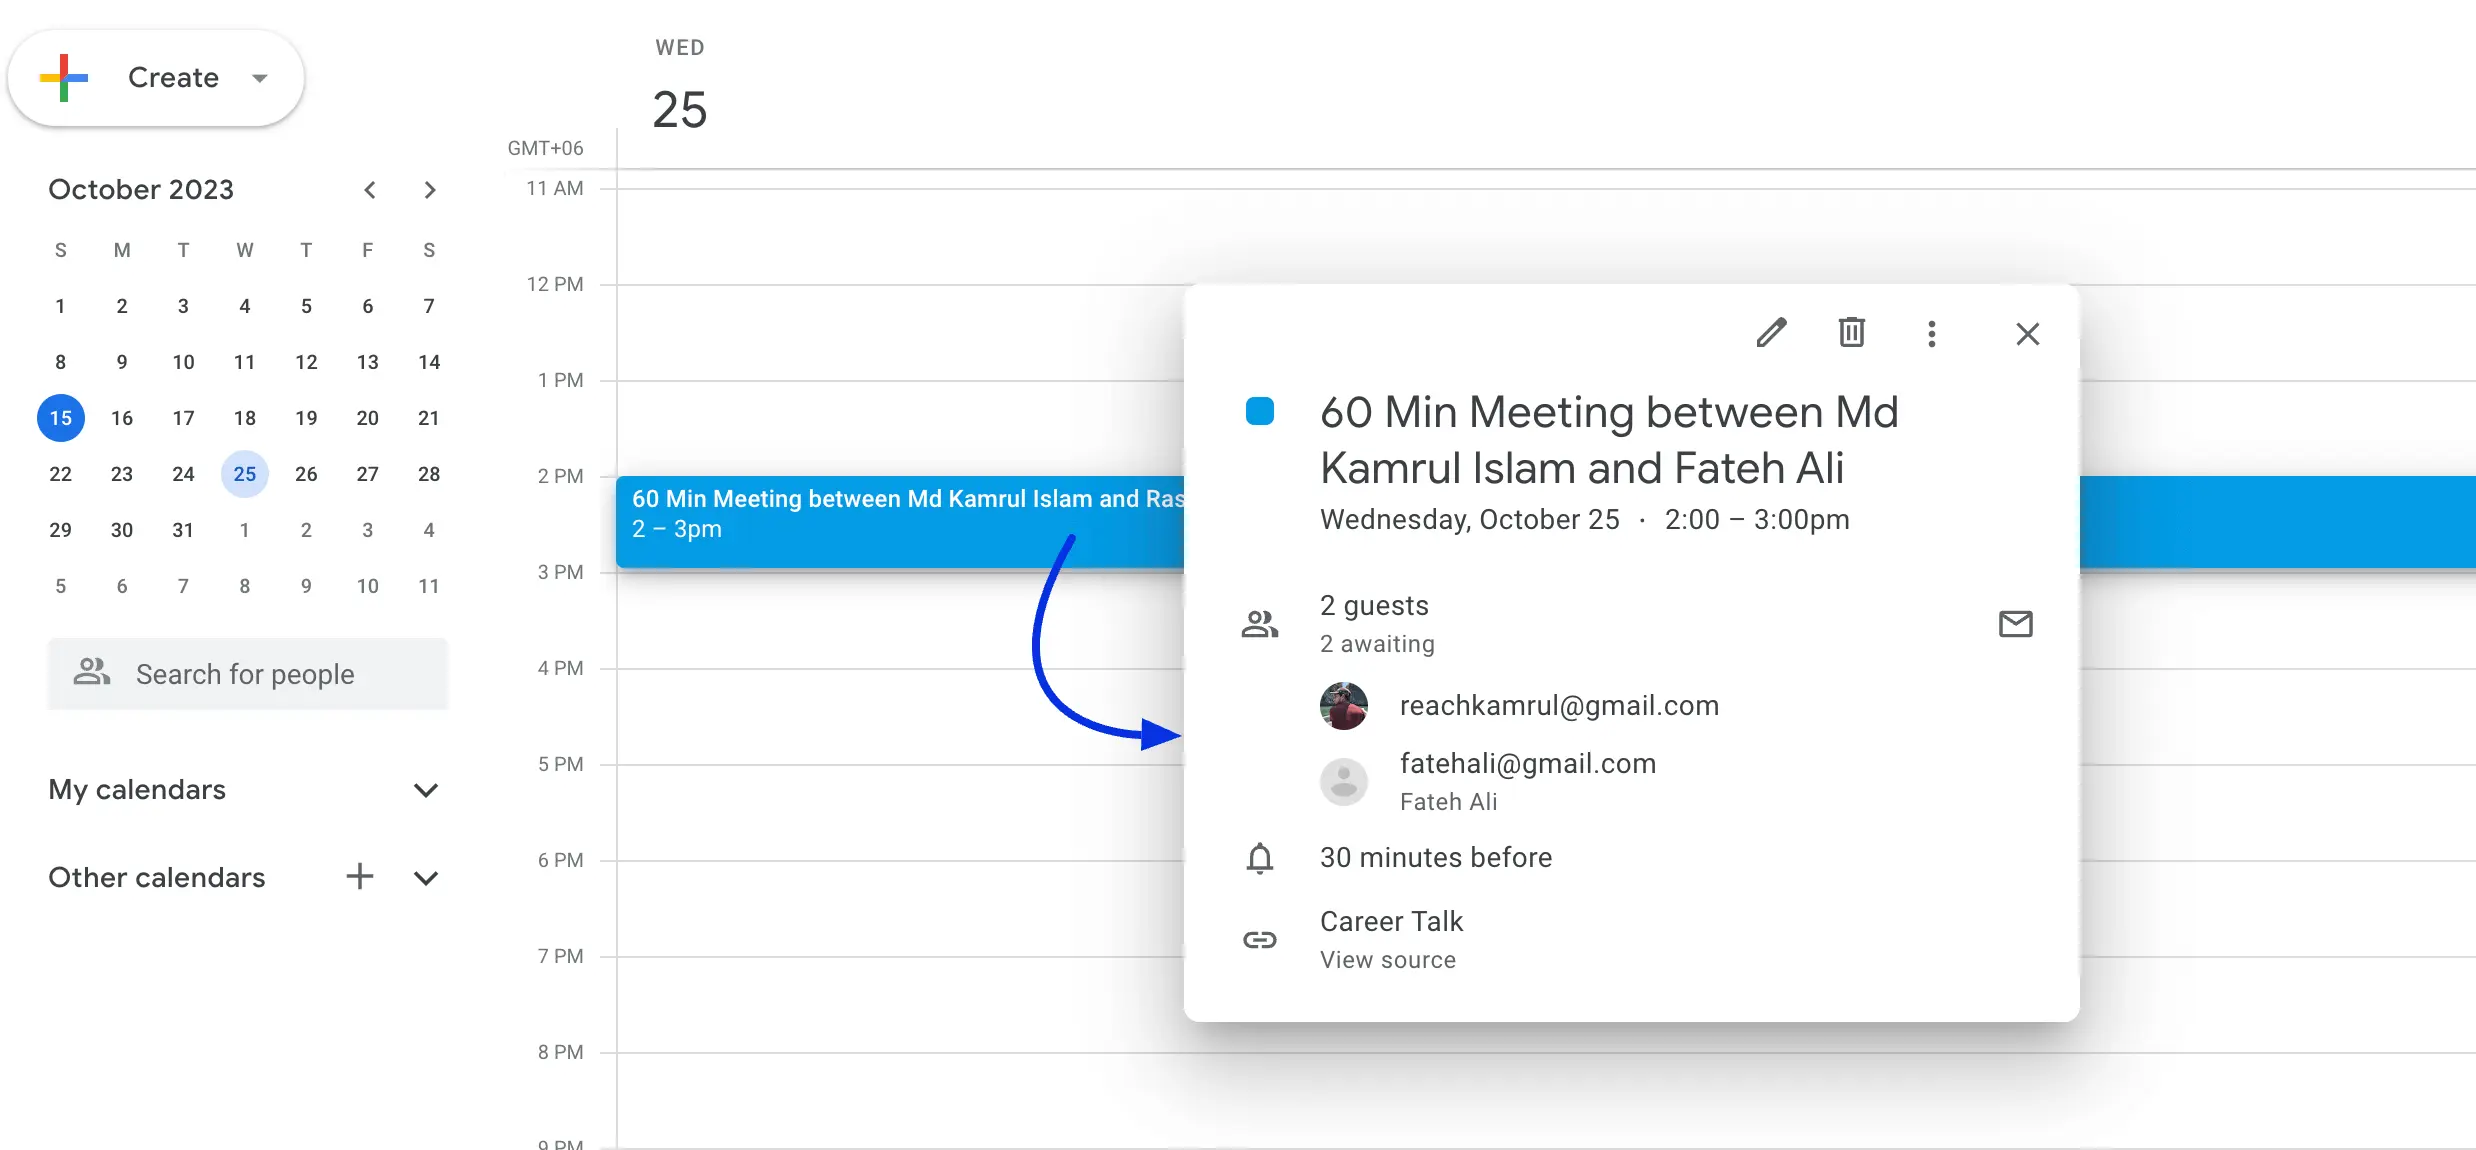
Your bookings can be found on your Google Calendar, just like in the below screenshot: