Appearance
Fluent Forms Integration with FluentBooking
FluentBooking integrates smoothly with Fluent Forms, allowing you to add booking events directly to your forms. This allows users to schedule appointments while submitting a form, making the process simple and convenient.
The Fluent Forms integration is only available in FluentBooking Pro. You will need the FluentBooking Pro plugin to access this feature.
Important
You need the Fluent Forms plugin installed and at least one booking event created in FluentBooking before adding it to a form.
Add Booking to the Fluent Forms
Open the Fluent Forms to get started. You have two options for adding your booking: either Create a new form or Select an existing one where you want to add your booking event.
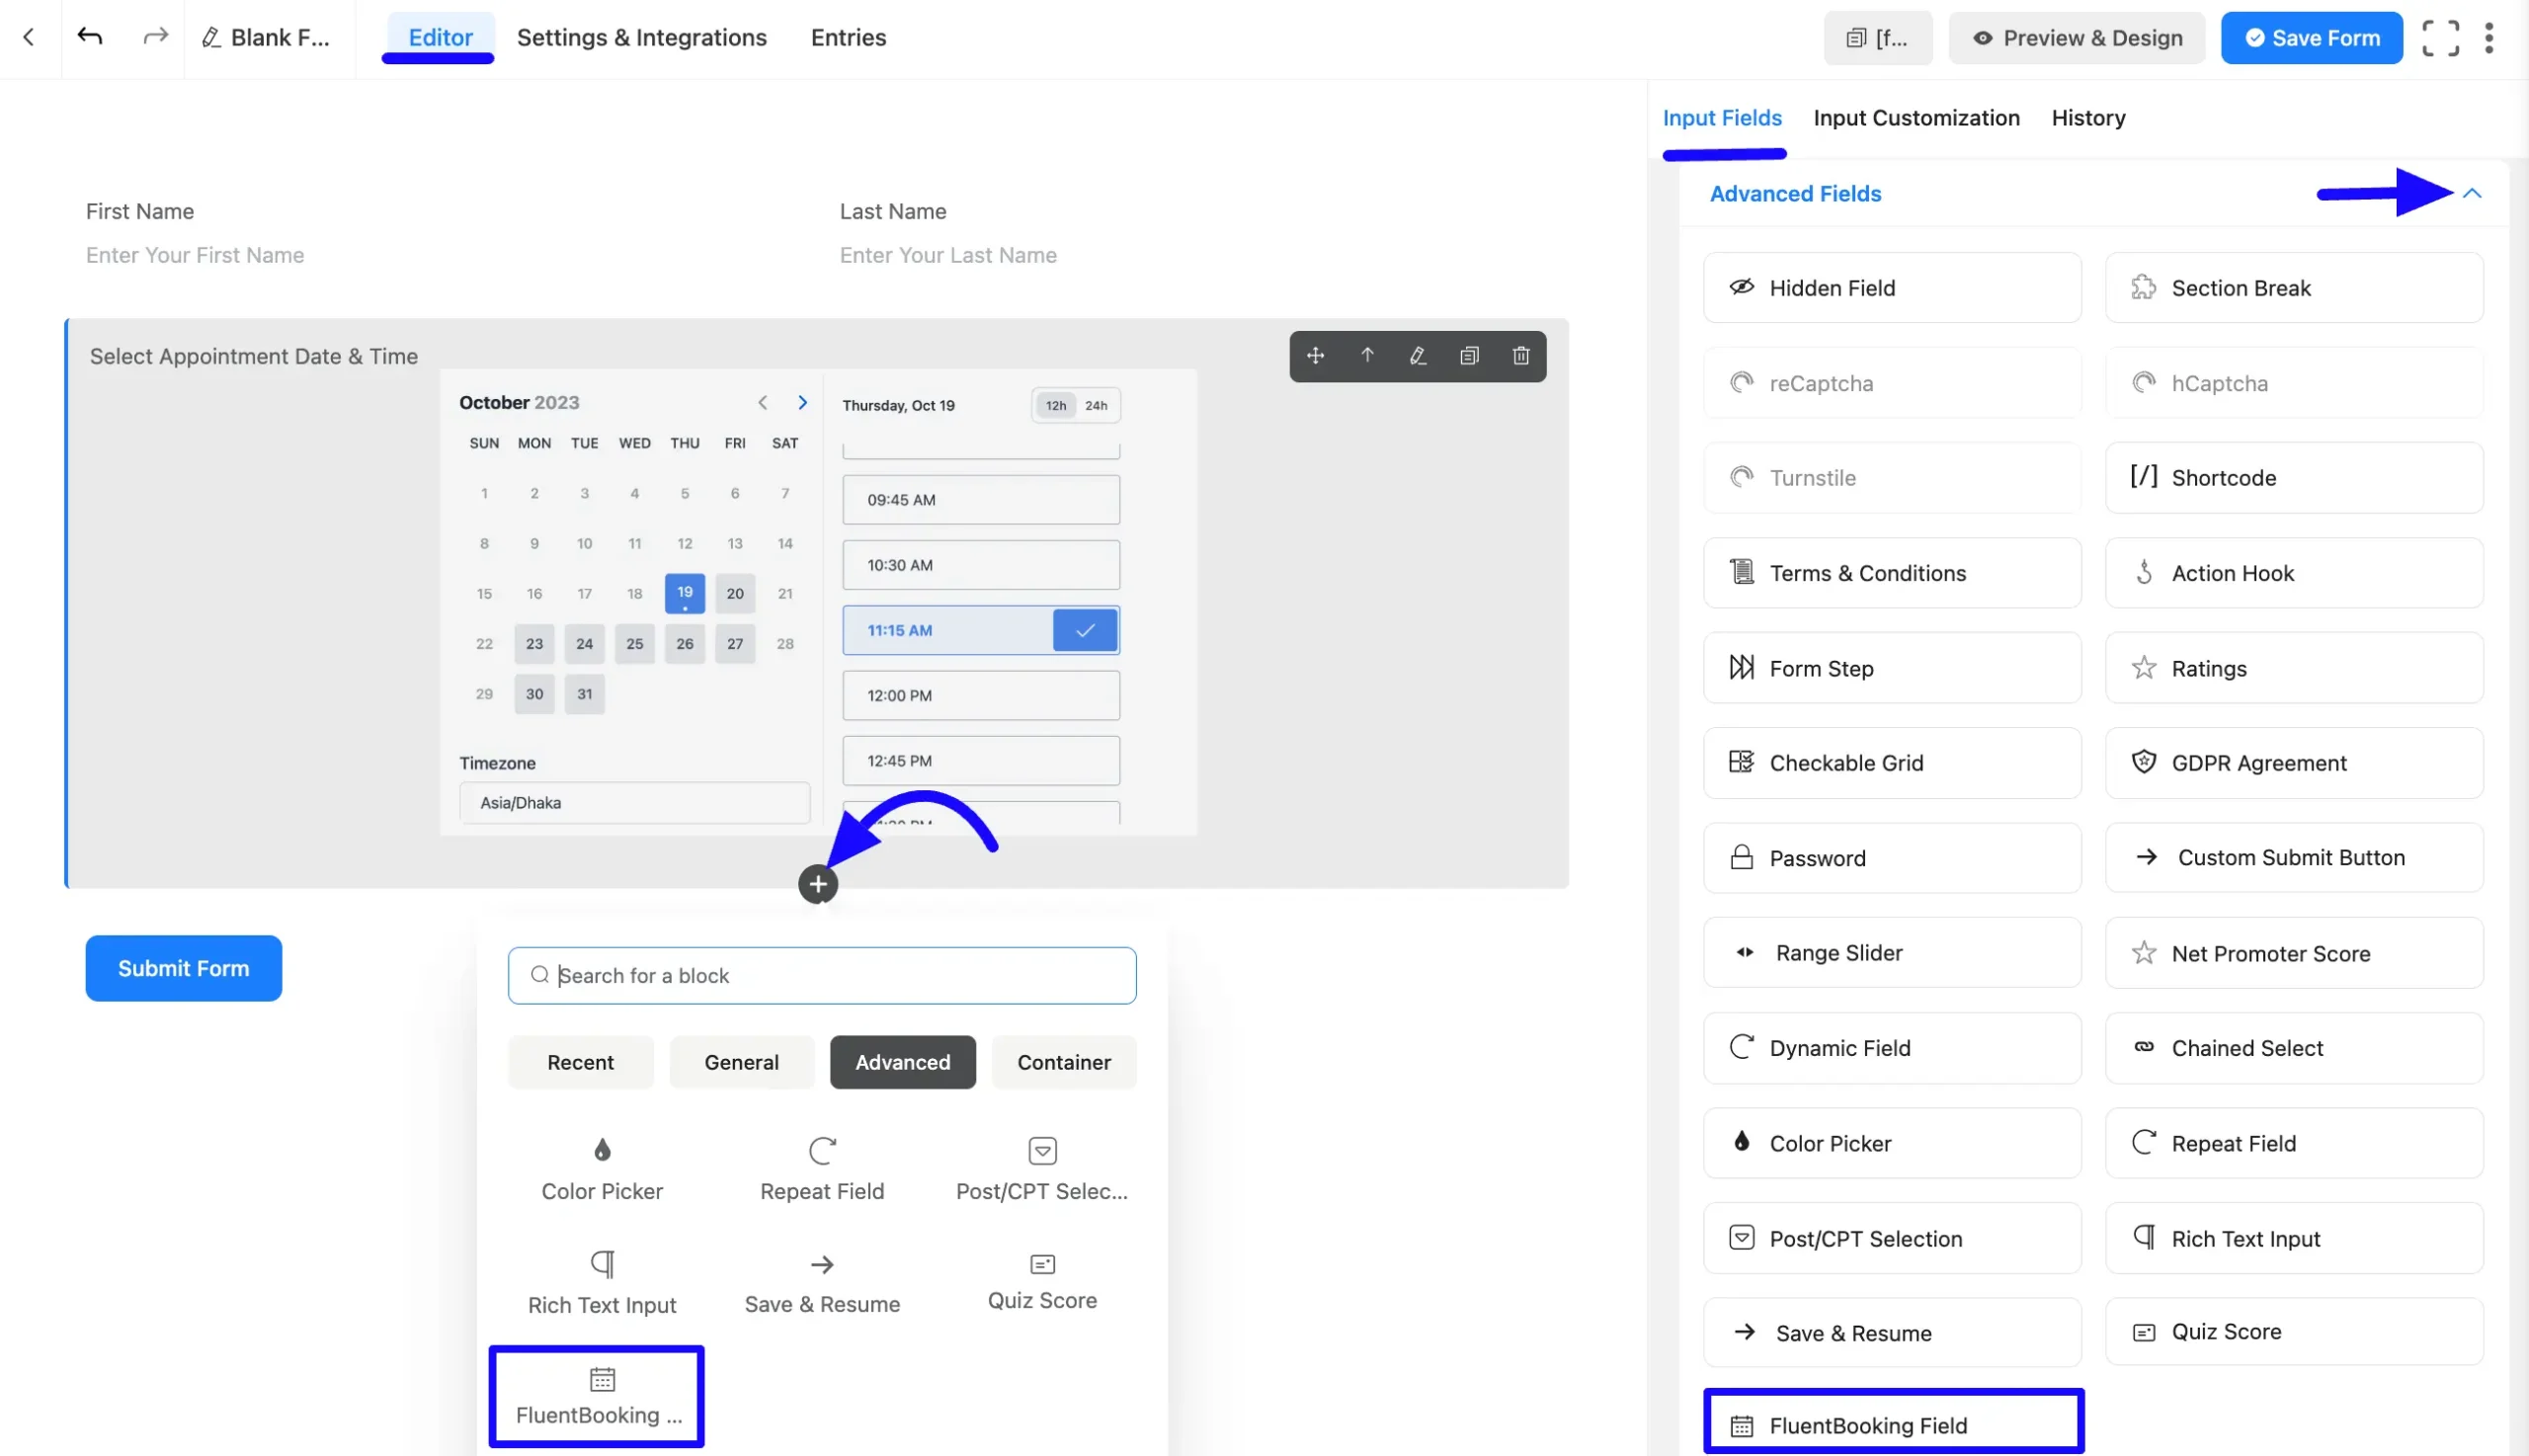
Add the FluentBooking Field in the form from Advanced Input fields or click on the Plus icon button and search for FluentBooking. Add this input box by dragging it into your form or simply clicking it. Your booking field will be added to the form right away.
NOTE
In order to take booking, you must add Name and Email field to that form.
Map with your specific calendar
Once you add the action hook field, you can customize it by hovering over it and clicking the Pencil Icon. It will take you to the Input Customization tab on the right side and offer the following options for customizing the field.
- FluentBooking Field
- Advanced Options
FluentBooking Field
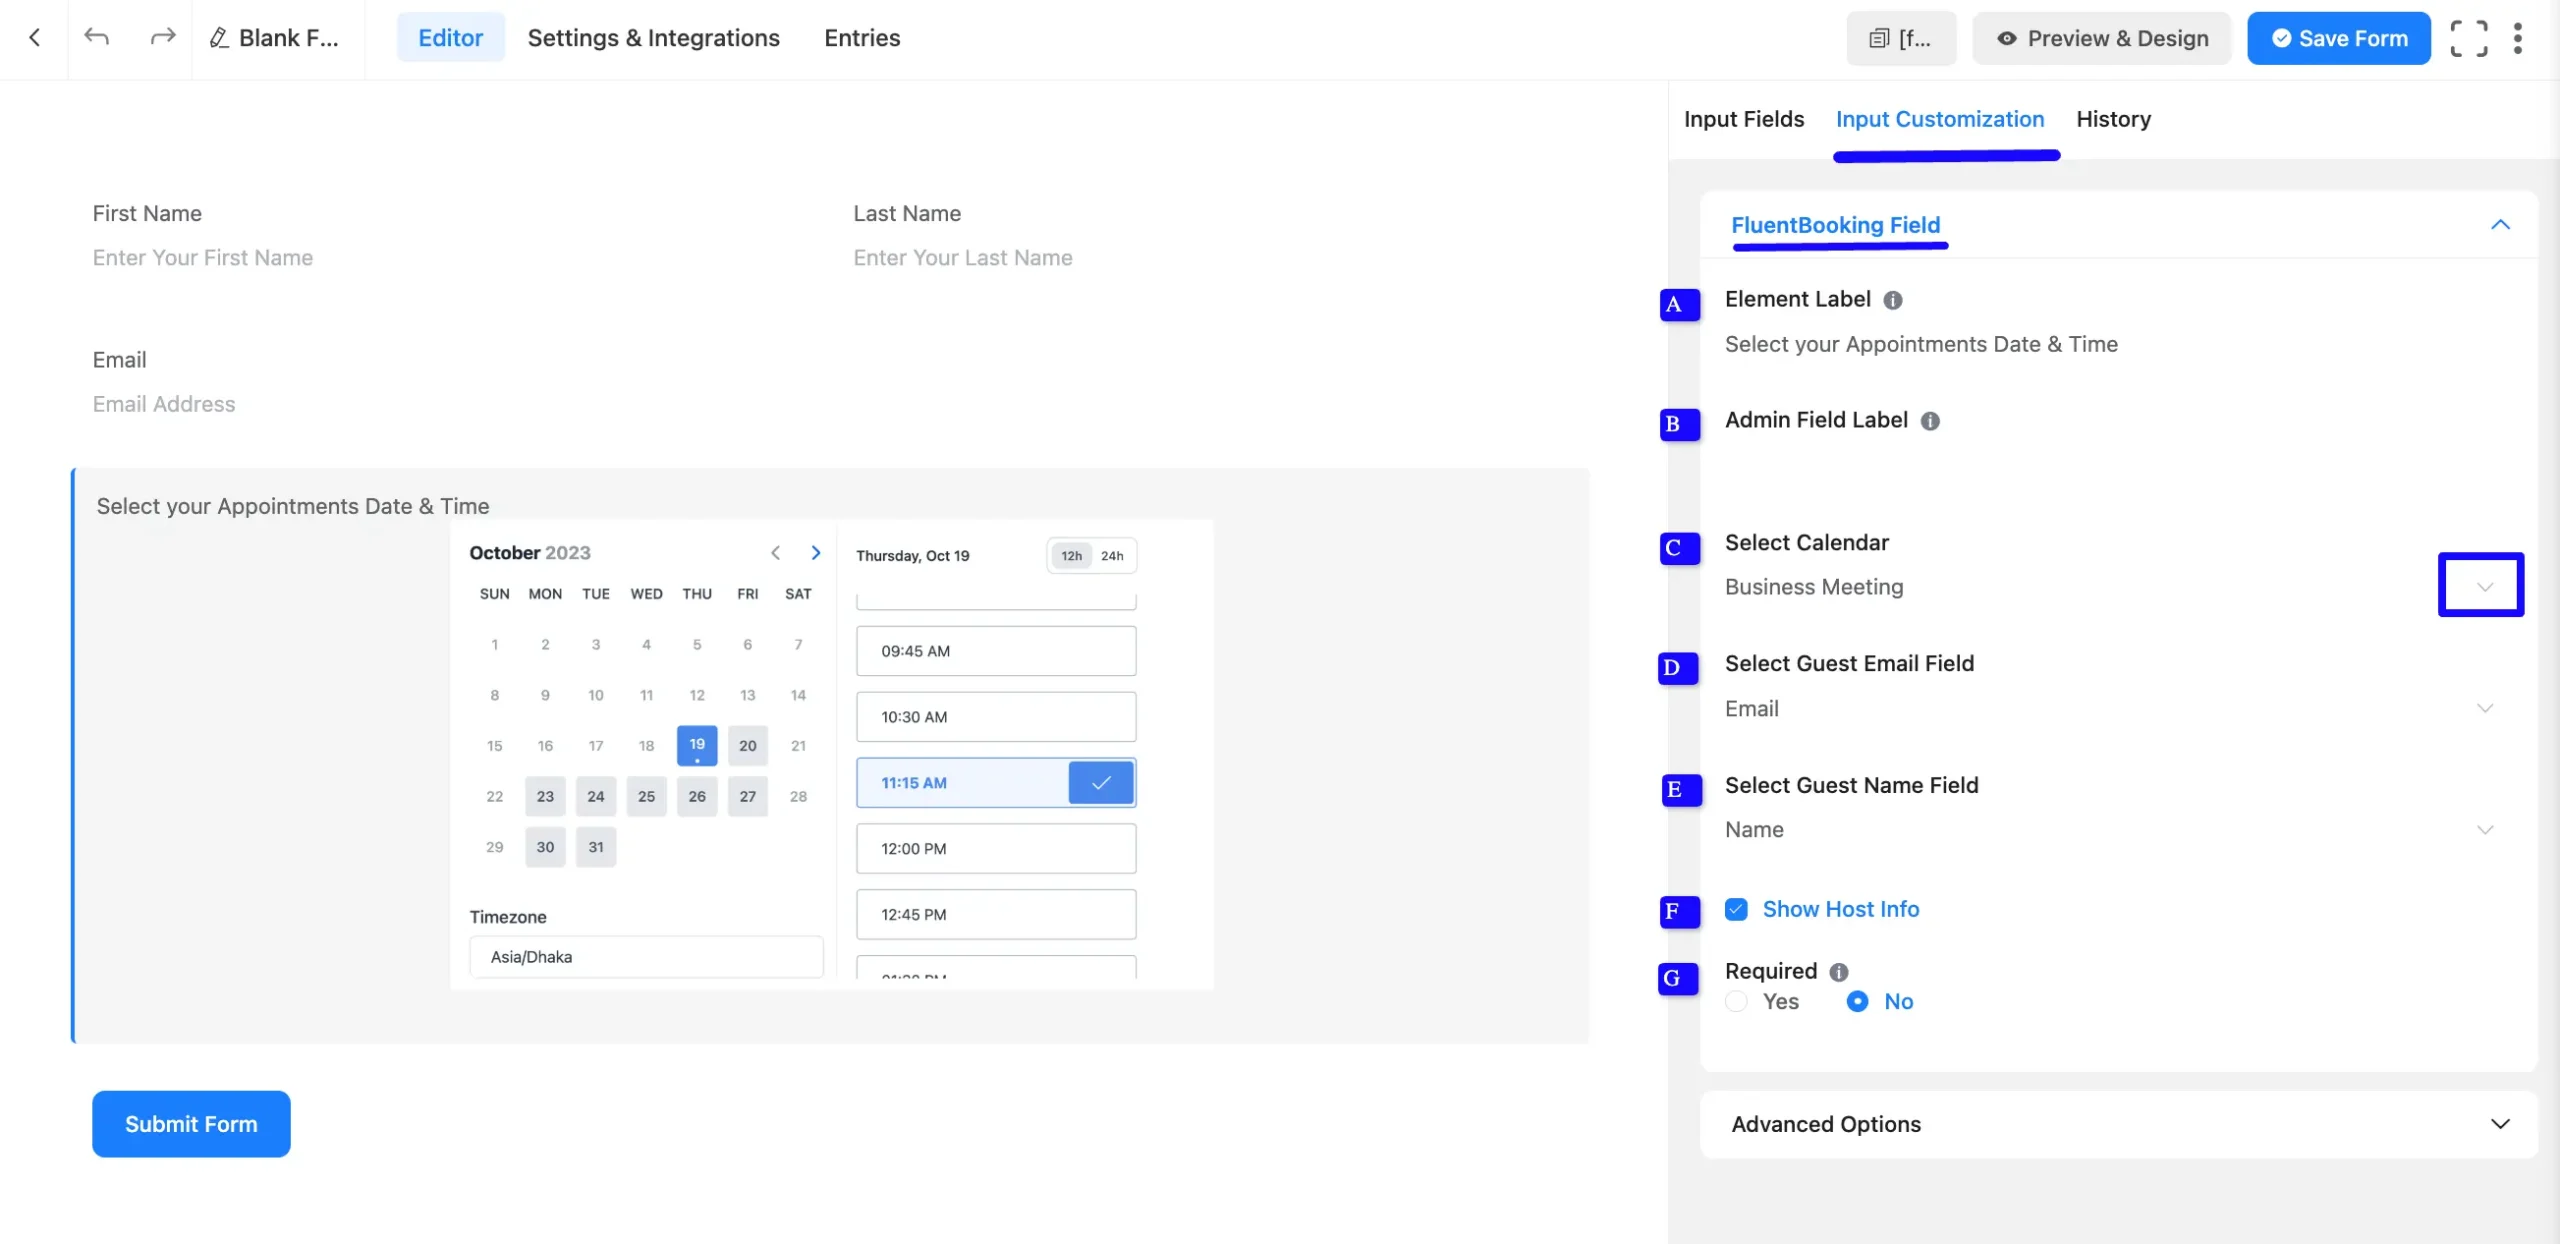
You will find various settings options for customizing the field. Located in the Input Customization Tab, these options allow you to configure essential aspects of the FluentBooking input field.
- A. Element Label: This is the field title users will see when filling out the FluentBooking field in a form. You can enter any text here to help users understand the field's purpose.
- B. Admin Field Label: The admin field label is a field title displayed only to admin users. You can configure this option to show a different field label for your admin users when they view the form submissions.
- C. Select Calendar: Choose a calendar from the dropdown. The calendar must be created using the FluentBooking plugin.
- D. Select Guest Email Field: Map the email field to ensure proper data collection.
- E. Select Guest Name Field: Map the name field for user identification.
- F. Show Host Info: If you want to show your host info, then check the Show Host Info option. If you do not want to show off your host info, then uncheck the Show Host Info option.
- G. Required: Choose the appropriate option from here to determine whether the field should be empty when the user submits your form.
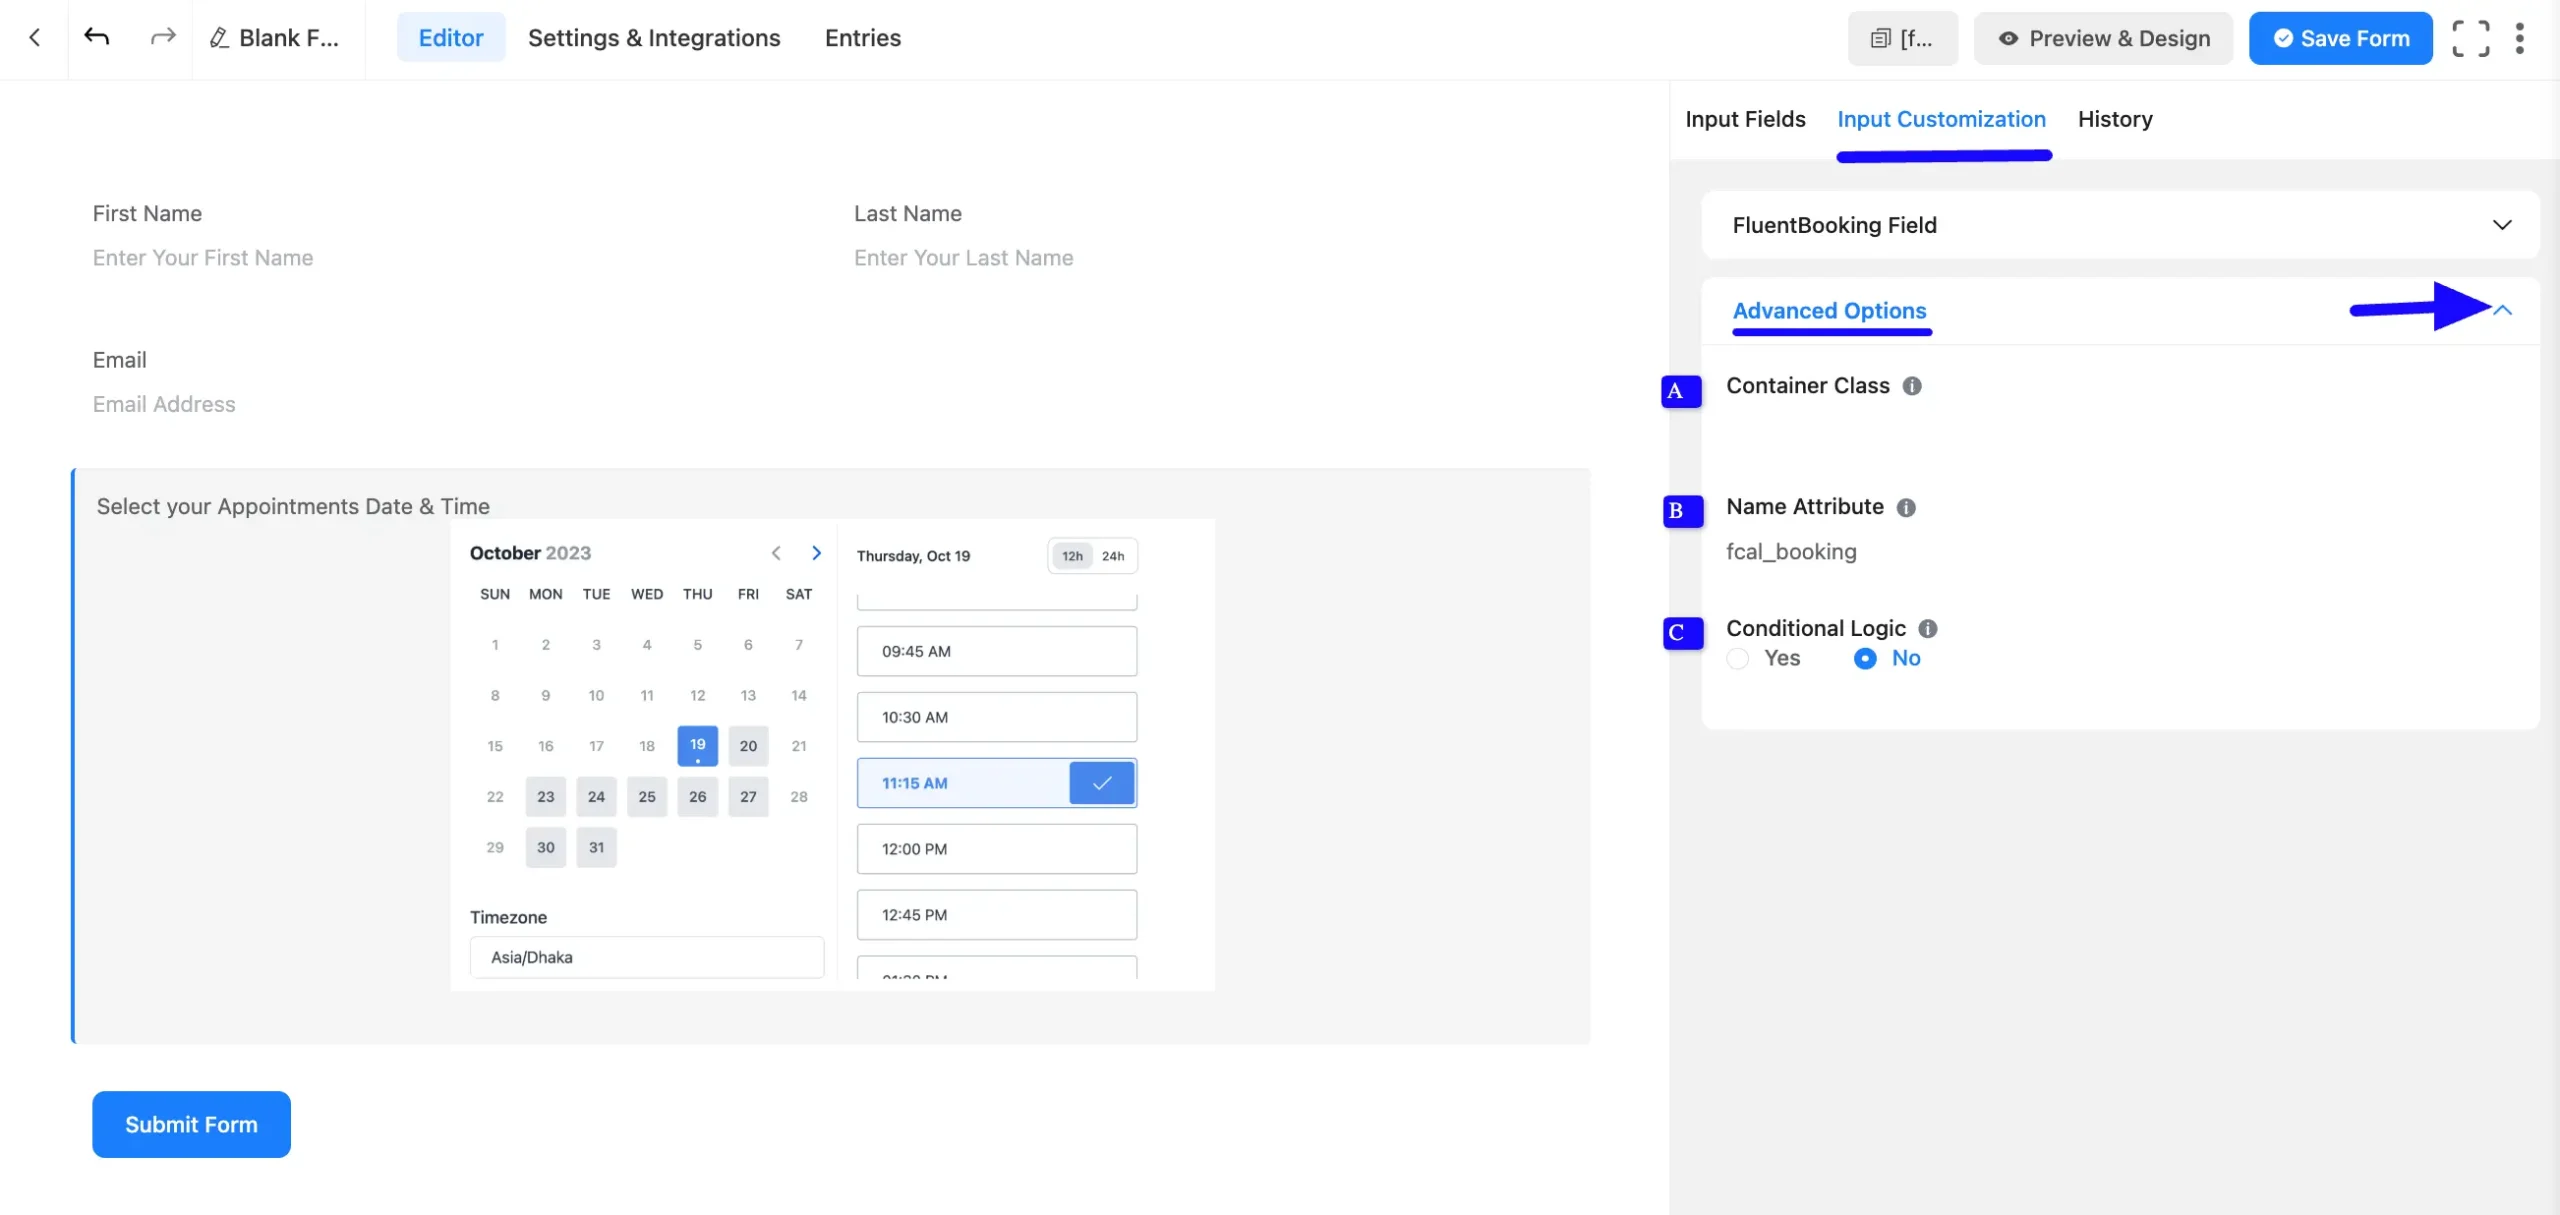
Advanced Options
Advanced settings allow further customization to meet specific use cases. All the Settings under the Advanced Options tab mentioned in the screenshot are briefly explained below –
- A. Container Class: Use this option to add your custom CSS classes to the field’s wrapper.
- B. Name Attribute: The input field’s name attribute is the HTML equivalent of the same name. You don’t need to modify this.
- C. Conditional Logic: This option allows you to create specific rules to dynamically hide/show the input field to function conditionally based on your submission values according to your set of conditional logic.
Preview of Added FluentBooking Field
Here is a preview of the form with the FluentBooking field.
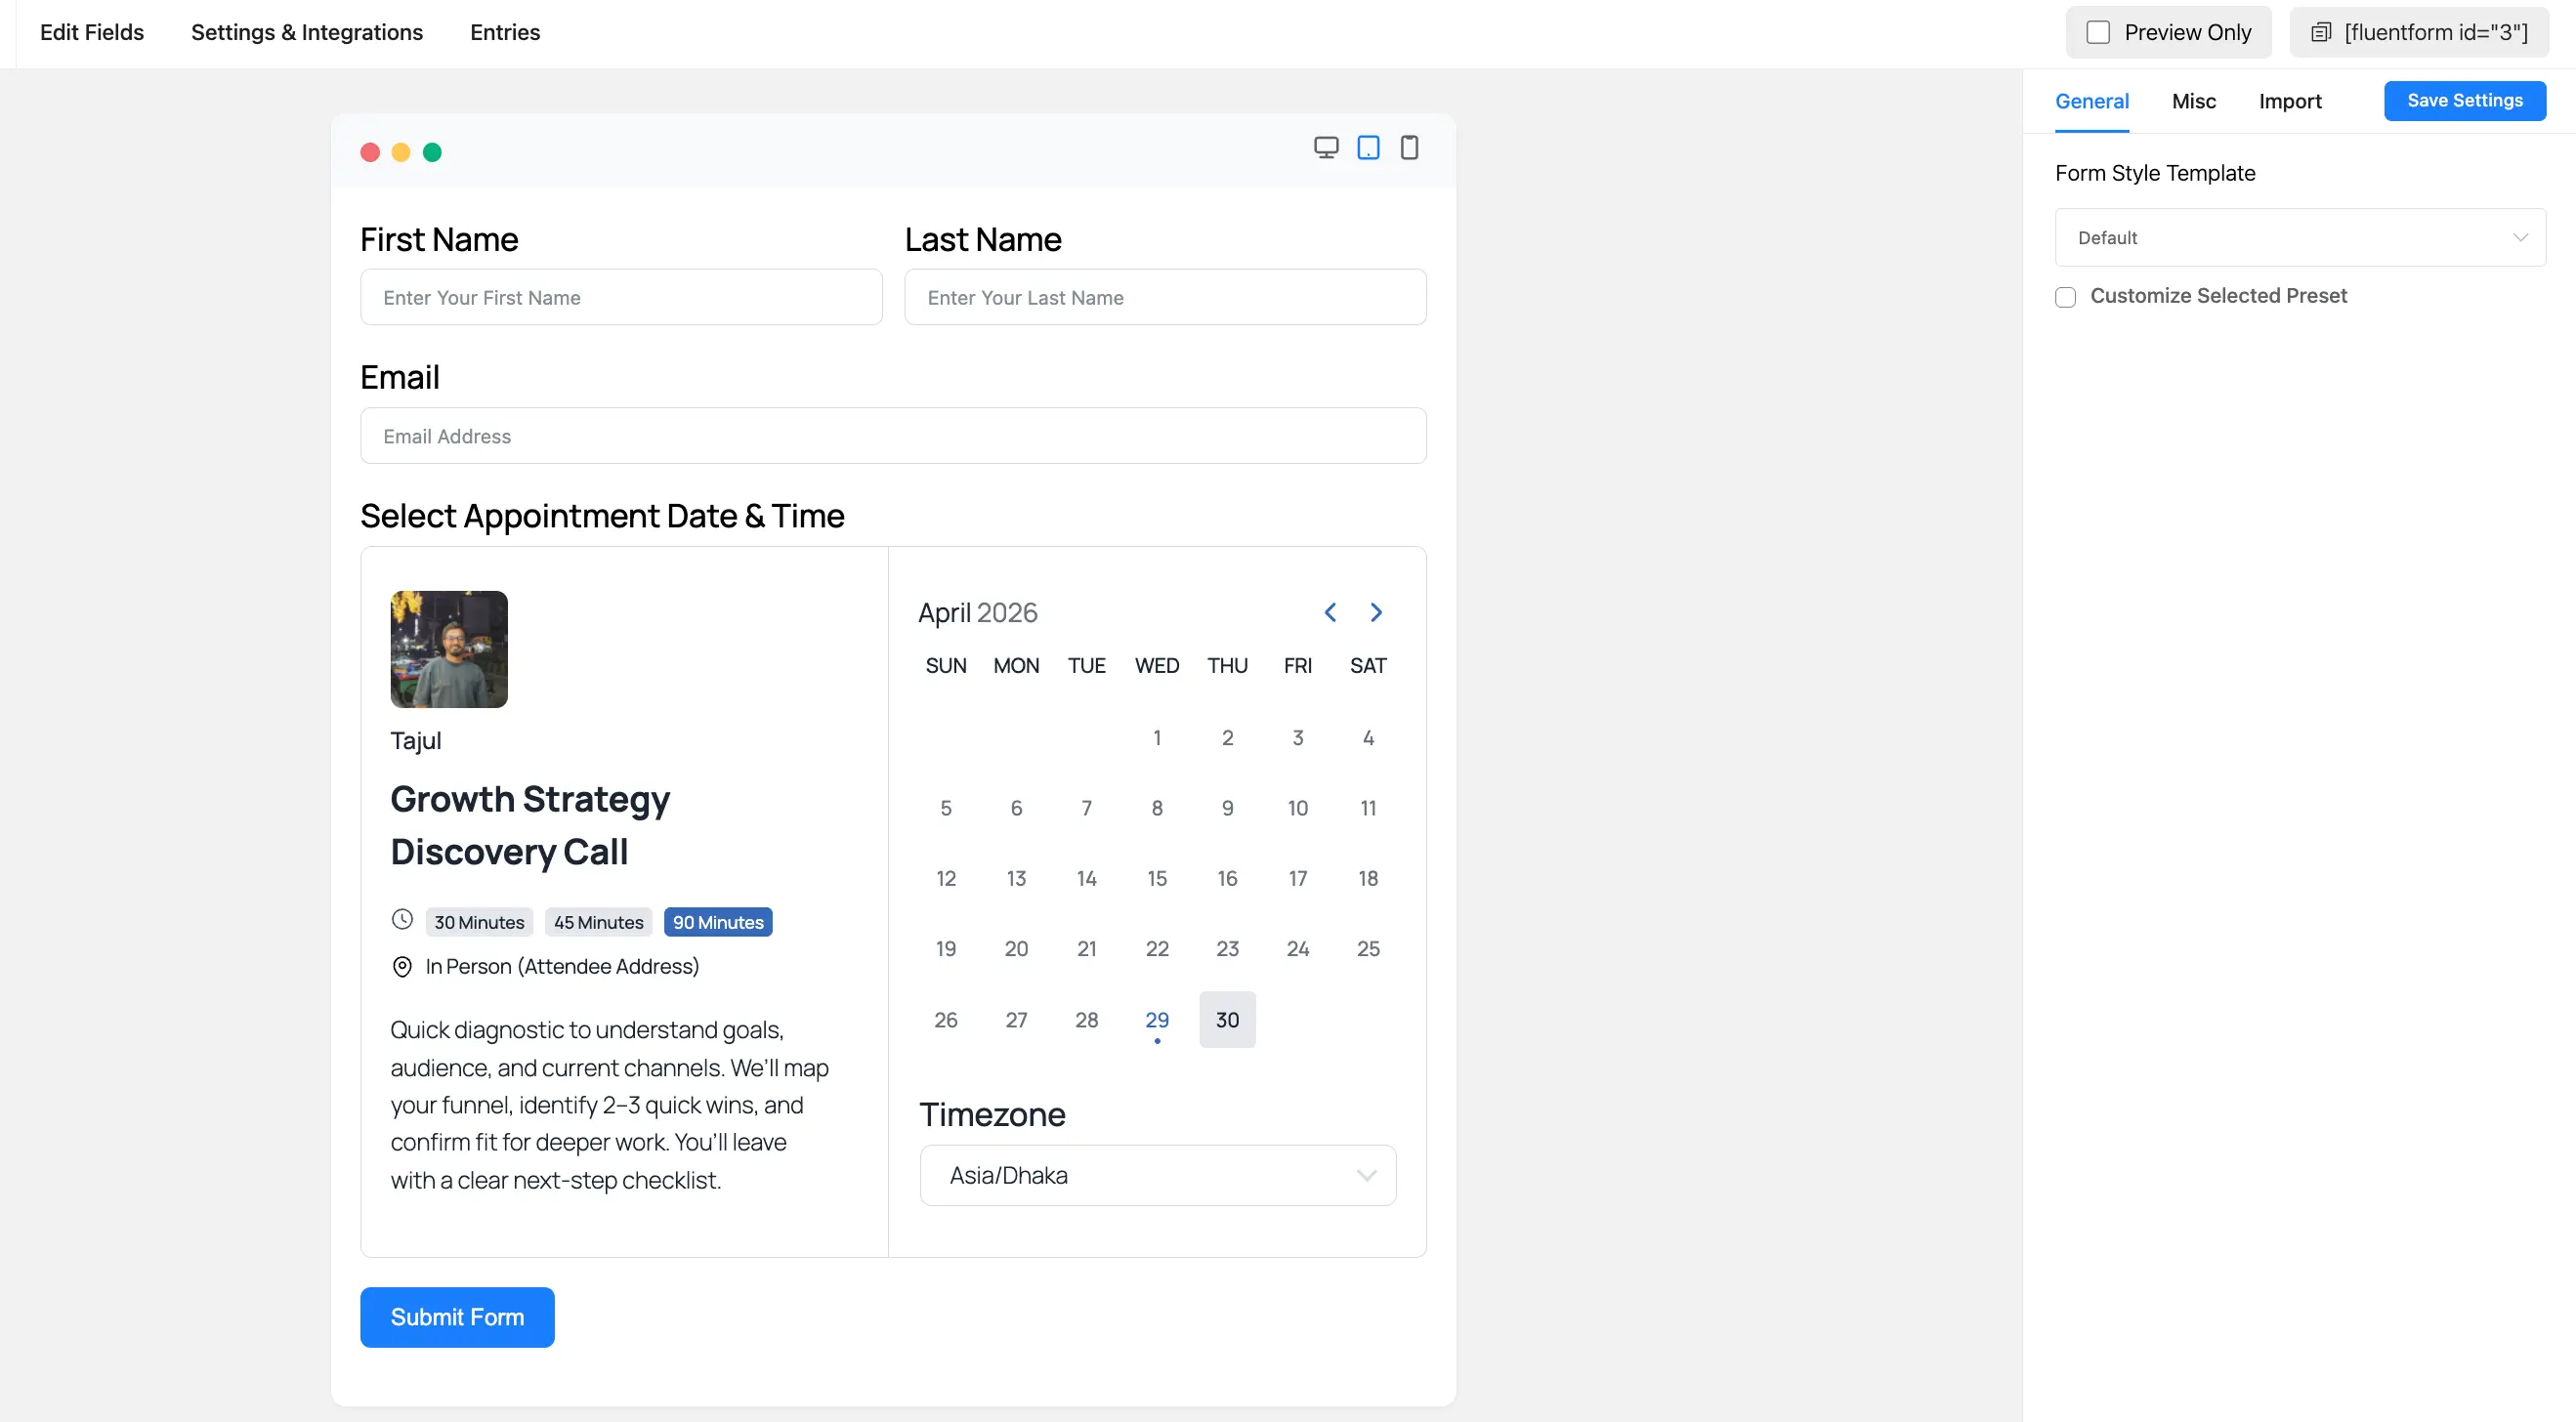
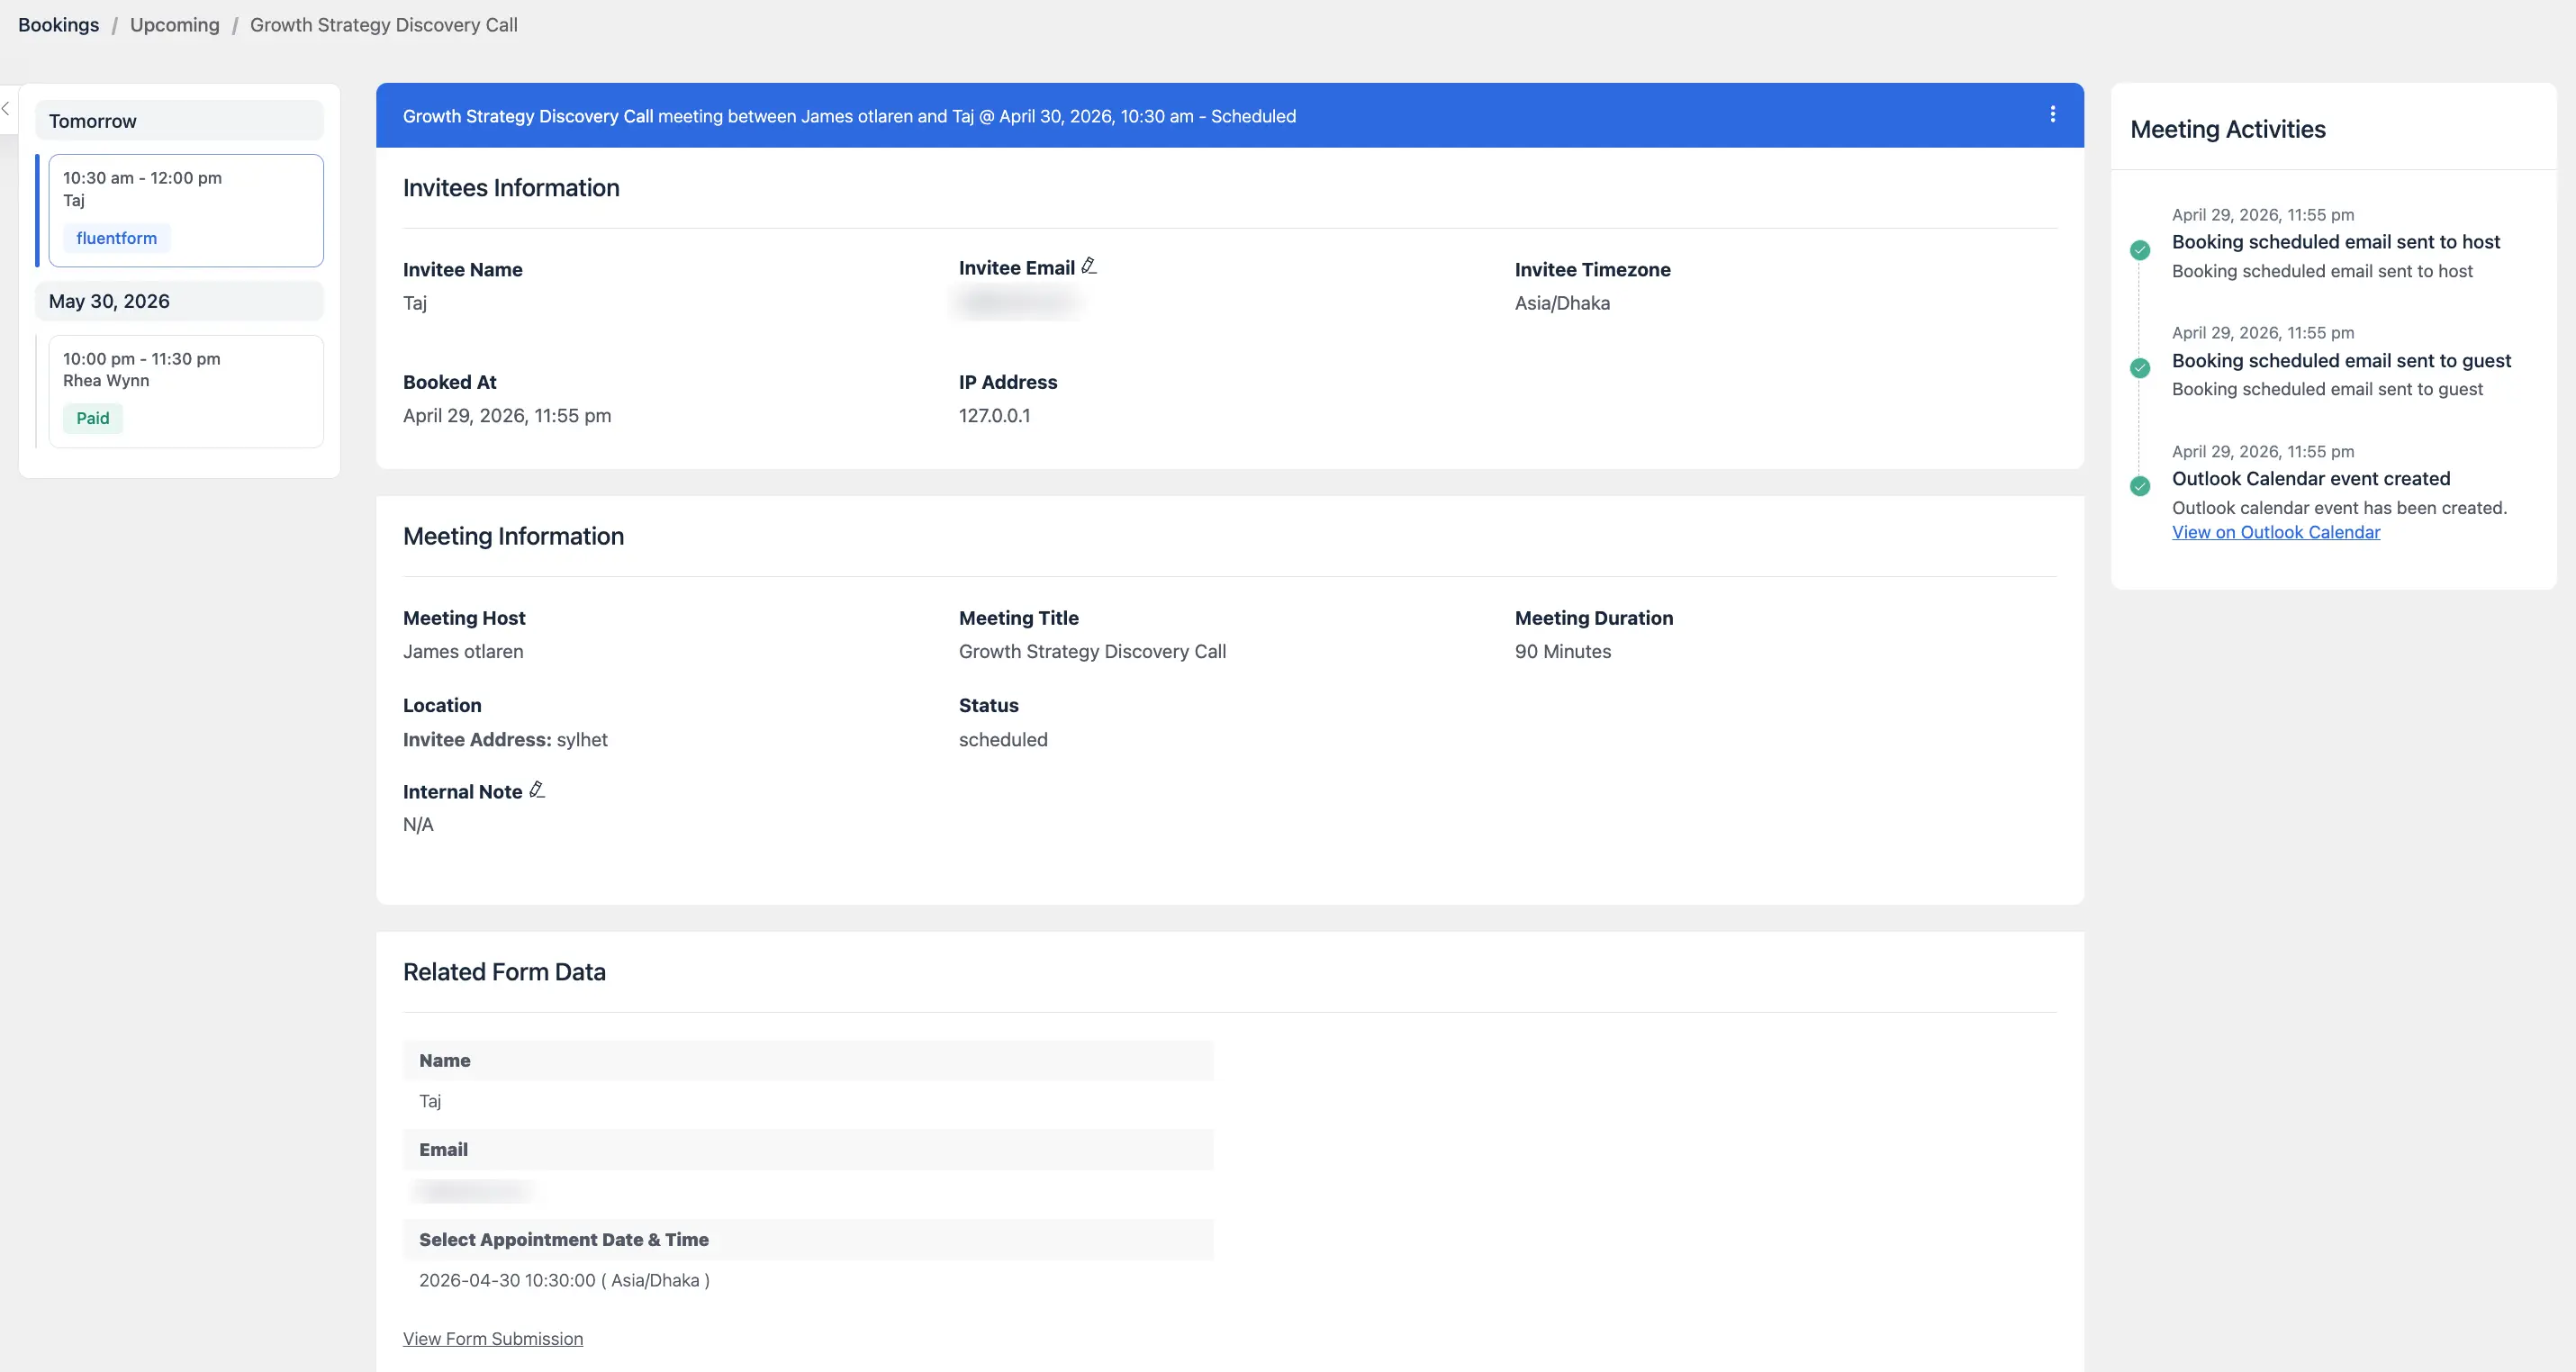
That's it! You've successfully added your booking event to Fluent Forms. Now, you will be able to see the form data inside the Booking details page and also from the form entries of Fluent Forms.