Appearance
Install & Activate FluentBooking
FluentBooking offers the perfect solution for effortless and hassle-free booking for appointments, meetings, webinars, events, sales calls, and more.
This article will guide you through installing, activating and updating the FluentBooking plugin directly from your WordPress Site.
Install and Activate FluentBooking
To learn how to install and activate the FluentBooking plugin directly from the WordPress Site, follow the steps with the screenshots below –
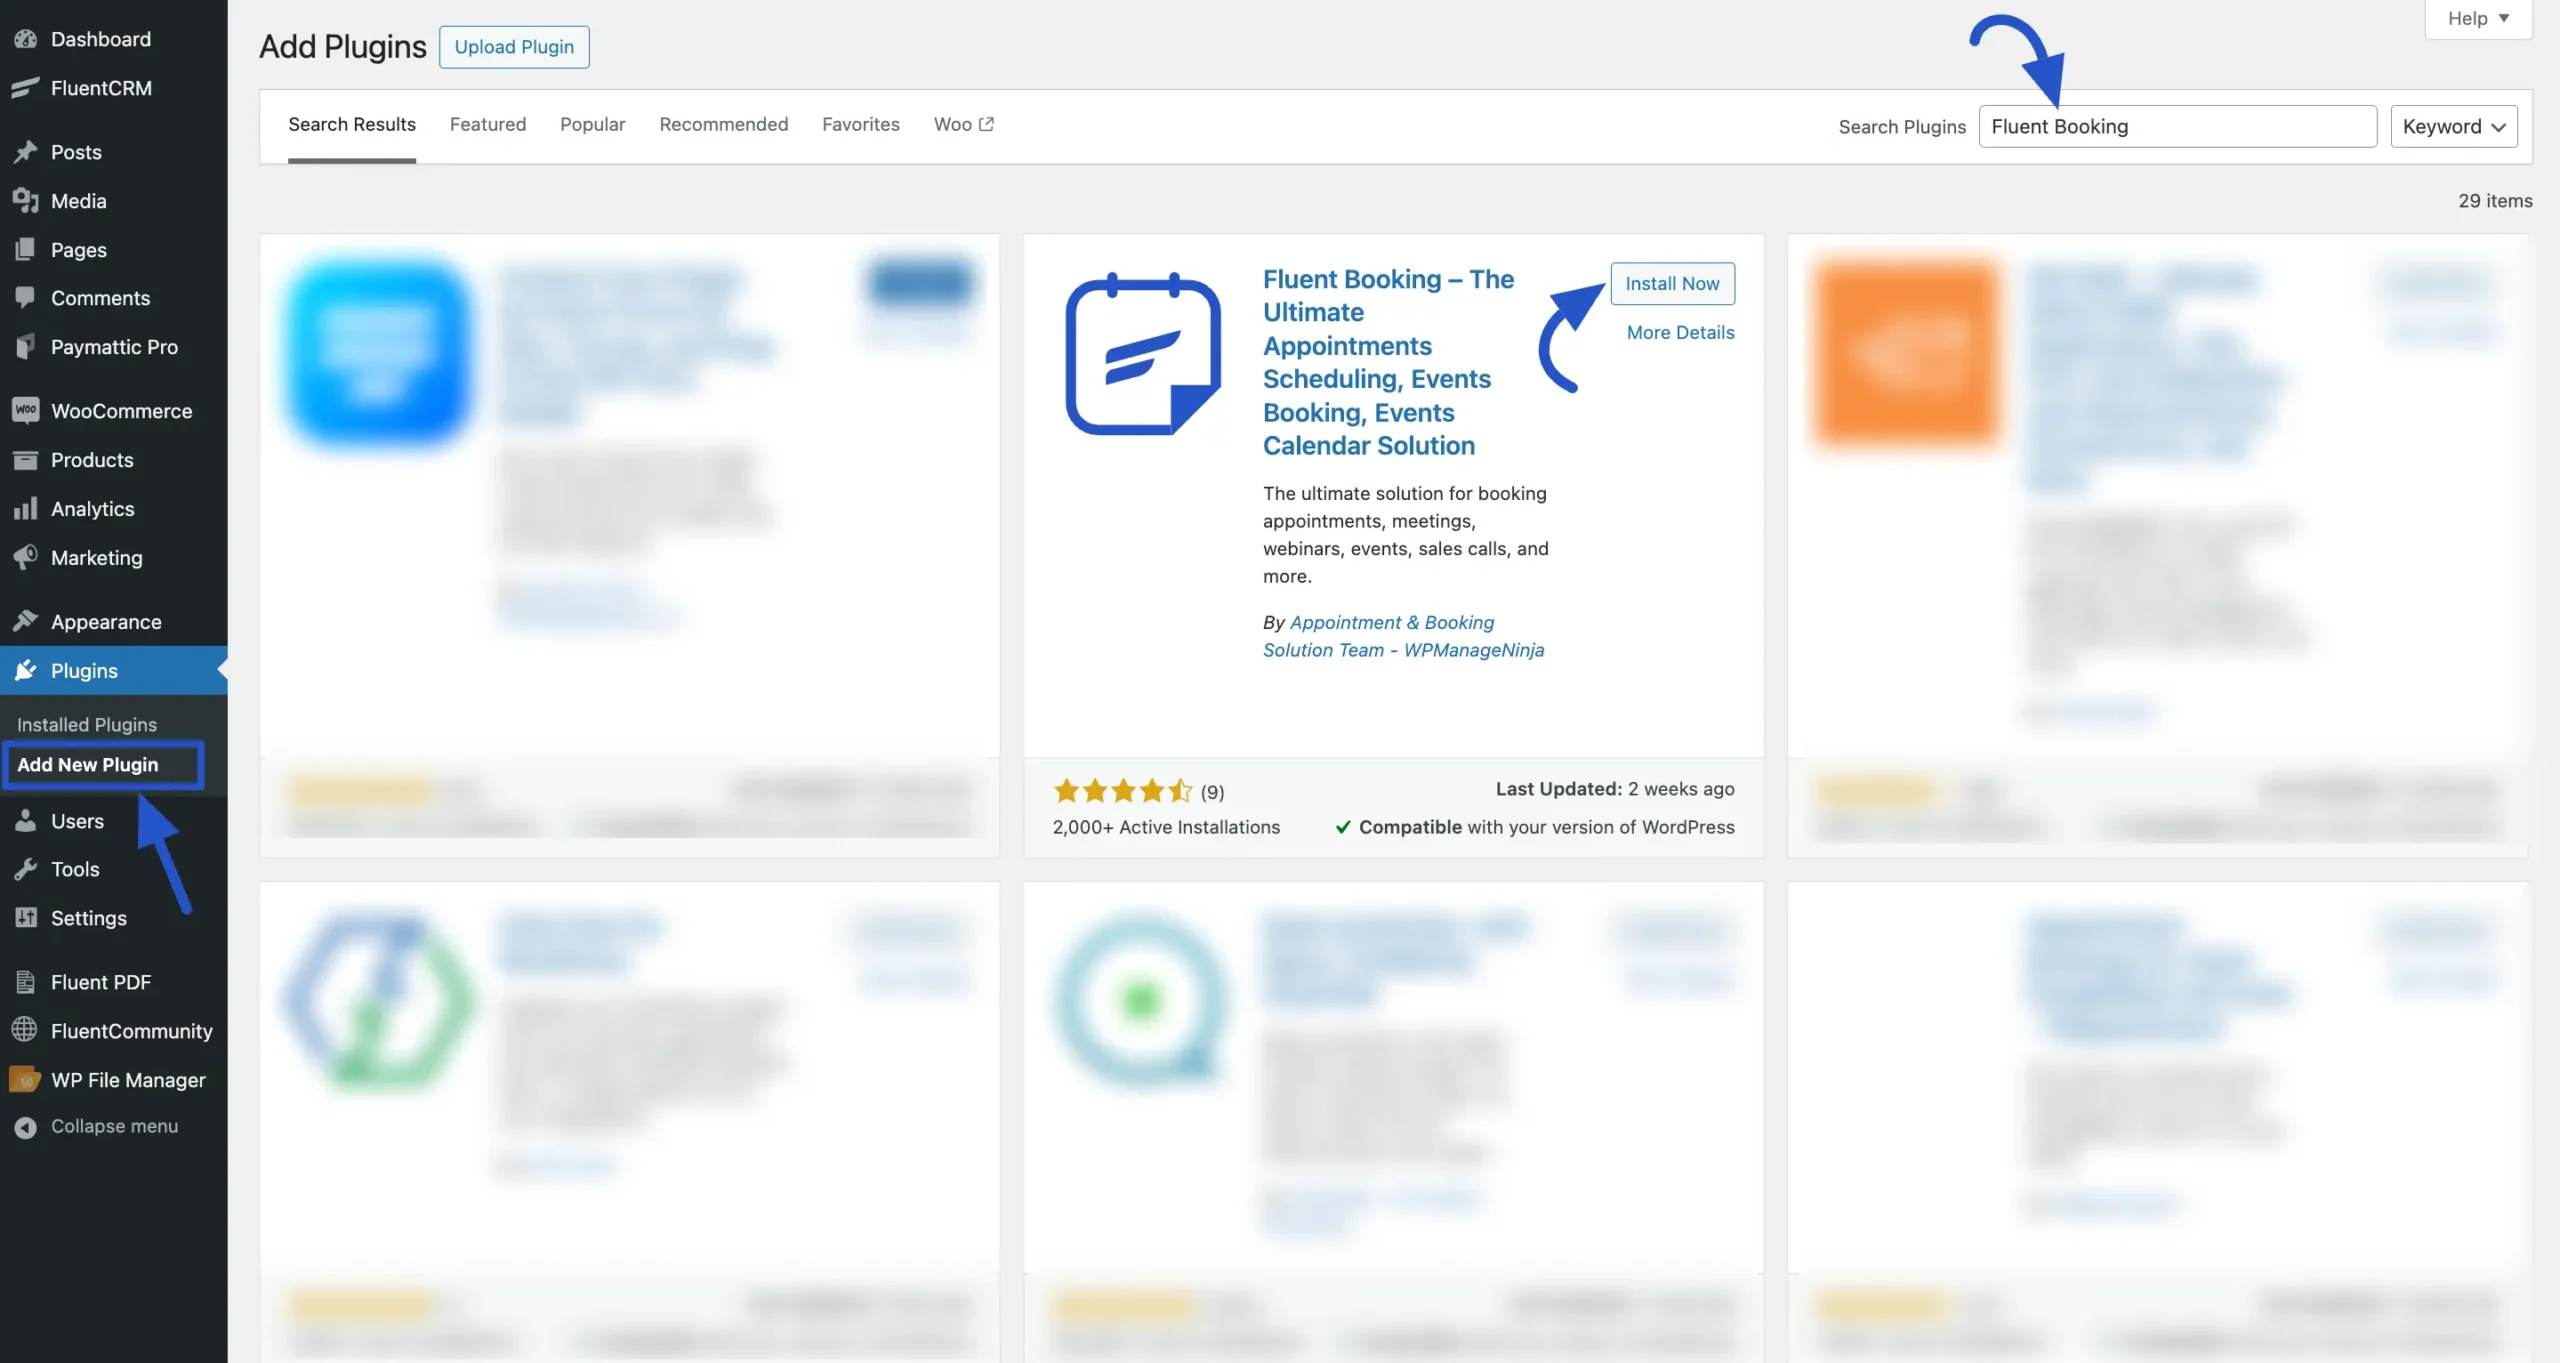
First, go to the Add New Plugin page from the WordPress Dashboard, search for FluentBooking through the Search Plugins field, and the plugin will appear.
Now, click the Install button and the FluentBooking plugin will be successfully installed on your WordPress site.
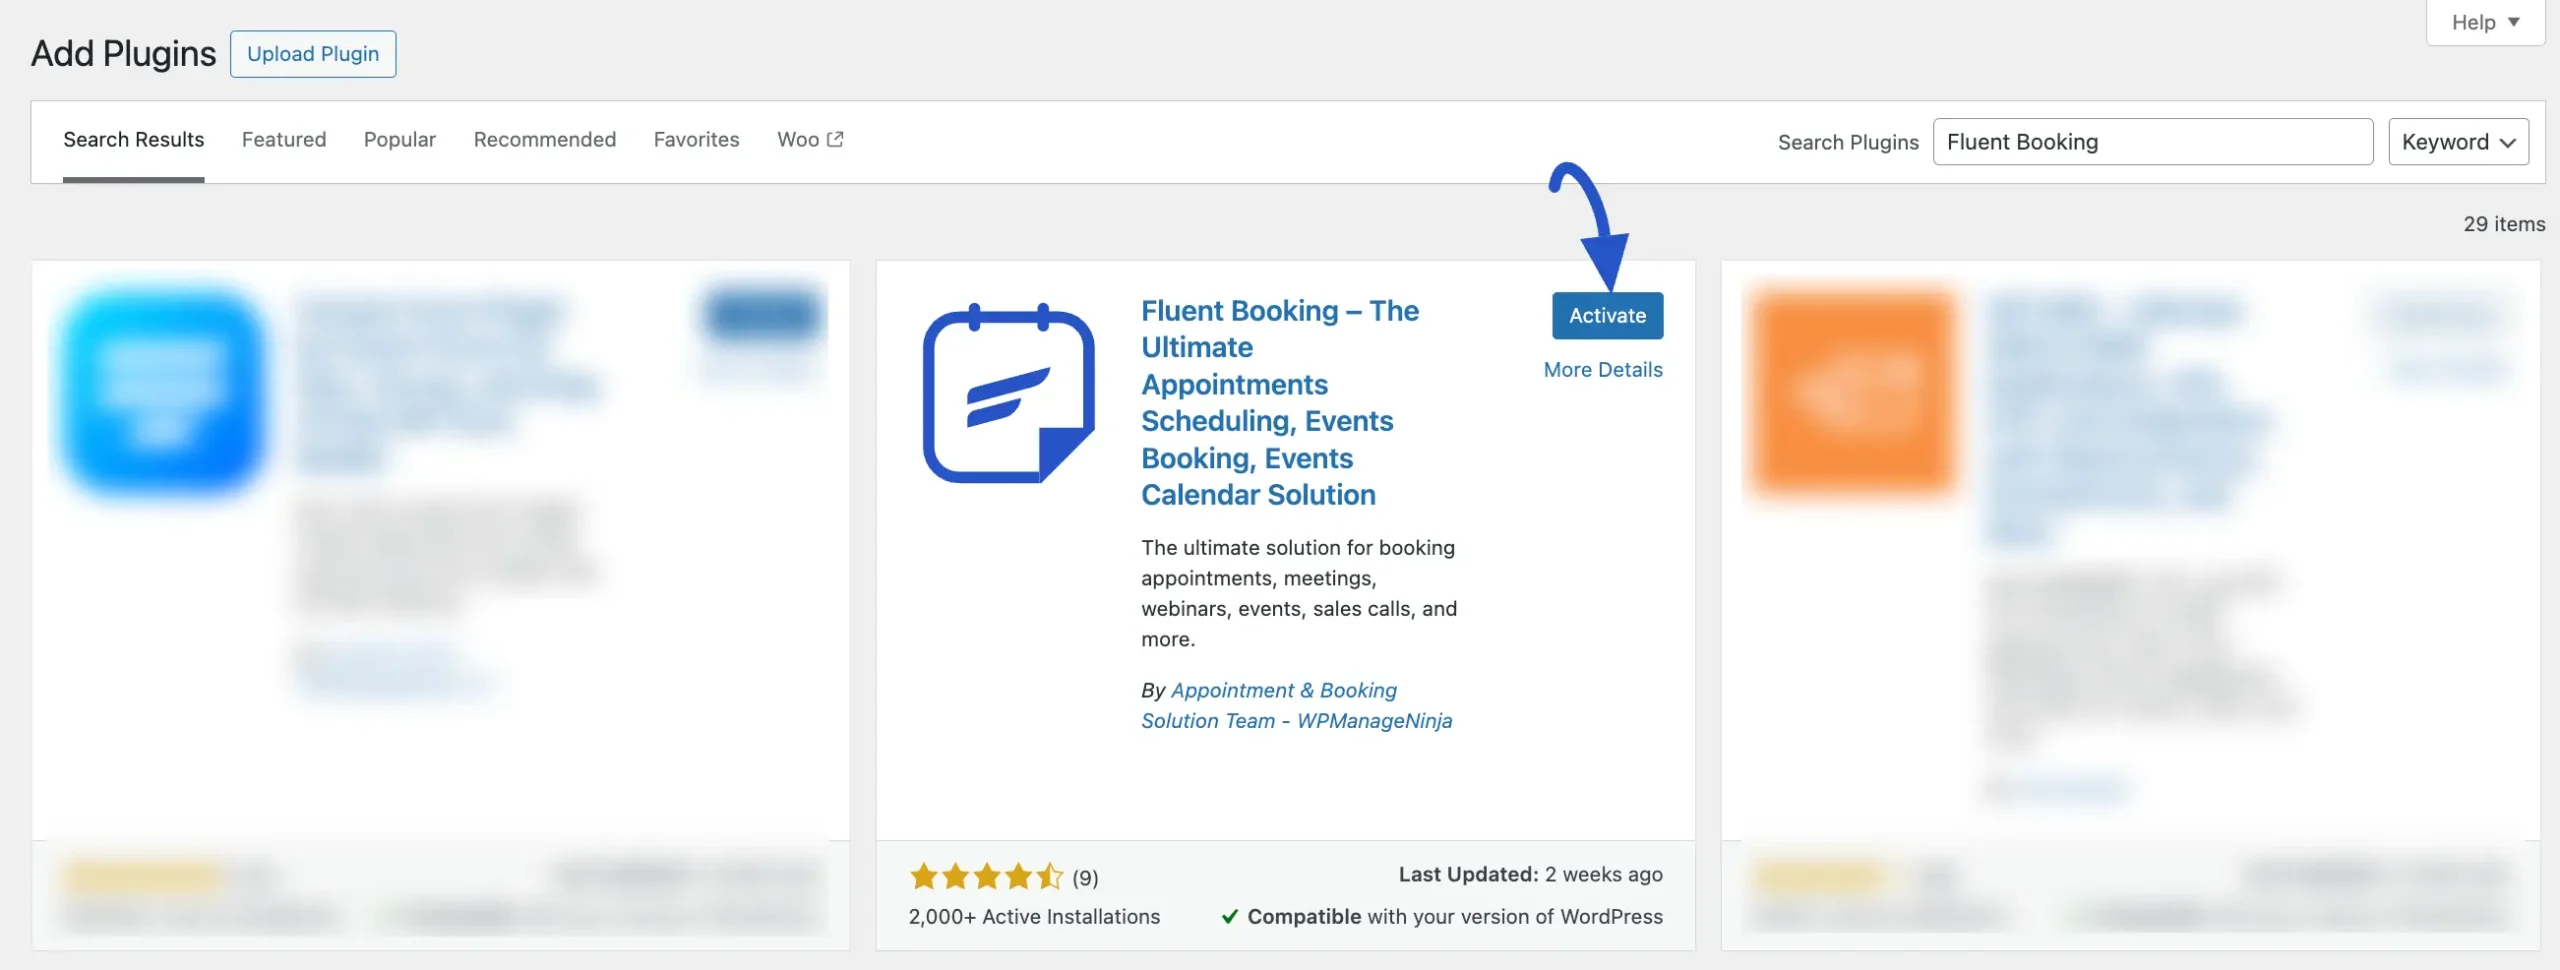
Finally, to activate, click on the Activate button.
But, you need the License key to activate all the FluentBooking features successfully. To learn how to activate the license key, read this Documentation
How to Update FluentBooking
To update the latest version of FluentBooking, we have implemented an automatic update system compatible with the previous version. Also, you can manually update it anytime if needed.
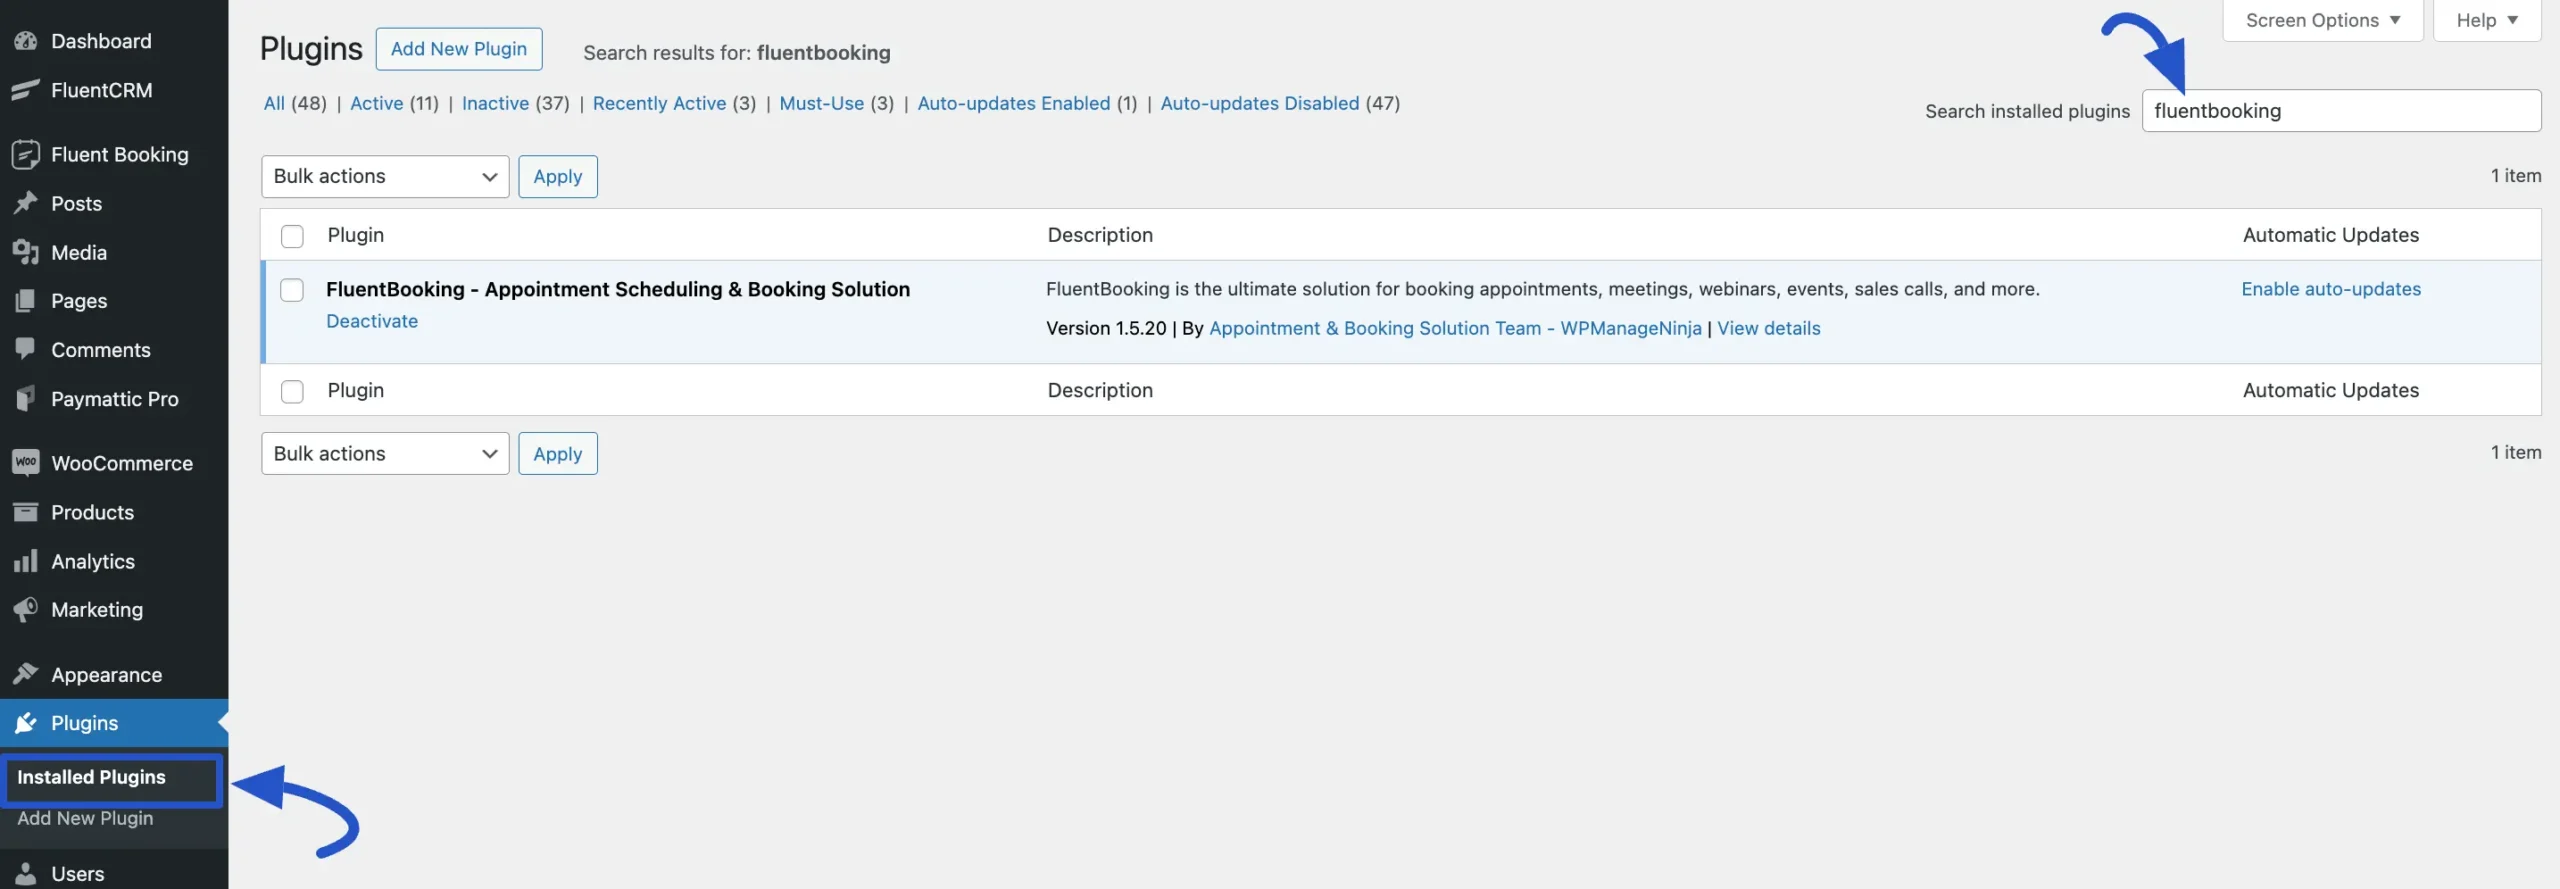
Go to the Installed Plugins page of your WordPress Dashboard and search for FluentBooking from the Search Bar in the top right corner.
Now, check if any update is available. If yes, just click on the Update button.
Congratulations! Now, you can explore all the amazing features of FluentBooking!